

https://www.pinecone.io/learn/series/langchain/langchain-retrieval-augmentation/
Fixing Hallucination with Knowledge Bases | Pinecone
© Pinecone Systems, Inc. | San Francisco, CA Pinecone is a registered trademark of Pinecone Systems, Inc.
www.pinecone.io
Fixing Hallucination with Knowledge Bases
Large Language Models (LLMs) have a data freshness problem. Even some of the most powerful models, like GPT-4, have no idea about recent events.
LLM(대형 언어 모델)에는 데이터 freshness 최신성 문제가 있습니다. GPT-4와 같은 가장 강력한 모델 조차도 최근 사건에 대해 전혀 모릅니다.
The world, according to LLMs, is frozen in time. They only know the world as it appeared through their training data.
LLM에 따르면 세상은 시간이 멈춰 있습니다. 그들은 훈련 데이터를 통해 나타난 대로만 세상을 알고 있습니다.
That creates problems for any use case that relies on up-to-date information or a particular dataset. For example, you may have internal company documents you’d like to interact with via an LLM.
이는 최신 정보나 특정 데이터세트에 의존하는 모든 사용 사례에 문제를 야기합니다. 예를 들어 LLM을 통해 상호 작용하고 싶은 회사 내부 문서가 있을 수 있습니다.
The first challenge is adding those documents to the LLM, we could try training the LLM on these documents, but this is time-consuming and expensive. And what happens when a new document is added? Training for every new document added is beyond inefficient — it is simply impossible.
첫 번째 과제는 해당 문서를 LLM에 추가하는 것입니다. 이러한 문서에 대해 LLM을 교육해 볼 수 있지만 이는 시간과 비용이 많이 듭니다. 새 문서가 추가되면 어떻게 되나요? 추가된 모든 새 문서에 대한 교육은 비효율적일 뿐만 아니라 불가능합니다.
So, how do we handle this problem? We can use retrieval augmentation. This technique allows us to retrieve relevant information from an external knowledge base and give that information to our LLM.
그렇다면 이 문제를 어떻게 처리해야 할까요? 검색 확대 retrieval augmentation 를 사용할 수 있습니다. 이 기술을 사용하면 외부 지식 기반에서 관련 정보를 검색하고 해당 정보를 LLM에 제공할 수 있습니다.
The external knowledge base is our “window” into the world beyond the LLM’s training data. In this chapter, we will learn all about implementing retrieval augmentation for LLMs using LangChain.
외부 지식 기반은 LLM의 교육 데이터 너머의 세계를 들여다보는 "창"입니다. 이 장에서는 LangChain을 사용하여 LLM에 대한 검색 확장 retrieval augmentation 을 구현하는 방법에 대해 모두 배웁니다.
https://youtu.be/kvdVduIJsc8?si=iq2SbckGL7DPQT3a
Creating the Knowledge Base
We have two primary types of knowledge for LLMs. The parametric knowledge refers to everything the LLM learned during training and acts as a frozen snapshot of the world for the LLM.
LLM에 대한 두 가지 주요 유형의 지식이 있습니다. parametric knowledge 은 LLM이 훈련 중에 배운 모든 것을 의미하며 LLM의 세계에 대한 고정된 스냅샷 역할을 합니다.
The second type of knowledge is source knowledge. This knowledge covers any information fed into the LLM via the input prompt. When we talk about retrieval augmentation, we’re talking about giving the LLM valuable source knowledge.
두 번째 유형의 지식은 source knowledge 입니다. 이 지식은 입력 프롬프트를 통해 LLM에 입력된 모든 정보를 다룹니다. retrieval augmentation 에 대해 이야기할 때 LLM에 valuable source knowledge을 제공하는 것에 대해 이야기합니다.
(You can follow along with the following sections using the Jupyter notebook here! )
05-langchain-retrieval-augmentation.ipynb
Run, share, and edit Python notebooks
colab.research.google.com
Getting Data for our Knowledge Base
To help our LLM, we need to give it access to relevant source knowledge. To do that, we need to create our knowledge base.
LLM을 돕기 위해서는 관련 소스 지식에 대한 액세스 권한을 부여해야 합니다. 그러기 위해서는 지식 기반을 구축해야 합니다.
We start with a dataset. The dataset used naturally depends on the use case. It could be code documentation for an LLM that needs to help write code, company documents for an internal chatbot, or anything else.
데이터 세트로 시작합니다. 자연스럽게 사용되는 데이터 세트는 사용 사례에 따라 다릅니다. 코드 작성에 도움이 되는 LLM용 코드 문서, 내부 챗봇용 회사 문서 등이 될 수 있습니다.
In our example, we will use a subset of Wikipedia. To get that data, we will use Hugging Face datasets like so:
이 예에서는 Wikipedia의 subset 을 사용합니다. 해당 데이터를 얻기 위해 다음과 같이 Hugging Face 데이터세트를 사용합니다.
Large Language Models (LLMs) have a data freshness problem. The most powerful LLMs in the world, like GPT-4, have no idea about recent world events.
LLM(대형 언어 모델)에는 데이터 최신성 문제가 있습니다. GPT-4와 같이 세계에서 가장 강력한 LLM은 최근 세계 사건에 대해 전혀 모릅니다.
The world of LLMs is frozen in time. Their world exists as a static snapshot of the world as it was within their training data.
LLM의 세계는 시간이 멈춰 있습니다. 그들의 세계는 훈련 데이터 내에 있는 것처럼 세계의 정적 스냅샷으로 존재합니다.
A solution to this problem is retrieval augmentation. The idea behind this is that we retrieve relevant information from an external knowledge base and give that information to our LLM. In this notebook we will learn how to do that.
이 문제에 대한 해결책은 검색 확대(Retrieval Augmentation)입니다. 이에 대한 아이디어는 외부 지식 기반에서 관련 정보를 검색하여 해당 정보를 LLM에 제공한다는 것입니다. 이 노트북에서 우리는 그 방법을 배울 것입니다. LLM(대형 언어 모델)에는 데이터 신선도 문제가 있습니다. GPT-4와 같이 세계에서 가장 강력한 LLM은 최근 세계 사건에 대해 전혀 모릅니다.
To begin, we must install the prerequisite libraries that we will be using in this notebook. If we install all libraries we will find a conflict in the Hugging Face datasets library so we must install everything in a specific order like so:
시작하려면 이 노트북에서 사용할 필수 구성 요소 라이브러리를 설치해야 합니다. 모든 라이브러리를 설치하면 Hugging Face 데이터 세트 라이브러리에서 충돌이 발견되므로 다음과 같이 특정 순서로 모든 것을 설치해야 합니다.
!pip install -qU \
    datasets==2.12.0 \
    apache_beam \
    mwparserfromhell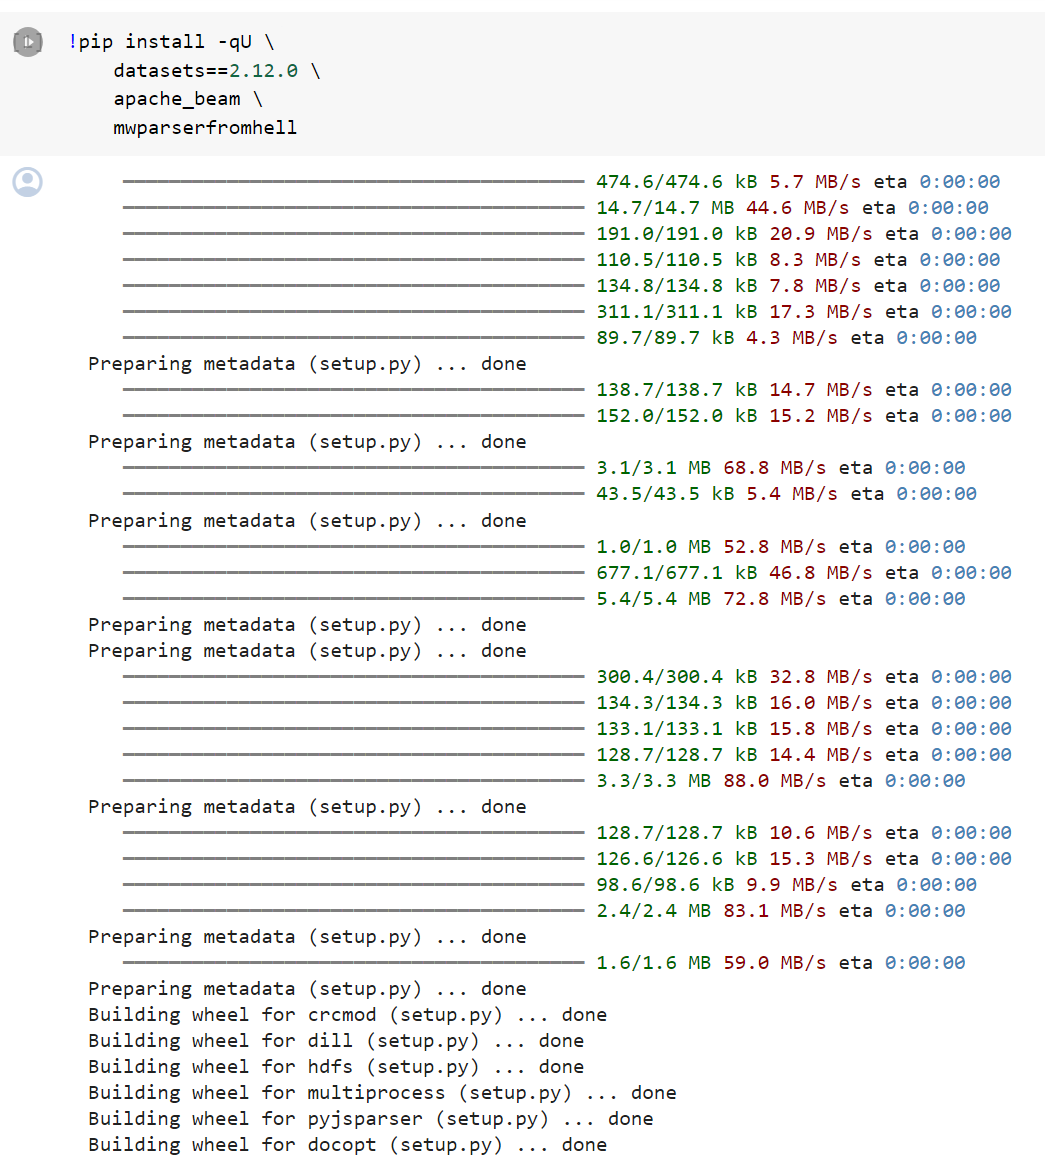
from datasets import load_dataset

data = load_dataset("wikipedia", "20220301.simple", split='train[:10000]')
data
이 코드는 Python 패키지 datasets와 다른 패키지들을 설치하고, wikipedia 데이터셋에서 특정 날짜의 일부 데이터를 불러오는 예제입니다. 아래는 코드의 각 부분에 대한 설명입니다:
- !pip install -qU datasets==2.12.0 apache_beam mwparserfromhell: 셸 명령어를 사용하여 필요한 Python 패키지들을 설치합니다.
- !pip install: Jupyter Notebook에서 셸 명령어를 실행하기 위한 방식입니다.
- -qU: 설치 과정을 조용히 진행하되 패키지를 최신 버전으로 업그레이드합니다.
- datasets==2.12.0: datasets 패키지의 2.12.0 버전을 설치합니다.
- apache_beam: Apache Beam 패키지를 설치합니다.
- mwparserfromhell: mwparserfromhell 패키지를 설치합니다.
- from datasets import load_dataset: datasets 패키지에서 load_dataset 함수를 가져옵니다. 이 함수는 Hugging Face의 데이터셋을 쉽게 로드할 수 있도록 도와줍니다.
- data = load_dataset("wikipedia", "20220301.simple", split='train[:10000]'): load_dataset 함수를 사용하여 wikipedia 데이터셋에서 특정 날짜의 20220301.simple 버전을 로드합니다. 여기서는 학습 데이터 중 처음 10,000개의 샘플을 불러옵니다. 결과로 data 변수에 데이터셋이 할당됩니다.
이렇게 초기화된 data 변수에는 wikipedia 데이터셋의 일부가 로드되어 있습니다. 이 데이터셋을 통해 Wikipedia의 문서나 문장 등의 정보를 활용할 수 있습니다.
data[6]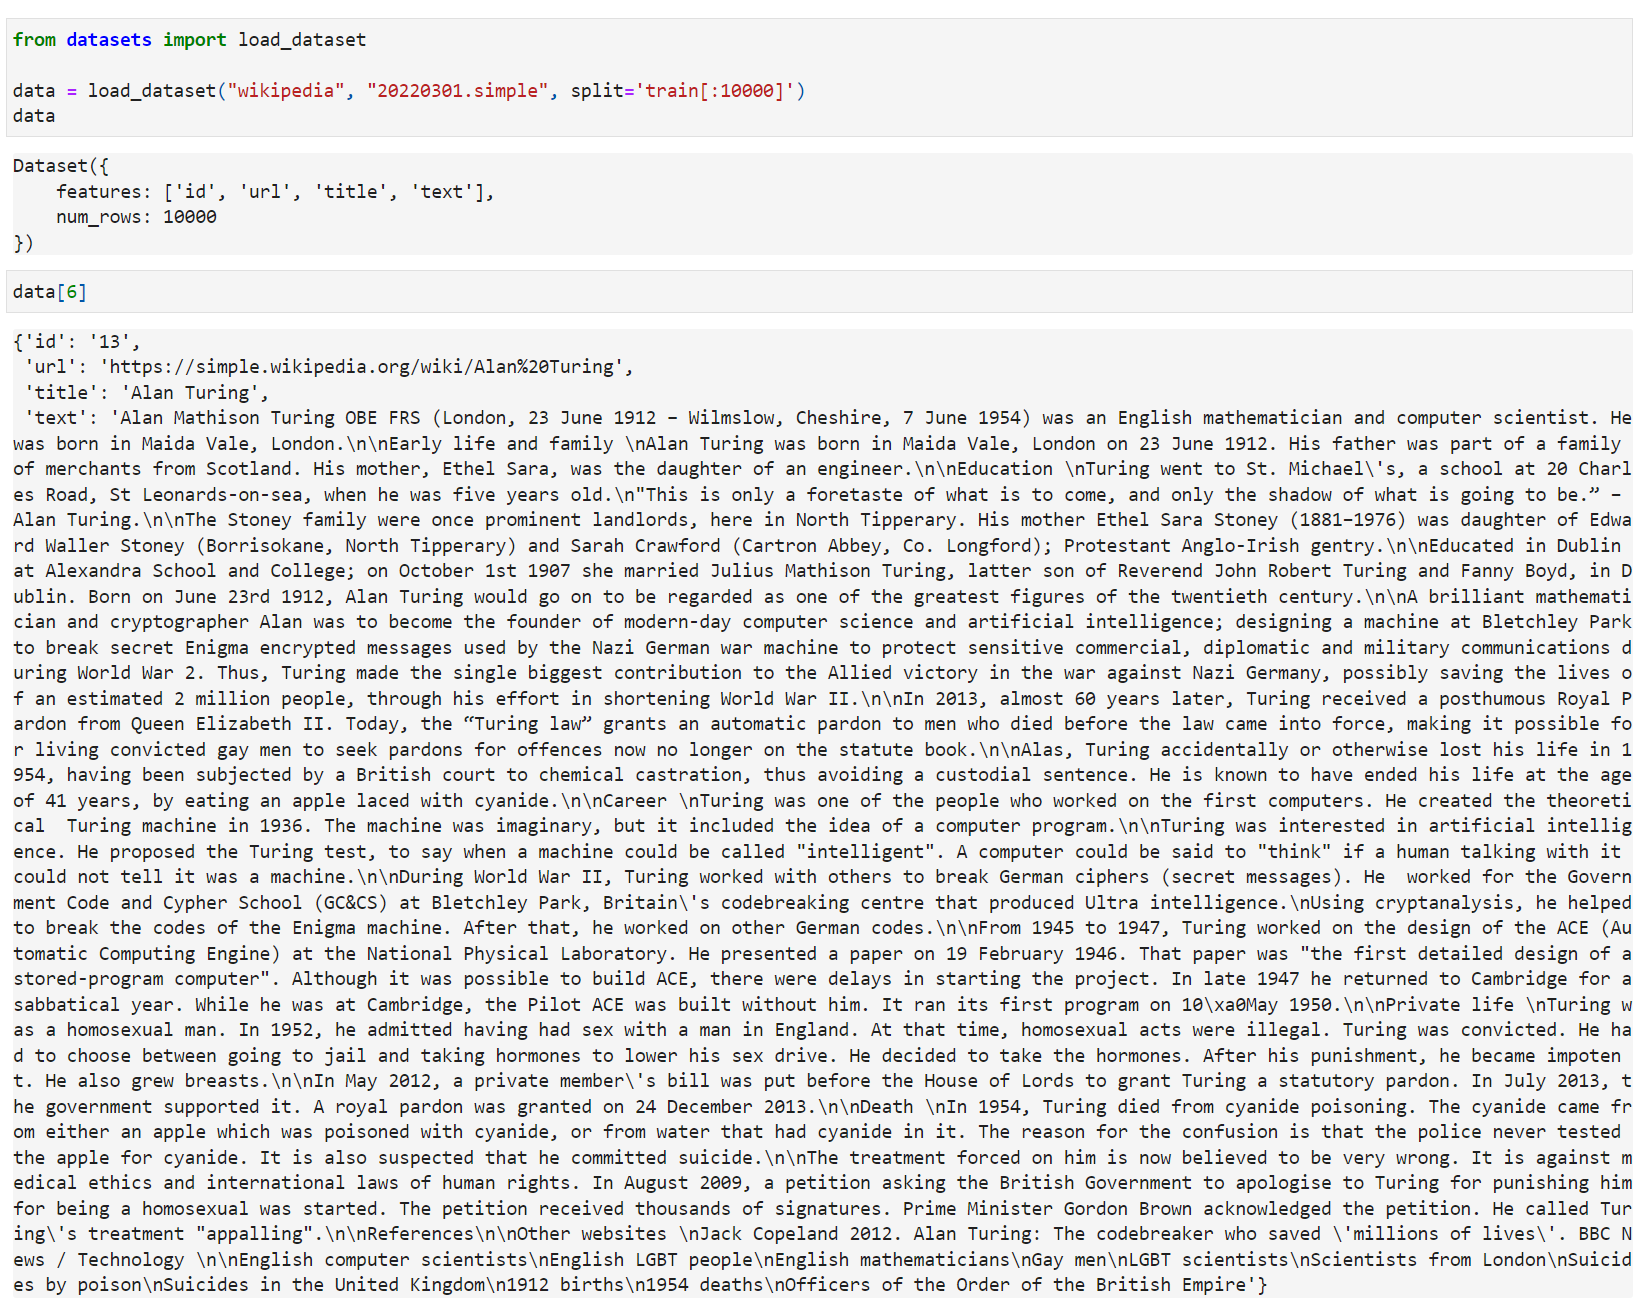
Now we install the remaining libraries:
!pip install -qU \
  langchain==0.0.162 \
  openai==0.27.7 \
  tiktoken==0.4.0 \
  "pinecone-client[grpc]"==2.2.2
🚨 Note: the above pip install is formatted for Jupyter notebooks. If running elsewhere you may need to drop the !.
🚨 참고: 위의 pip 설치는 Jupyter 노트북용으로 형식화되었습니다. 다른 곳에서 실행하는 경우 !를 삭제해야 할 수도 있습니다.
Every record contains a lot of text. Our first task is therefore to identify a good preprocessing methodology for chunking these articles into more "concise" chunks to later be embedding and stored in our Pinecone vector database.
모든 레코드에는 많은 텍스트가 포함되어 있습니다. 따라서 우리의 첫 번째 작업은 나중에 Pinecone 벡터 데이터베이스에 포함되고 저장될 수 있도록 이러한 기사를 보다 "간결한" 청크로 분할하기 위한 좋은 전처리 방법을 식별하는 것입니다.
For this we use LangChain's RecursiveCharacterTextSplitter to split our text into chunks of a specified max length.
이를 위해 LangChain의 RecursiveCharacterTextSplitter를 사용하여 텍스트를 지정된 최대 길이의 청크로 분할합니다.
Creating Chunks
Splitting our text into smaller chunks is essential for several reasons. Primarily we are looking to:
여러 가지 이유로 텍스트를 작은 덩어리로 나누는 것이 필수적입니다. 주로 우리가 찾고 있는 것은:
- Improve “embedding accuracy” — this will improve the relevance of results later.
- "임베딩 정확도" 향상 - 이는 나중에 결과의 관련성을 향상시킵니다.
- Reduce the amount of text fed into our LLM as source knowledge. Limiting input improves the LLM’s ability to follow instructions, reduces generation costs, and helps us get faster responses.
- LLM에 소스 지식으로 입력되는 텍스트의 양을 줄입니다. 입력을 제한하면 LLM의 지침 준수 능력이 향상되고 생성 비용이 절감되며 더 빠른 응답을 얻을 수 있습니다.
- Provide users with more precise information sources as we can narrow down the information source to a smaller chunk of text.
- 정보 소스를 더 작은 텍스트 덩어리로 좁힐 수 있으므로 사용자에게 보다 정확한 정보 소스를 제공합니다.
- In the case of very long chunks of text, we will exceed the maximum context window of our embedding or completion models. Splitting these chunks makes it possible to add these longer documents to our knowledge base.
- 매우 긴 텍스트 청크의 경우 임베딩 또는 완성 모델의 최대 컨텍스트 창을 초과합니다. 이러한 청크를 분할하면 이러한 긴 문서를 지식 기반에 추가할 수 있습니다.
To create these chunks, we first need a way of measuring the length of our text. LLMs don’t measure text by word or character — they measure it by “tokens”.
이러한 청크를 만들려면 먼저 텍스트의 길이를 측정하는 방법이 필요합니다. LLM은 텍스트를 단어나 문자로 측정하지 않고 "토큰"으로 측정합니다.
A token is typically the size of a word or sub-word and varies by LLM. The tokens themselves are built using a tokenizer. We will be using gpt-3.5-turbo as our completion model, and we can initialize the tokenizer for this model like so:
토큰은 일반적으로 단어 또는 하위 단어의 크기이며 LLM에 따라 다릅니다. 토큰 자체는 토크나이저를 사용하여 구축됩니다. 우리는 완성 모델로 gpt-3.5-turbo를 사용할 것이며 다음과 같이 이 모델에 대한 토크나이저를 초기화할 수 있습니다.
import tiktoken  # !pip install tiktoken

tokenizer = tiktoken.get_encoding('p50k_base')
Using the tokenizer, we can create tokens from plain text and count the number of tokens. We will wrap this into a function called tiktoken_len:
토크나이저를 사용하면 일반 텍스트에서 토큰을 생성하고 토큰 수를 계산할 수 있습니다. 이것을 tiktoken_len이라는 함수로 래핑하겠습니다.
# create the length function
def tiktoken_len(text):
    tokens = tokenizer.encode(
        text,
        disallowed_special=()
    )
    return len(tokens)

tiktoken_len("hello I am a chunk of text and using the tiktoken_len function "
             "we can find the length of this chunk of text in tokens")
28
이 코드는 텍스트의 토큰 수를 계산하는 사용자 정의 함수 tiktoken_len을 정의하고, 이 함수를 호출하여 특정 텍스트의 토큰 수를 출력하는 예제입니다. 아래는 코드의 각 부분에 대한 설명입니다:
- 함수 정의:
-
- tiktoken_len: 함수의 이름으로, 텍스트의 토큰 수를 계산하는 함수입니다.
- text: 함수에 전달되는 텍스트입니다.
- tokenizer.encode: 주어진 텍스트를 토큰으로 인코딩하는 함수입니다.
- disallowed_special=(): 특수 토큰을 허용하지 않도록 설정합니다.
- len(tokens): 인코딩된 토큰의 길이를 반환합니다.
- 함수 호출:
-
- tiktoken_len 함수를 호출하여 주어진 텍스트의 토큰 수를 계산합니다.
- 여기서는 주어진 텍스트의 토큰 수를 반환하는 것이 목적입니다.
따라서, 이 코드는 주어진 텍스트의 토큰 수를 계산하는 사용자 정의 함수를 정의하고, 특정 텍스트에 대해 이 함수를 호출하여 토큰 수를 출력하는 예제입니다.
With our token counting function ready, we can initialize a LangChain RecursiveCharacterTextSplitter object. This object will allow us to split our text into chunks no longer than what we specify via the chunk_size parameter.
토큰 계산 기능이 준비되면 LangChain RecursiveCharacterTextSplitter 개체를 초기화할 수 있습니다. 이 개체를 사용하면 Chunk_size 매개변수를 통해 지정한 것보다 더 길지 않은 청크로 텍스트를 분할할 수 있습니다.
from langchain.text_splitter import RecursiveCharacterTextSplitter

text_splitter = RecursiveCharacterTextSplitter(
    chunk_size=400,
    chunk_overlap=20,
    length_function=tiktoken_len,
    separators=["\n\n", "\n", " ", ""]
)
Now we split the text like so: 이제 텍스트를 다음과 같이 분할합니다.
chunks = text_splitter.split_text(data[6]['text'])[:3]
chunks
['Alan Mathison Turing OBE FRS (London, 23 June 1912 – Wilmslow, Cheshire, 7 June 1954) was an English mathematician and computer scientist. He was born in Maida Vale, London.\n\nEarly life and family \nAlan Turing was born in Maida Vale, London on 23 June 1912. His father was part of a family of merchants from Scotland. His mother, Ethel Sara, was the daughter of an engineer.\n\nEducation \nTuring went to St. Michael\'s, a school at 20 Charles Road, St Leonards-on-sea, when he was five years old.\n"This is only a foretaste of what is to come, and only the shadow of what is going to be.” – Alan Turing.\n\nThe Stoney family were once prominent landlords, here in North Tipperary. His mother Ethel Sara Stoney (1881–1976) was daughter of Edward Waller Stoney (Borrisokane, North Tipperary) and Sarah Crawford (Cartron Abbey, Co. Longford); Protestant Anglo-Irish gentry.\n\nEducated in Dublin at Alexandra School and College; on October 1st 1907 she married Julius Mathison Turing, latter son of Reverend John Robert Turing and Fanny Boyd, in Dublin. Born on June 23rd 1912, Alan Turing would go on to be regarded as one of the greatest figures of the twentieth century.\n\nA brilliant mathematician and cryptographer Alan was to become the founder of modern-day computer science and artificial intelligence; designing a machine at Bletchley Park to break secret Enigma encrypted messages used by the Nazi German war machine to protect sensitive commercial, diplomatic and military communications during World War 2. Thus, Turing made the single biggest contribution to the Allied victory in the war against Nazi Germany, possibly saving the lives of an estimated 2 million people, through his effort in shortening World War II.',
'In 2013, almost 60 years later, Turing received a posthumous Royal Pardon from Queen Elizabeth II. Today, the “Turing law” grants an automatic pardon to men who died before the law came into force, making it possible for living convicted gay men to seek pardons for offences now no longer on the statute book.\n\nAlas, Turing accidentally or otherwise lost his life in 1954, having been subjected by a British court to chemical castration, thus avoiding a custodial sentence. He is known to have ended his life at the age of 41 years, by eating an apple laced with cyanide.\n\nCareer \nTuring was one of the people who worked on the first computers. He created the theoretical Turing machine in 1936. The machine was imaginary, but it included the idea of a computer program.\n\nTuring was interested in artificial intelligence. He proposed the Turing test, to say when a machine could be called "intelligent". A computer could be said to "think" if a human talking with it could not tell it was a machine.\n\nDuring World War II, Turing worked with others to break German ciphers (secret messages). He worked for the Government Code and Cypher School (GC&CS) at Bletchley Park, Britain\'s codebreaking centre that produced Ultra intelligence.\nUsing cryptanalysis, he helped to break the codes of the Enigma machine. After that, he worked on other German codes.',
'From 1945 to 1947, Turing worked on the design of the ACE (Automatic Computing Engine) at the National Physical Laboratory. He presented a paper on 19 February 1946. That paper was "the first detailed design of a stored-program computer". Although it was possible to build ACE, there were delays in starting the project. In late 1947 he returned to Cambridge for a sabbatical year. While he was at Cambridge, the Pilot ACE was built without him. It ran its first program on 10\xa0May 1950.\n\nPrivate life \nTuring was a homosexual man. In 1952, he admitted having had sex with a man in England. At that time, homosexual acts were illegal. Turing was convicted. He had to choose between going to jail and taking hormones to lower his sex drive. He decided to take the hormones. After his punishment, he became impotent. He also grew breasts.\n\nIn May 2012, a private member\'s bill was put before the House of Lords to grant Turing a statutory pardon. In July 2013, the government supported it. A royal pardon was granted on 24 December 2013.\n\nDeath \nIn 1954, Turing died from cyanide poisoning. The cyanide came from either an apple which was poisoned with cyanide, or from water that had cyanide in it. The reason for the confusion is that the police never tested the apple for cyanide. It is also suspected that he committed suicide.\n\nThe treatment forced on him is now believed to be very wrong. It is against medical ethics and international laws of human rights. In August 2009, a petition asking the British Government to apologise to Turing for punishing him for being a homosexual was started. The petition received thousands of signatures. Prime Minister Gordon Brown acknowledged the petition. He called Turing\'s treatment "appalling".\n\nReferences\n\nOther websites \nJack Copeland 2012. Alan Turing: The codebreaker who saved \'millions of lives\'. BBC News / Technology']
이 코드는 텍스트를 잘게 나누는 작업을 수행하는데 사용되는 RecursiveCharacterTextSplitter 클래스를 초기화하고, 특정 텍스트를 나누어서 반환하는 예제입니다. 아래는 코드의 각 부분에 대한 설명입니다:
- from langchain.text_splitter import RecursiveCharacterTextSplitter: langchain 패키지에서 RecursiveCharacterTextSplitter 클래스를 가져옵니다. 이 클래스는 텍스트를 재귀적으로 나누는 데 사용됩니다.
- text_splitter = RecursiveCharacterTextSplitter(chunk_size=400, chunk_overlap=20, length_function=tiktoken_len, separators=["\n\n", "\n", " ", ""]):
- RecursiveCharacterTextSplitter 클래스의 인스턴스를 생성합니다.
- chunk_size=400: 각 청크(조각)의 크기를 지정합니다. 여기서는 400으로 설정되어 있습니다.
- chunk_overlap=20: 청크 간의 겹치는 부분 크기를 지정합니다. 여기서는 20으로 설정되어 있습니다.
- length_function=tiktoken_len: 텍스트의 길이를 측정하는 함수로 앞서 정의한 tiktoken_len 함수를 사용합니다.
- separators=["\n\n", "\n", " ", ""]: 텍스트를 나누는 기준으로 사용할 구분자(separators) 목록을 지정합니다. 여기서는 빈 문자열을 포함한 여러 구분자가 설정되어 있습니다.
- chunks = text_splitter.split_text(data[6]['text'])[:3]:
- text_splitter 객체를 사용하여 특정 텍스트(data[6]['text'])를 나눕니다.
- [:3]: 나눈 결과 중에서 처음부터 3개의 청크를 선택합니다.
이렇게 초기화된 text_splitter 객체를 사용하여 텍스트를 나누고, 나눈 결과 중에서 처음부터 3개의 청크를 선택한 것입니다. 이렇게 나눈 청크들은 chunks 변수에 할당되어 있습니다.
None of these chunks are larger than the 400 chunk size limit we set earlier:
이러한 청크는 이전에 설정한 400 청크 크기 제한보다 크지 않습니다.
tiktoken_len(chunks[0]), tiktoken_len(chunks[1]), tiktoken_len(chunks[2])(397, 304, 399)
With the text_splitter, we get nicely-sized chunks of text. We’ll use this functionality during the indexing process later. For now, let’s take a look at embeddings.
text_splitter를 사용하면 적절한 크기의 텍스트 덩어리를 얻을 수 있습니다. 나중에 인덱싱 프로세스 중에 이 기능을 사용할 것입니다. 지금은 임베딩에 대해 살펴보겠습니다.
Creating Embeddings
The vector embeddings are vital to retrieving relevant context for our LLM. We take the chunks of text we’d like to store in our knowledge base and encode each chunk into a vector embedding.
벡터 임베딩은 LLM에 대한 관련 컨텍스트를 검색하는 데 필수적입니다. 우리는 지식 베이스에 저장하고 싶은 텍스트 덩어리를 가져와 각 덩어리를 벡터 임베딩으로 인코딩합니다.
These embeddings can act as “numerical representations” of the meaning of each chunk of text. This is possible because we create the embeddings with another AI language model that has learned to translate human-readable text into AI-readable embeddings.
이러한 임베딩은 각 텍스트 덩어리의 의미를 "수치적으로 표현"하는 역할을 할 수 있습니다. 이는 사람이 읽을 수 있는 텍스트를 AI가 읽을 수 있는 임베딩으로 변환하는 방법을 학습한 또 다른 AI 언어 모델을 사용하여 임베딩을 생성하기 때문에 가능합니다.
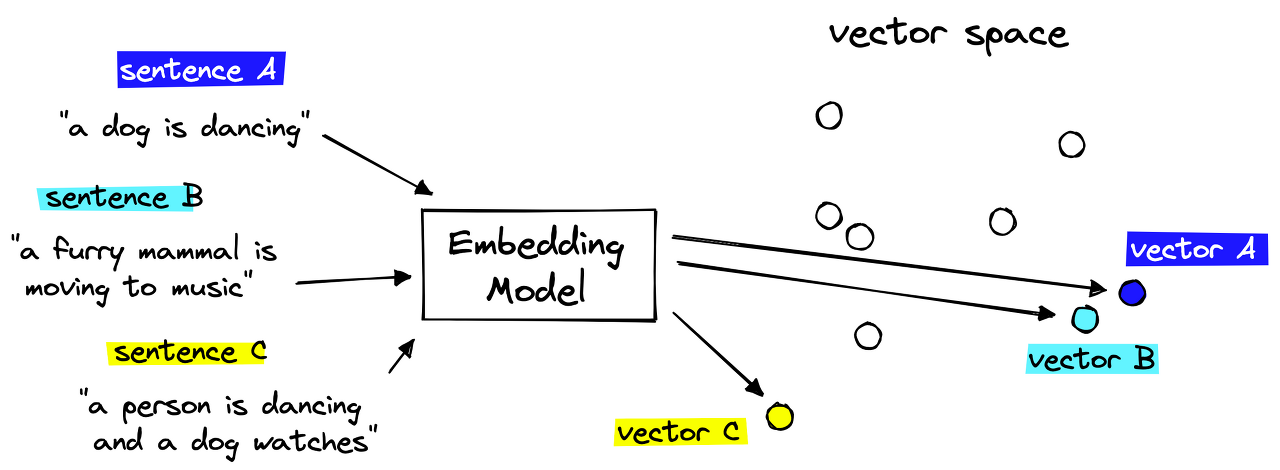
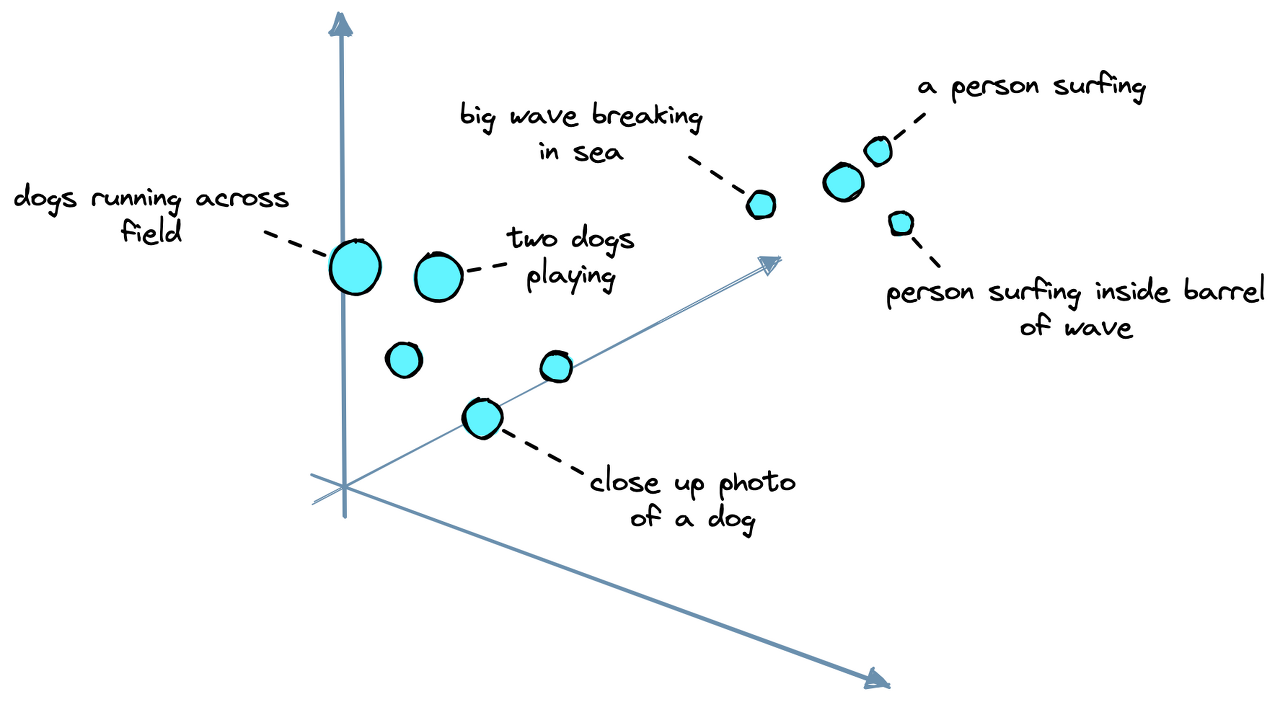
We then store these embeddings in our vector database (more on this soon) and can find text chunks with similar meanings by calculating the distance between embeddings in vector space.
그런 다음 이러한 임베딩을 벡터 데이터베이스에 저장하고(자세한 내용은 곧 설명) 벡터 공간에서 임베딩 사이의 거리를 계산하여 유사한 의미를 가진 텍스트 청크를 찾을 수 있습니다.
The embedding model we will use is another OpenAI model called text-embedding-ada-002. We can initialize it via LangChain like so:
우리가 사용할 임베딩 모델은 text-embedding-ada-002라는 또 다른 OpenAI 모델입니다. 다음과 같이 LangChain을 통해 초기화할 수 있습니다.
from langchain.embeddings.openai import OpenAIEmbeddings

model_name = 'text-embedding-ada-002'

embed = OpenAIEmbeddings(
    document_model_name=model_name,
    query_model_name=model_name,
    openai_api_key=OPENAI_API_KEY
)
이 코드는 langchain 패키지에서 OpenAIEmbeddings 클래스를 사용하여 텍스트 임베딩을 생성하는 작업을 수행하는 예제입니다. 아래는 코드의 각 부분에 대한 설명입니다:
- from langchain.embeddings.openai import OpenAIEmbeddings: langchain 패키지에서 OpenAIEmbeddings 클래스를 가져옵니다. 이 클래스는 OpenAI의 언어 모델을 사용하여 텍스트를 임베딩하는 데 사용됩니다.
- model_name = 'text-embedding-ada-002': 사용할 OpenAI 언어 모델의 이름을 지정합니다. 여기서는 'text-embedding-ada-002' 모델을 사용합니다.
- embed = OpenAIEmbeddings(document_model_name=model_name, query_model_name=model_name, openai_api_key=OPENAI_API_KEY): OpenAIEmbeddings 클래스의 인스턴스를 생성합니다.
- document_model_name=model_name: 텍스트 문서에 대한 임베딩을 생성하는 데 사용할 모델의 이름을 설정합니다.
- query_model_name=model_name: 쿼리(질문)에 대한 임베딩을 생성하는 데 사용할 모델의 이름을 설정합니다.
- openai_api_key=OPENAI_API_KEY: OpenAI API에 액세스하기 위한 API 키를 지정합니다.
이제 embed 객체를 사용하여 주어진 텍스트 문서나 쿼리에 대한 임베딩을 생성할 수 있습니다. 이렇게 생성된 임베딩은 텍스트의 의미적 표현을 나타내는 벡터로 사용될 수 있습니다.
Now we can embed our text: 이제 텍스트를 embed 할 수 있습니다.
texts = [
    'this is the first chunk of text',
    'then another second chunk of text is here'
]

res = embed.embed_documents(texts)
len(res), len(res[0])
(2, 1536)
From this, we get two embeddings as we passed in two chunks of text. Each embedding is a 1536-dimensional vector. This dimension is simply the output dimensionality of text-embedding-ada-002.
여기에서 두 개의 텍스트 덩어리를 전달하면서 두 개의 임베딩을 얻습니다. 각 임베딩은 1536차원 벡터입니다. 이 차원은 단순히 text-embedding-ada-002의 출력 차원입니다.
With that, we have our dataset, text splitter, and embedding model. We have everything needed to begin constructing our knowledge base.
이를 통해 데이터 세트, 텍스트 분할기 및 임베딩 모델이 있습니다. 우리는 지식 기반 구축을 시작하는 데 필요한 모든 것을 갖추고 있습니다.
Vector Database
A vector database is a type of knowledge base that allows us to scale the search of similar embeddings to billions of records, manage our knowledge base by adding, updating, or removing records, and even do things like filtering.
벡터 데이터베이스는 유사한 임베딩 검색을 수십억 개의 레코드로 확장하고, 레코드를 추가, 업데이트 또는 제거하여 knowledge base 을 관리하고, 심지어 필터링과 같은 작업도 수행할 수 있게 해주는 일종의 knowledge base 입니다.
We will be using the Pinecone vector database. To use it, we need a free API key. Then we initialize our database index like so:
우리는 Pinecone 벡터 데이터베이스를 사용할 것입니다. 이를 사용하려면 무료 API 키가 필요합니다. 그런 다음 데이터베이스 인덱스를 다음과 같이 초기화합니다.
import pinecone

index_name = 'langchain-retrieval-augmentation'

pinecone.init(
        api_key="YOUR_API_KEY",  # find api key in console at app.pinecone.io
        environment="YOUR_ENV"  # find next to api key in console
)

# we create a new index
pinecone.create_index(
        name=index_name,
        metric='dotproduct',
        dimension=len(res[0]) # 1536 dim of text-embedding-ada-002
)
이 코드는 Pinecone을 사용하여 새로운 인덱스를 만들고 설정하는 작업을 수행하는 예제입니다. Pinecone은 벡터 검색을 위한 서비스로, 벡터를 저장하고 검색할 수 있는 기능을 제공합니다. 아래는 코드의 각 부분에 대한 설명입니다:
- import pinecone: Pinecone 패키지를 가져옵니다. Pinecone은 벡터 검색 서비스를 구현하는 패키지입니다.
- index_name = 'langchain-retrieval-augmentation': 새로 생성할 Pinecone 인덱스의 이름을 지정합니다. 여기서는 'langchain-retrieval-augmentation'으로 설정되어 있습니다.
- pinecone.init(api_key="YOUR_API_KEY", environment="YOUR_ENV"): Pinecone을 초기화하고 설정을 수행합니다.
- api_key="YOUR_API_KEY": Pinecone API에 액세스하기 위한 API 키를 설정합니다. 여기서는 사용자가 직접 발급받은 API 키를 넣어야 합니다.
- environment="YOUR_ENV": Pinecone 서비스가 실행되는 환경을 설정합니다. 이는 Pinecone 콘솔에서 확인할 수 있는 환경 값입니다.
- pinecone.create_index(name=index_name, metric='dotproduct', dimension=len(res[0])): Pinecone에 새로운 인덱스를 생성합니다.
- name=index_name: 새로운 인덱스의 이름을 설정합니다.
- metric='dotproduct': 벡터 간 유사성을 측정하는 데 사용할 메트릭을 지정합니다. 여기서는 내적(dotproduct)을 사용하고 있습니다.
- dimension=len(res[0]): 벡터의 차원을 설정합니다. len(res[0])는 앞서 언급된 res 변수의 첫 번째 요소의 차원을 나타냅니다. 이 경우에는 1536차원으로 설정되어 있습니다. Pinecone은 벡터의 차원을 사전에 알고 있어야 하기 때문에 이를 설정합니다.
이렇게 Pinecone을 초기화하고, 새로운 인덱스를 생성하는 코드입니다. Pinecone은 생성된 인덱스를 통해 벡터를 저장하고 검색할 수 있는 서비스를 제공합니다.
Then we connect to the new index: 그런 다음 새 인덱스에 연결합니다.
index = pinecone.GRPCIndex(index_name)

index.describe_index_stats()
{'dimension': 1536,
'index_fullness': 0.0,
'namespaces': {},
'total_vector_count': 0}
이 코드는 Pinecone에서 설정한 인덱스에 대한 통계 정보를 조회하는 예제입니다. Pinecone에서는 벡터 검색을 위한 인덱스를 설정하고, 이러한 인덱스에 대한 통계 정보를 확인할 수 있습니다. 아래는 코드의 각 부분에 대한 설명입니다:
- index = pinecone.GRPCIndex(index_name): pinecone.GRPCIndex 클래스의 인스턴스를 생성합니다.
- index_name: 조회하려는 Pinecone 인덱스의 이름을 전달합니다. 이전 코드에서 생성한 인덱스의 이름인 'langchain-retrieval-augmentation'이 여기서 사용됩니다.
- index.describe_index_stats(): 생성한 index 객체를 통해 해당 인덱스에 대한 통계 정보를 조회합니다.
- describe_index_stats(): Pinecone에서 제공하는 메서드로, 인덱스에 대한 통계 정보를 반환합니다.
따라서, 이 코드는 Pinecone에서 설정한 특정 인덱스의 통계 정보를 조회하는 작업을 수행합니다. 이 통계 정보는 해당 인덱스에 저장된 벡터의 상태 및 특성에 대한 정보를 포함합니다.
We will see that the new Pinecone index has a total_vector_count of 0 because we haven’t added any vectors yet. Our next task is to do that.
아직 벡터를 추가하지 않았기 때문에 새 Pinecone 인덱스의 total_Vector_count가 0임을 알 수 있습니다. 우리의 다음 임무는 그것을 하는 것입니다.
The indexing process consists of us iterating through the data we’d like to add to our knowledge base, creating IDs, embeddings, and metadata — then adding these to the index.
indexing 프로세스는 knowledge base 에 추가하려는 데이터를 반복하고 ID, 임베딩 및 메타데이터를 생성한 다음 이를 색인에 추가하는 것으로 구성됩니다.
We can do this in batches to speed up the process.
프로세스 속도를 높이기 위해 이 작업을 일괄적으로 수행할 수 있습니다.
from tqdm.auto import tqdm
from uuid import uuid4

batch_limit = 100

texts = []
metadatas = []

for i, record in enumerate(tqdm(data)):
    # first get metadata fields for this record
    metadata = {
        'wiki-id': str(record['id']),
        'source': record['url'],
        'title': record['title']
    }
    # now we create chunks from the record text
    record_texts = text_splitter.split_text(record['text'])
    # create individual metadata dicts for each chunk
    record_metadatas = [{
        "chunk": j, "text": text, **metadata
    } for j, text in enumerate(record_texts)]
    # append these to current batches
    texts.extend(record_texts)
    metadatas.extend(record_metadatas)
    # if we have reached the batch_limit we can add texts
    if len(texts) >= batch_limit:
        ids = [str(uuid4()) for _ in range(len(texts))]
        embeds = embed.embed_documents(texts)
        index.upsert(vectors=zip(ids, embeds, metadatas))
        texts = []
        metadatas = []
이 코드는 Pinecone을 사용하여 벡터 검색을 위한 데이터를 인덱싱하는 작업을 수행하는 예제입니다. 아래는 코드의 각 부분에 대한 설명입니다:
- from tqdm.auto import tqdm: 데이터 처리의 진행 상황을 시각적으로 확인하기 위해 tqdm 패키지를 가져옵니다.
- from uuid import uuid4: UUID(Universally Unique Identifier)를 생성하기 위해 uuid4 함수를 가져옵니다.
- batch_limit = 100: 각 배치에 포함될 텍스트 및 메타데이터의 최대 수를 나타내는 변수입니다.
- texts = [] 및 metadatas = []: 텍스트 및 메타데이터를 저장할 빈 리스트를 초기화합니다.
- for i, record in enumerate(tqdm(data)):: 데이터셋에서 각 레코드에 대한 반복문을 수행하며, tqdm을 사용하여 처리 상황을 표시합니다.
- metadata = {...}: 각 레코드에서 추출한 메타데이터를 metadata 딕셔너리에 저장합니다. 여기서는 'wiki-id', 'source', 'title' 정보를 추출합니다.
- record_texts = text_splitter.split_text(record['text']): 현재 레코드의 텍스트를 text_splitter 객체를 사용하여 나눕니다. 나눈 결과를 record_texts에 저장합니다.
- record_metadatas = [...]: 각 텍스트 청크에 대한 메타데이터를 생성하고, 해당 청크의 순서("chunk"), 텍스트("text"), 그리고 이전에 추출한 메타데이터를 포함하는 딕셔너리의 리스트를 생성합니다.
- texts.extend(record_texts) 및 metadatas.extend(record_metadatas): 현재 레코드에서 추출한 텍스트와 메타데이터를 각각 texts와 metadatas 리스트에 추가합니다.
- if len(texts) >= batch_limit:: 현재까지 추가된 텍스트의 수가 지정된 배치 제한에 도달하면 아래 작업을 수행합니다.
- ids = [str(uuid4()) for _ in range(len(texts))]: 각 텍스트에 대한 고유한 UUID를 생성하여 ids 리스트에 저장합니다.
- embeds = embed.embed_documents(texts): embed 객체를 사용하여 텍스트를 임베딩합니다. 이는 Pinecone에 벡터를 저장하기 위한 작업입니다.
- index.upsert(vectors=zip(ids, embeds, metadatas)): upsert 메서드를 사용하여 벡터와 메타데이터를 Pinecone 인덱스에 추가합니다. zip 함수를 사용하여 각 벡터와 메타데이터를 결합합니다.
- texts = [] 및 metadatas = []: 배치 처리가 완료되면 다음 배치를 처리하기 위해 texts와 metadatas 리스트를 초기화합니다.
이렇게 반복문을 통해 데이터를 일정한 크기의 배치로 나누어 Pinecone 인덱스에 추가하는 작업을 수행합니다.
We’ve now indexed everything. To check the number of records in our index, we call describe_index_stats again:
이제 모든 항목의 색인이 생성되었습니다. 인덱스의 레코드 수를 확인하려면 explain_index_stats를 다시 호출합니다.
index.describe_index_stats(){'dimension': 1536,
'index_fullness': 0.1,
'namespaces': {'': {'vector_count': 27437}},
'total_vector_count': 27437}
Our index contains ~27K records. As mentioned earlier, we can scale this up to billions, but 27K is enough for our example.
우리 색인에는 ~27,000개의 레코드가 포함되어 있습니다. 앞서 언급했듯이 이를 수십억까지 확장할 수 있지만 이 예에서는 27K면 충분합니다.
LangChain Vector Store and Querying
We construct our index independently of LangChain. That’s because it’s a straightforward process, and it is faster to do this with the Pinecone client directly. However, we’re about to jump back into LangChain, so we should reconnect to our index via the LangChain library.
우리는 LangChain과 독립적으로 인덱스를 구성합니다. 그 이유는 프로세스가 간단하고 Pinecone 클라이언트를 사용하여 직접 수행하는 것이 더 빠르기 때문입니다. 그러나 우리는 곧 LangChain으로 돌아갈 예정이므로 LangChain 라이브러리를 통해 인덱스에 다시 연결해야 합니다.
from langchain.vectorstores import Pinecone

text_field = "text"

# switch back to normal index for langchain
index = pinecone.Index(index_name)

vectorstore = Pinecone(
    index, embed.embed_query, text_field
)
이 코드는 langchain 패키지에서 Pinecone 벡터 스토어를 초기화하는 작업을 수행하는 예제입니다. 아래는 코드의 각 부분에 대한 설명입니다:
- from langchain.vectorstores import Pinecone: langchain 패키지에서 Pinecone 벡터 스토어를 가져옵니다.
- text_field = "text": 벡터 스토어에서 검색을 수행할 텍스트 필드의 이름을 지정합니다. 여기서는 "text"로 설정되어 있습니다.
- index = pinecone.Index(index_name): Pinecone에 대한 Index 객체를 생성합니다.
- index_name: 앞서 설정한 Pinecone 인덱스의 이름을 사용합니다.
- vectorstore = Pinecone(index, embed.embed_query, text_field): Pinecone 벡터 스토어를 초기화합니다.
- index: Pinecone 인덱스에 대한 객체입니다.
- embed.embed_query: Pinecone에 저장된 벡터와 검색 쿼리를 임베딩하는 데 사용되는 함수입니다. 이 함수는 embed 객체의 embed_query 메서드입니다.
- text_field: 검색 쿼리에 사용할 텍스트 필드의 이름을 설정합니다.
이렇게 초기화된 vectorstore 객체는 Pinecone에 저장된 벡터를 활용하여 특정 텍스트 필드에서 검색을 수행할 수 있습니다. Pinecone 벡터 스토어는 벡터를 효율적으로 저장하고 검색하는 데 사용되는 도구입니다.
We can use the similarity search method to make a query directly and return the chunks of text without any LLM generating the response.
유사성 검색 방법을 사용하여 직접 쿼리를 만들고 LLM이 응답을 생성하지 않고도 텍스트 덩어리를 반환할 수 있습니다.
query = "who was Benito Mussolini?"

vectorstore.similarity_search(
    query,  # our search query
    k=3  # return 3 most relevant docs
)
[Document(page_content='Benito Amilcare Andrea Mussolini KSMOM GCTE (29 July 1883 – 28 April 1945) was an Italian politician and journalist. He was also the Prime Minister of Italy from 1922 until 1943. He was the leader of the National Fascist Party.\n\nBiography\n\nEarly life\nBenito Mussolini was named after Benito Juarez, a Mexican opponent of the political power of the Roman Catholic Church, by his anticlerical (a person who opposes the political interference of the Roman Catholic Church in secular affairs) father. Mussolini\'s father was a blacksmith. Before being involved in politics, Mussolini was a newspaper editor (where he learned all his propaganda skills) and elementary school teacher.\n\nAt first, Mussolini was a socialist, but when he wanted Italy to join the First World War, he was thrown out of the socialist party. He \'invented\' a new ideology, Fascism, much out of Nationalist\xa0and Conservative views.\n\nRise to power and becoming dictator\nIn 1922, he took power by having a large group of men, "Black Shirts," march on Rome and threaten to take over the government. King Vittorio Emanuele III gave in, allowed him to form a government, and made him prime minister. In the following five years, he gained power, and in 1927 created the OVRA, his personal secret police force. Using the agency to arrest, scare, or murder people against his regime, Mussolini was dictator\xa0of Italy by the end of 1927. Only the King and his own Fascist party could challenge his power.', lookup_str='', metadata={'chunk': 0.0, 'source': 'https://simple.wikipedia.org/wiki/Benito%20Mussolini', 'title': 'Benito Mussolini', 'wiki-id': '6754'}, lookup_index=0),
Document(page_content='Fascism as practiced by Mussolini\nMussolini\'s form of Fascism, "Italian Fascism"- unlike Nazism, the racist ideology that Adolf Hitler followed- was different and less destructive than Hitler\'s. Although a believer in the superiority of the Italian nation and national unity, Mussolini, unlike Hitler, is quoted "Race? It is a feeling, not a reality. Nothing will ever make me believe that biologically pure races can be shown to exist today".\n\nMussolini wanted Italy to become a new Roman Empire. In 1923, he attacked the island of Corfu, and in 1924, he occupied the city state of Fiume. In 1935, he attacked the African country Abyssinia (now called Ethiopia). His forces occupied it in 1936. Italy was thrown out of the League of Nations because of this aggression. In 1939, he occupied the country Albania. In 1936, Mussolini signed an alliance with Adolf Hitler, the dictator of Germany.\n\nFall from power and death\nIn 1940, he sent Italy into the Second World War on the side of the Axis countries. Mussolini attacked Greece, but he failed to conquer it. In 1943, the Allies landed in Southern Italy. The Fascist party and King Vittorio Emanuel III deposed Mussolini and put him in jail, but he was set free by the Germans, who made him ruler of the Italian Social Republic puppet state which was in a small part of Central Italy. When the war was almost over, Mussolini tried to escape to Switzerland with his mistress, Clara Petacci, but they were both captured and shot by partisans. Mussolini\'s dead body was hanged upside-down, together with his mistress and some of Mussolini\'s helpers, on a pole at a gas station in the village of Millan, which is near the border between Italy and Switzerland.', lookup_str='', metadata={'chunk': 1.0, 'source': 'https://simple.wikipedia.org/wiki/Benito%20Mussolini', 'title': 'Benito Mussolini', 'wiki-id': '6754'}, lookup_index=0),
Document(page_content='Fascist Italy \nIn 1922, a new Italian government started. It was ruled by Benito Mussolini, the leader of Fascism in Italy. He became head of government and dictator, calling himself "Il Duce" (which means "leader" in Italian). He became friends with German dictator Adolf Hitler. Germany, Japan, and Italy became the Axis Powers. In 1940, they entered World War II together against France, Great Britain, and later the Soviet Union. During the war, Italy controlled most of the Mediterranean Sea.\n\nOn July 25, 1943, Mussolini was removed by the Great Council of Fascism. On September 8, 1943, Badoglio said that the war as an ally of Germany was ended. Italy started fighting as an ally of France and the UK, but Italian soldiers did not know whom to shoot. In Northern Italy, a movement called Resistenza started to fight against the German invaders. On April 25, 1945, much of Italy became free, while Mussolini tried to make a small Northern Italian fascist state called the Republic of Salò. The fascist state failed and Mussolini tried to flee to Switzerland and escape to Francoist Spain, but he was captured by Italian partisans. On 28 April 1945 Mussolini was executed by a partisan.\n\nAfter World War Two \n\nThe state became a republic on June 2, 1946. For the first time, women were able to vote. Italian people ended the Savoia dynasty and adopted a republic government.\n\nIn February 1947, Italy signed a peace treaty with the Allies. They lost all the colonies and some territorial areas (Istria and parts of Dalmatia).\n\nSince then Italy has joined NATO and the European Community (as a founding member). It is one of the seven biggest industrial economies in the world.\n\nTransportation \n\nThe railway network in Italy totals . It is the 17th longest in the world. High speed trains include ETR-class trains which travel at .', lookup_str='', metadata={'chunk': 5.0, 'source': 'https://simple.wikipedia.org/wiki/Italy', 'title': 'Italy', 'wiki-id': '363'}, lookup_index=0)]
All of these are relevant results, telling us that the retrieval component of our systems is functioning. The next step is adding our LLM to generatively answer our question using the information provided in these retrieved contexts.
이 모든 것은 관련 결과이며, 이는 우리 시스템의 검색 구성 요소가 작동하고 있음을 알려줍니다. 다음 단계는 검색된 컨텍스트에서 제공된 정보를 사용하여 질문에 생성적으로 답변하기 위해 LLM을 추가하는 것입니다.
Generative Question Answering
In generative question-qnswering (GQA), we pass our question to the LLM but instruct it to base the answer on the information returned from our knowledge base. We can do this in LangChain easily using the RetrievalQA chain.
생성적 질문 답변(GQA)에서는 질문을 LLM에 전달하지만 knowledge base 에서 반환된 정보를 기반으로 답변을 작성하도록 지시합니다. RetrievalQA 체인을 사용하여 LangChain에서 이를 쉽게 수행할 수 있습니다.
from langchain.chat_models import ChatOpenAI
from langchain.chains import RetrievalQA

# completion llm
llm = ChatOpenAI(
    openai_api_key=OPENAI_API_KEY,
    model_name='gpt-3.5-turbo',
    temperature=0.0
)

qa = RetrievalQA.from_chain_type(
    llm=llm,
    chain_type="stuff",
    retriever=vectorstore.as_retriever()
)
이 코드는 langchain 패키지에서 대화형 OpenAI 언어 모델과 벡터 검색을 결합하여 정보 검색을 수행하는 작업을 수행하는 예제입니다. 아래는 코드의 각 부분에 대한 설명입니다:
- from langchain.chat_models import ChatOpenAI: langchain 패키지에서 대화형 OpenAI 언어 모델을 가져옵니다.
- from langchain.chains import RetrievalQA: langchain 패키지에서 벡터 검색을 기반으로 한 질문 응답 시스템을 가져옵니다.
- llm = ChatOpenAI(openai_api_key=OPENAI_API_KEY, model_name='gpt-3.5-turbo', temperature=0.0): 대화형 OpenAI 언어 모델(ChatOpenAI)을 초기화합니다.
- openai_api_key=OPENAI_API_KEY: OpenAI API에 액세스하기 위한 API 키를 설정합니다.
- model_name='gpt-3.5-turbo': 사용할 OpenAI 언어 모델의 이름을 설정합니다. 여기서는 'gpt-3.5-turbo' 모델을 사용합니다.
- temperature=0.0: 모델의 응답에 대한 랜덤성을 조절하는 온도 매개변수를 0으로 설정하여 확률 분포의 뾰족함을 제거합니다.
- qa = RetrievalQA.from_chain_type(llm=llm, chain_type="stuff", retriever=vectorstore.as_retriever()): 벡터 검색 기반의 질문 응답 시스템(RetrievalQA)을 초기화합니다.
- llm=llm: 사용할 언어 모델을 설정합니다.
- chain_type="stuff": 언어 모델과 검색 엔진을 결합하여 생성할 체인의 유형을 설정합니다. 여기서는 'stuff'로 설정되어 있습니다.
- retriever=vectorstore.as_retriever(): 검색을 수행할 벡터 스토어를 설정합니다. vectorstore 객체를 벡터 검색 엔진으로 변환합니다.
이렇게 초기화된 qa 객체는 대화형 OpenAI 언어 모델과 벡터 검색을 결합하여 사용자의 질문에 대한 답변을 생성하는 시스템을 나타냅니다. 이 시스템은 벡터 검색을 통해 저장된 정보에서 적절한 답변을 찾아내고, OpenAI 언어 모델을 사용하여 질문에 응답합니다.
Let’s try this with our earlier query: 이전 쿼리로 이를 시도해 보겠습니다.
qa.run(query)'Benito Mussolini was an Italian politician and journalist who served as the Prime Minister of Italy from 1922 until 1943. He was the leader of the National Fascist Party and invented the ideology of Fascism. Mussolini was a dictator of Italy by the end of 1927, and his form of Fascism, "Italian Fascism," was different and less destructive than Hitler\'s Nazism. Mussolini wanted Italy to become a new Roman Empire and attacked several countries, including Abyssinia (now called Ethiopia) and Greece. He was removed from power in 1943 and was executed by Italian partisans in 1945.'
The response we get this time is generated by our gpt-3.5-turbo LLM based on the retrieved information from our vector database.
이번에 얻은 응답은 벡터 데이터베이스에서 검색된 정보를 기반으로 gpt-3.5-turbo LLM에 의해 생성되었습니다.
We’re still not entirely protected from convincing yet false hallucinations by the model, they can happen, and it’s unlikely that we can eliminate the problem completely. However, we can do more to improve our trust in the answers provided.
우리는 여전히 모델에 의한 설득력 있지만 잘못된 환각 hallucinations 으로부터 완전히 보호되지는 않으며, 이러한 일이 발생할 수 있으며, 문제를 완전히 제거할 수 있을 것 같지 않습니다. 그러나 제공된 답변에 대한 신뢰를 높이기 위해 더 많은 노력을 기울일 수 있습니다.
An effective way of doing this is by adding citations to the response, allowing a user to see where the information is coming from. We can do this using a slightly different version of the RetrievalQA chain called RetrievalQAWithSourcesChain.
이를 수행하는 효과적인 방법은 응답에 인용을 추가하여 사용자가 정보의 출처를 확인할 수 있도록 하는 것입니다. RetrievalQAWithSourcesChain이라는 약간 다른 버전의 RetrievalQA 체인을 사용하여 이 작업을 수행할 수 있습니다.
from langchain.chains import RetrievalQAWithSourcesChain

qa_with_sources = RetrievalQAWithSourcesChain.from_chain_type(
    llm=llm,
    chain_type="stuff",
    retriever=vectorstore.as_retriever()
)
이 코드는 langchain 패키지에서 정보 검색을 수행하는 체인에 대한 초기화를 수행하는 예제입니다. RetrievalQAWithSourcesChain 클래스는 벡터 검색을 기반으로 한 질문 응답 시스템을 나타냅니다. 아래는 코드의 각 부분에 대한 설명입니다:
- from langchain.chains import RetrievalQAWithSourcesChain: langchain 패키지에서 벡터 검색을 기반으로 한 질문 응답 시스템에 소스(출처) 정보를 추가한 RetrievalQAWithSourcesChain 클래스를 가져옵니다.
- qa_with_sources = RetrievalQAWithSourcesChain.from_chain_type(llm=llm, chain_type="stuff", retriever=vectorstore.as_retriever()): RetrievalQAWithSourcesChain 클래스의 인스턴스를 초기화합니다.
- llm=llm: 사용할 언어 모델을 설정합니다. 여기서는 llm 변수에 저장된 대화형 OpenAI 언어 모델을 사용합니다.
- chain_type="stuff": 언어 모델과 검색 엔진을 결합하여 생성할 체인의 유형을 설정합니다. 여기서는 'stuff'로 설정되어 있습니다.
- retriever=vectorstore.as_retriever(): 검색을 수행할 벡터 스토어를 설정합니다. vectorstore 객체를 벡터 검색 엔진으로 변환합니다.
이렇게 초기화된 qa_with_sources 객체는 벡터 검색을 기반으로 한 질문 응답 시스템을 나타냅니다. 더불어, 이 시스템은 각 답변에 대한 소스(출처) 정보를 함께 제공합니다. 이는 사용자에게 답변의 신뢰성과 출처를 제공하는 데 도움이 됩니다.
qa_with_sources(query)
{'question': 'who was Benito Mussolini?',
 'answer': 'Benito Mussolini was an Italian politician and journalist who was the Prime Minister of Italy from 1922 until 1943. He was the leader of the National Fascist Party and invented the ideology of Fascism. He became dictator of Italy by the end of 1927 and was friends with German dictator Adolf Hitler. Mussolini attacked Greece and failed to conquer it. He was removed by the Great Council of Fascism in 1943 and was executed by a partisan on April 28, 1945. After the war, several Neo-Fascist movements have had success in Italy, the most important being the Movimento Sociale Italiano. His granddaughter Alessandra Mussolini has outspoken views similar to Fascism. \n',
 'sources': 'https://simple.wikipedia.org/wiki/Benito%20Mussolini, https://simple.wikipedia.org/wiki/Fascism'}
Now we have answered the question being asked but also included the source of this information being used by the LLM.
이제 우리는 질문에 대한 답변을 마쳤지만 LLM에서 사용하는 이 정보의 출처도 포함했습니다.
We’ve learned how to ground Large Language Models with source knowledge by using a vector database as our knowledge base. Using this, we can encourage accuracy in our LLM’s responses, keep source knowledge up to date, and improve trust in our system by providing citations with every answer.
우리는 벡터 데이터베이스를 지식 기반으로 사용하여 소스 지식으로 대규모 언어 모델을 기반으로 하는 방법을 배웠습니다. 이를 사용하면 LLM 응답의 정확성을 높이고, 소스 지식을 최신 상태로 유지하며, 모든 답변에 인용을 제공하여 시스템에 대한 신뢰도를 높일 수 있습니다.
We’re already seeing LLMs and knowledge bases paired together in huge products like Bing’s AI search, Google Bard, and ChatGPT plugins. Without a doubt, the future of LLMs is tightly coupled with high-performance, scalable, and reliable knowledge bases.
우리는 이미 Bing의 AI 검색, Google Bard 및 ChatGPT 플러그인과 같은 거대한 제품에서 LLM과 지식 기반이 함께 결합되는 것을 보고 있습니다. 의심의 여지 없이 LLM의 미래는 고성능, 확장 가능하고 안정적인 지식 기반과 긴밀하게 결합되어 있습니다.
'Pinecone > LangChain AI Handbook' 카테고리의 다른 글
| Chapter 7. Custom Tools (0) | 2023.11.17 |
|---|---|
| Chapter 6. AI Agents (1) | 2023.11.16 |
| Chapter 4. Conversational Memory (1) | 2023.11.15 |
| Chapter 3. Building Composable Pipelines with Chains (1) | 2023.11.14 |
| Chapter 2. Prompt Templates and the Art of Prompts (0) | 2023.11.13 |
| Chapter 1. An Introduction to LangChain (0) | 2023.11.10 |
| 0. Pinecone - LangChain AI Handbook (0) | 2023.11.08 |