반응형
블로그 이미지
개발자로서 현장에서 일하면서 새로 접하는 기술들이나 알게된 정보 등을 정리하기 위한 블로그입니다. 운 좋게 미국에서 큰 회사들의 프로젝트에서 컬설턴트로 일하고 있어서 새로운 기술들을 접할 기회가 많이 있습니다. 미국의 IT 프로젝트에서 사용되는 툴들에 대해 많은 분들과 정보를 공유하고 싶습니다.
솔웅

최근에 올라온 글

최근에 달린 댓글

최근에 받은 트랙백

글 보관함

카테고리


반응형

Azure OpenAI를 사용하려면 해당 서비스를 사용할 수 있는 권한을 Microsoft 사로부터 얻어야 합니다.

저는 공부 목적으로 필요하다고 신청했는데 거부 됐습니다.


실제 이 Azure OpenAI를 이용해서 제품을 개발하고자 한다면 한번 신청해 보세요.

신청 방법은 아래 글에 정리 해 놨습니다.

https://coronasdk.tistory.com/1304


Azure OpenAI 를 사용하기 위한 사전 요구 사항들 - 사용 요청 거부 됨

OpenAI CookBook 을 거의 다 공부하고 Azure OpenAI 를 공부할 차례 입니다. https://github.com/openai/openai-cookbook GitHub - openai/openai-cookbook: Examples and guides for using the OpenAI API Examples and guides for using the OpenAI API. C

coronasdk.tistory.com


저는 일단 실습은 못하고 Cookbook에 있는 글로 공부해 보겠습니다.


https://github.com/openai/openai-cookbook/blob/main/examples/azure/finetuning.ipynb


GitHub - openai/openai-cookbook: Examples and guides for using the OpenAI API

Examples and guides for using the OpenAI API. Contribute to openai/openai-cookbook development by creating an account on GitHub.

github.com


Azure Fine tuning example

In this example we'll try to go over all operations that can be done using the Azure endpoints and their differences with the openAI endpoints (if any).


이 예제에서는 Azure endpoints 를  사용하여 수행할 수 있는 모든 작업과 openAI endpoints  (있는 경우)과의 차이점을 살펴보겠습니다.


This example focuses on finetuning but also touches on the majority of operations that are available using the API. This example is meant to be a quick way of showing simple operations and is not meant as a finetune model adaptation tutorial.


이 예제는 finetuning에 중점을 두지만 API를 사용하여 사용할 수 있는 대부분의 작업도 다룹니다. 이 예제는 간단한 작업을 빠르게 보여주기 위한 것이며 finetuning 모델 적용 튜토리얼이 아닙니다.


import openai
from openai import cli


Setup

For the following sections to work properly we first have to setup some things. Let's start with the api_base and api_version. To find your api_base go to https://portal.azure.com, find your resource and then under "Resource Management" -> "Keys and Endpoints" look for the "Endpoint" value.


다음 섹션이 제대로 작동하려면 먼저 몇 가지를 설정해야 합니다. api_base 및 api_version부터 시작하겠습니다. api_base를 찾으려면 https://portal.azure.com으로 이동하여 리소스를 찾은 다음 "Resource Management" -> "Keys and Endpoints"에서 "Endpoint" 값을 찾습니다.


openai.api_version = '2022-12-01'
openai.api_base = '' # Please add your endpoint here


We next have to setup the api_type and api_key. We can either get the key from the portal or we can get it through Microsoft Active Directory Authentication. Depending on this the api_type is either azure or azure_ad.


다음으로 api_type 및 api_key를 설정해야 합니다. 포털에서 키를 얻거나 Microsoft Active Directory 인증을 통해 얻을 수 있습니다. 이에 따라 api_type은 azure 또는 azure_ad입니다.


Setup: Portal

Let's first look at getting the key from the portal. Go to https://portal.azure.com, find your resource and then under "Resource Management" -> "Keys and Endpoints" look for one of the "Keys" values.


먼저 포털에서 키를 가져오는 방법을 살펴보겠습니다. https://portal.azure.com으로 이동하여 리소스를 찾은 다음 "Resource Management" -> "Keys and Endpoints"에서 "Keys" 값 중 하나를 찾습니다.


openai.api_type = 'azure'
openai.api_key = ''  # Please add your api key here

(Optional) Setup: Microsoft Active Directory Authentication

Let's now see how we can get a key via Microsoft Active Directory Authentication. Uncomment the following code if you want to use Active Directory Authentication instead of keys from the portal.


(선택 사항) 설정: Microsoft Active Directory 인증
이제 Microsoft Active Directory 인증을 통해 키를 얻는 방법을 살펴보겠습니다. 포털의 키 대신 Active Directory 인증을 사용하려면 다음 코드의 주석을 제거하십시오.


# from azure.identity import DefaultAzureCredential

# default_credential = DefaultAzureCredential()
# token = default_credential.get_token("https://cognitiveservices.azure.com/.default")

# openai.api_type = 'azure_ad'
# openai.api_key = token.token


Files

In the next section we will focus on the files operations: importing, listing, retrieving, deleting. For this we need to create 2 temporary files with some sample data. For the sake of simplicity, we will use the same data for training and validation.


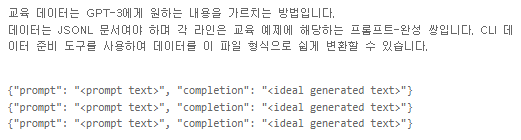
다음 섹션에서는 가져오기, 나열, 검색, 삭제와 같은 파일 작업에 중점을 둘 것입니다. 이를 위해 일부 샘플 데이터로 2개의 임시 파일을 생성해야 합니다. 단순화를 위해 교육 및 검증에 동일한 데이터를 사용합니다.


import shutil
import json

training_file_name = 'training.jsonl'
validation_file_name = 'validation.jsonl'

sample_data = [{"prompt": "When I go to the store, I want an", "completion": "apple."},
    {"prompt": "When I go to work, I want a", "completion": "coffee."},
    {"prompt": "When I go home, I want a", "completion": "soda."}]

print(f'Generating the training file: {training_file_name}')
with open(training_file_name, 'w') as training_file:
    for entry in sample_data:
        json.dump(entry, training_file)
        training_file.write('\n')

print(f'Copying the training file to the validation file')
shutil.copy(training_file_name, validation_file_name)


Files: Listing

List all of the uploaded files and check for the ones that are named "training.jsonl" or "validation.jsonl"


업로드된 모든 파일을 나열하고 이름이 "training.jsonl" 또는 "validation.jsonl"인 파일을 확인합니다.


print('Checking for existing uploaded files.')
results = []
files = openai.File.list().data
print(f'Found {len(files)} total uploaded files in the subscription.')
for item in files:
    if item["filename"] in [training_file_name, validation_file_name]:
        results.append(item["id"])
print(f'Found {len(results)} already uploaded files that match our names.')


Files: Deleting

Let's now delete those found files (if any) since we're going to be re-uploading them next.


다음에 다시 업로드할 예정이므로 찾은 파일(있는 경우)을 삭제하겠습니다.


print(f'Deleting already uploaded files...')
for id in results:
    openai.File.delete(sid = id)


Files: Importing & Retrieving

Now, let's import our two files ('training.jsonl' and 'validation.jsonl') and keep those IDs since we're going to use them later for finetuning.


이제 두 파일('training.jsonl' 및 'validation.jsonl')을 가져오고 나중에 미세 조정에 사용할 것이므로 해당 ID를 유지하겠습니다.


For this operation we are going to use the cli wrapper which does a bit more checks before uploading and also gives us progress. In addition, after uploading we're going to check the status our import until it has succeeded (or failed if something goes wrong)


이 작업을 위해 업로드하기 전에 조금 더 확인하고 진행률을 제공하는 cli 래퍼를 사용할 것입니다. 또한 업로드 후 가져오기가 성공할 때까지(또는 무언가 잘못되면 실패할 때까지) 가져오기 상태를 확인합니다.


import time

def check_status(training_id, validation_id):
    train_status = openai.File.retrieve(training_id)["status"]
    valid_status = openai.File.retrieve(validation_id)["status"]
    print(f'Status (training_file | validation_file): {train_status} | {valid_status}')
    return (train_status, valid_status)

#importing our two files
training_id = cli.FineTune._get_or_upload(training_file_name, True)
validation_id = cli.FineTune._get_or_upload(validation_file_name, True)

#checking the status of the imports
(train_status, valid_status) = check_status(training_id, validation_id)

while train_status not in ["succeeded", "failed"] or valid_status not in ["succeeded", "failed"]:
    time.sleep(1)
    (train_status, valid_status) = check_status(training_id, validation_id)


Files: Downloading

Now let's download one of the files, the training file for example, to check that everything was in order during importing and all bits are there.


이제 파일 중 하나(예: 교육 파일)를 다운로드하여 가져오는 동안 모든 것이 제대로 작동하고 모든 비트가 있는지 확인합니다.


print(f'Downloading training file: {training_id}')
result = openai.File.download(training_id)
print(result.decode('utf-8'))


Finetune

In this section we are going to use the two training and validation files that we imported in the previous section, to train a finetune model.


이 섹션에서는 finetune  모델을 교육하기 위해 이전 섹션에서 가져온 두 개의 교육 및 검증 파일을 사용할 것입니다.


Finetune: Adapt

First let's create the finetune adaptation job.

먼저 미세 조정 적응 작업을 생성해 보겠습니다.


create_args = {
    "training_file": training_id,
    "validation_file": validation_id,
    "model": "babbage",
    "compute_classification_metrics": True,
    "classification_n_classes": 3,
    "n_epochs": 20,
    "batch_size": 3,
    "learning_rate_multiplier": 0.3
}
resp = openai.FineTune.create(**create_args)
job_id = resp["id"]
status = resp["status"]

print(f'Fine-tunning model with jobID: {job_id}.')


Finetune: Streaming

While the job runs, we can subscribe to the streaming events to check the progress of the operation.

작업이 실행되는 동안 스트리밍 이벤트를 구독하여 작업 진행 상황을 확인할 수 있습니다.


import signal
import datetime

def signal_handler(sig, frame):
    status = openai.FineTune.retrieve(job_id).status
    print(f"Stream interrupted. Job is still {status}.")
    return

print(f'Streaming events for the fine-tuning job: {job_id}')
signal.signal(signal.SIGINT, signal_handler)

events = openai.FineTune.stream_events(job_id)
try:
    for event in events:
        print(f'{datetime.datetime.fromtimestamp(event["created_at"])} {event["message"]}')

except Exception:
    print("Stream interrupted (client disconnected).")


Finetune: Listing and Retrieving

Now let's check that our operation was successful and in addition we can look at all of the finetuning operations using a list operation.

이제 작업이 성공했는지 확인하고 목록 작업을 사용하여 모든 finetune  작업을 볼 수 있습니다.


status = openai.FineTune.retrieve(id=job_id)["status"]
if status not in ["succeeded", "failed"]:
    print(f'Job not in terminal status: {status}. Waiting.')
    while status not in ["succeeded", "failed"]:
        time.sleep(2)
        status = openai.FineTune.retrieve(id=job_id)["status"]
        print(f'Status: {status}')
else:
    print(f'Finetune job {job_id} finished with status: {status}')

print('Checking other finetune jobs in the subscription.')
result = openai.FineTune.list()
print(f'Found {len(result.data)} finetune jobs.')


Finetune: Deleting

Finally we can delete our finetune job.
WARNING: Please skip this step if you want to continue with the next section as the finetune model is needed. (The delete code is commented out by default)


마지막으로 finetune  작업을 삭제할 수 있습니다.
경고: finetune 모델이 필요하므로 다음 섹션을 계속하려면 이 단계를 건너뛰십시오. (삭제 코드는 기본적으로 주석 처리됨)


# openai.FineTune.delete(sid=job_id)


Deployments

In this section we are going to create a deployment using the finetune model that we just adapted and then used the deployment to create a simple completion operation.


이 섹션에서는 방금 수정한 finetune  모델을 사용하여 deployment 를 생성한 다음 deployment 를 사용하여 간단한 completion  작업을 생성할 것입니다.


Deployments: Create

Let's create a deployment using the fine-tune model.

fine-tune모델을 사용하여 deployment 를 생성해 보겠습니다.


#Fist let's get the model of the previous job:
result = openai.FineTune.retrieve(id=job_id)
if result["status"] == 'succeeded':
    model = result["fine_tuned_model"]

# Now let's create the deployment
print(f'Creating a new deployment with model: {model}')
result = openai.Deployment.create(model=model, scale_settings={"scale_type":"standard"})
deployment_id = result["id"]


Deployments: Retrieving

Now let's check the status of the newly created deployment

이제 새로 생성된 배포의 상태를 확인하겠습니다.


print(f'Checking for deployment status.')
resp = openai.Deployment.retrieve(id=deployment_id)
status = resp["status"]
print(f'Deployment {deployment_id} is with status: {status}')

Deployments: Listing

Now because creating a new deployment takes a long time, let's look in the subscription for an already finished deployment that succeeded.

이제 새 deployment를 만드는 데 시간이 오래 걸리므로 이미 완료된 deployment에 대한 subscription 을 살펴보겠습니다.


print('While deployment running, selecting a completed one.')
deployment_id = None
result = openai.Deployment.list()
for deployment in result.data:
    if deployment["status"] == "succeeded":
        deployment_id = deployment["id"]
        break

if not deployment_id:
    print('No deployment with status: succeeded found.')
else:
    print(f'Found a successful deployment with id: {deployment_id}.')


Completions

Now let's send a sample completion to the deployment.

이제 deployment에 샘플 completion 을 보내겠습니다.


print('Sending a test completion job')
start_phrase = 'When I go home, I want a'
response = openai.Completion.create(deployment_id=deployment_id, prompt=start_phrase, temperature=0, stop=".")
text = response['choices'][0]['text'].replace('\n', '').replace(' .', '.').strip()
print(f'"{start_phrase} {text}."')


Deployments: Delete

Finally let's delete the deployment

마지막으로 deployment를 삭제하겠습니다.


print(f'Deleting deployment: {deployment_id}')
openai.Deployment.delete(sid=deployment_id)


반응형


반응형

오늘은 오랜만에 실습 예제 입니다.


Fine-tunning을 실제로 해 보도록 하겠습니다.


https://github.com/openai/openai-cookbook/blob/main/examples/Fine-tuned_classification.ipynb


GitHub - openai/openai-cookbook: Examples and guides for using the OpenAI API

Examples and guides for using the OpenAI API. Contribute to openai/openai-cookbook development by creating an account on GitHub.

github.com


Fine tuning classification example

아래 예제는 ada 모델을 이용해서 이메일 내용을 보고 이게 Baseball과 연관 돼 있는지 아니면 Hockey와 연관 돼 있는 건지 GPT-3 가 인지할 수 있도록 Fine-Tuning을 사용해서 훈련시키고 새로운 모델을 만드는 과정을 보여 줍니다.


from sklearn.datasets import fetch_20newsgroups
import pandas as pd
import openai

categories = ['rec.sport.baseball', 'rec.sport.hockey']
sports_dataset = fetch_20newsgroups(subset='train', shuffle=True, random_state=42, categories=categories)


이 예제에서 사용하는 데이터는 sklearn에서 제공하는 샘플 데이터인 fetch_20newsgroups를 사용합니다.


fetch_20newsgroups 는 데이터를 다루는 연습용으로 만들어진 데이터 세트 입니다.

20개의 newsgroup에서 데이터를 가져온 겁니다. 이 뉴스그룹들은 대부분 게시판이고 사용자들이 올른 글들이 데이터가 되는 겁니다. 예를 들어 내가 낚시에 관심이 있어서 낚시 관련된 카페 같은 뉴스 그룹에 가입하고 거기에 글을 올리듯이 사람들이 글을 올린 데이터 들 입니다.


여기에는 20개의 주제들이 있습니다. 그리고 총 샘플들은 18846개가 있고 1차원 배열이고 text로 이뤄져 있습니다.


이 중에서 Baseball 과 Hockey 관련된 데이터를 가지고 이 예제에서는 Fine-Tuning을 연습하는 소스코드를 만들게 됩니다.


https://scikit-learn.org/stable/modules/generated/sklearn.datasets.fetch_20newsgroups.html


sklearn.datasets.fetch_20newsgroups

Examples using sklearn.datasets.fetch_20newsgroups: Biclustering documents with the Spectral Co-clustering algorithm Biclustering documents with the Spectral Co-clustering algorithm Topic extractio...

scikit-learn.org

참고로 이 데이터세트에는 아래와 같은 주제들의 글들이 있습니다.


'alt.atheism',
 'comp.graphics',
 'comp.os.ms-windows.misc',
 'comp.sys.ibm.pc.hardware',
 'comp.sys.mac.hardware',
 'comp.windows.x',
 'misc.forsale',
 'rec.autos',
 'rec.motorcycles',
 'rec.sport.baseball',
 'rec.sport.hockey',
 'sci.crypt',
 'sci.electronics',
 'sci.med',
 'sci.space',
 'soc.religion.christian',
 'talk.politics.guns',
 'talk.politics.mideast',
 'talk.politics.misc',
 'talk.religion.misc'

https://scikit-learn.org/stable/datasets/real_world.html#newsgroups-dataset


7.2. Real world datasets

scikit-learn provides tools to load larger datasets, downloading them if necessary. They can be loaded using the following functions: The Olivetti faces dataset: This dataset contains a set of face...

scikit-learn.org


그리고 Pandas와 openai 모듈을 import 합니다.


관련 모듈을 import 한 다음에 한 일은 이 예제에서 다룰 topic들을 선택하는 겁니다. 이 두 topic들을 categories라는 배열 변수에 아이템으로 넣습니다.

그리고 sports_dataset 라는 변수에 이 fetch_20newsgroups에 있는 데이터 들 중 위에서 선택한 rec.sport.baseball과 rec.sport.hockey 뉴스그룹에 있는 데이터들만 담습니다.


데이터를 다루려면 우선 그 데이터으 구조를 잘 알아야 합니다.


이 데이터의 첫번째 데이터만 한번 출력해 보겠습니다.

print(sports_dataset['data'][0])

그러면 결과는 이렇게 나옵니다.

From: dougb@comm.mot.com (Doug Bank)
Subject: Re: Info needed for Cleveland tickets
Reply-To: dougb@ecs.comm.mot.com
Organization: Motorola Land Mobile Products Sector
Distribution: usa
Nntp-Posting-Host: 145.1.146.35
Lines: 17

In article <1993Apr1.234031.4950@leland.Stanford.EDU>, bohnert@leland.Stanford.EDU (matthew bohnert) writes:

|> I'm going to be in Cleveland Thursday, April 15 to Sunday, April 18.
|> Does anybody know if the Tribe will be in town on those dates, and
|> if so, who're they playing and if tickets are available?

The tribe will be in town from April 16 to the 19th.
There are ALWAYS tickets available! (Though they are playing Toronto,
and many Toronto fans make the trip to Cleveland as it is easier to
get tickets in Cleveland than in Toronto.  Either way, I seriously
doubt they will sell out until the end of the season.)

-- 
Doug Bank                       Private Systems Division
dougb@ecs.comm.mot.com          Motorola Communications Sector
dougb@nwu.edu                   Schaumburg, Illinois
dougb@casbah.acns.nwu.edu       708-576-8207

데이터는 글을 올린사람, 주제, Reply-To,, Organization, Distribution, 아이피 주소. 라인 수, 내용 등등등 ...

대충 어떤 식으로 데이터들이 구성 돼 있는지 알 수 있을 것 같습니다.


이건 sports_dataset 의 data라는 아이템에 들어 있는 첫 번째 데이터인 것이고 이 sports_dataset은 어떤 구조로 돼 있는지 한번 알아 볼까요?


#print(sports_dataset['data'][0])
print(sports_dataset)

결과의 일 부분인데요. sports_dataset 배열은 첫번째 item 이 data 입니다. 그리고 이 data 안에는 여러 글들이 있습니다. 각 글들은 From: 으로 시작합니다. 첫번째 글은 바로 위에서 출력한 그 글입니다. dougb@comm.mot.com으로 시작해서 708-576-8207 로 끝납니다.

data는 이렇게 구성이 돼 있고 그렇다면 다른 아이템에는 무엇이 있을 까요?


그 다음에는 target_names인데 이 변수에는 baseball과 hockey 토픽만 들어 있다는걸 확인 할 수 있습니다.

그리고 'target' : array(0,1,0...,... 이렇게 돼 있는 것은 data의 첫번째 데이터는 baseball 뉴스그룹에서 온 것이고 두번째 데이터는 hockey 그룹에서 그리고 세번째는 baseball 그룹에서 온 것이라는 것을 말합니다.

data에 있는 데이터 가지고는 이것이 어느 뉴스그룹 소속인지 알 수 없는데 이 target_names 라는 두번째 아이템에서 그 정보를 얻을 수 있네요.


오늘 다룰 Fine-Tunning 예제에서는 이 두가지 정보만 있으면 GPT-3 AI 를 훈련 시킬 수 있습니다.


참고로 target_names의 아이템만 알 수 있는 방법은 아래와 같습니다.


sports_dataset.target_names[sports_dataset['target'][0]]

그러면 결과 값은 아래와 같습니다.

'rec.sport.baseball'


그러면 전체 데이터와 각 주제별 데이터 갯수를 한번 알아 보겠습니다.


len_all, len_baseball, len_hockey = len(sports_dataset.data), len([e for e in sports_dataset.target if e == 0]), len([e for e in sports_dataset.target if e == 1])
print(f"Total examples: {len_all}, Baseball examples: {len_baseball}, Hockey examples: {len_hockey}")

len(sports_dataset.data) 는 이 sports_dataset에 있는 data 아이템에 있는 데이터 수를 가져 옵니다.

len([e for e in sports_dataset.target if e == 0] 는 data에 있는 데이터 중 target 이 0인 데이터 즉 rec.sport.baseball에 속한 데이터만 가져 옵니다. 

같은 방법으로 Hockey 에 속한 데이터만 가져 오려면 이러헥 사용 합니다. len([e for e in sports_dataset.target if e == 1]

결과는 아래와 같습니다.

Total examples: 1197, Baseball examples: 597, Hockey examples: 600

전체 데이터 갯수는 1197개이고 야구와 관련된 글은 597개 그리고 하키와 관련된 글은 600개 입니다.


이제 이 데이터의 구조에 대해서 어느정도 파악을 했습니다.


그러면 이 데이터를 Fune-Tuning 시키기 위한 구조로 바꾸어 주어야 합니다.

Fine-Tunning은 AI를 교육 시키는 겁니다. 이 AI를 교육시키기 위해서는 데이터를 제공해야 합니다.

GPT-3라는 AI가 알아 들을 수 있는 데이터 구조는 이전 Guide에서 설명 된 부분이 있습니다.


GPT-3는 Prompt 와 Completion 이 두 부분으로 나뉘어진 데이터세트를 제공하면 됩니다.

그러면 이 아이는 그것을 보고 패턴을 찾아내서 학습하게 되는 겁니다.

이런 내용의 글은 야구와 관련 돼 있고 또 저런 내용의 글은 하키와 관련 돼 있다는 것을 알아 내는 것이죠.


예를 들어 위에서 출력한 첫번째 글을 보시죠.


여기에는 이 글이 야구와 관련돼 있는지 하키와 관련 돼 있는지에 대한 명시적인 정보는 없습니다.

다면 이 글에는 Cleveland에 갈거고 팬들끼리 좀 모이자는 내용이 있습니다. 그리고 상대팀 이름도 있고 어디서 경기가 열리는지 뭐 이런 정보가 있습니다.

미국에서 야구에 대해 관심 있는 사람이라면 이 글은 야구와 관련된 글이라는 것을 알겠죠.

이렇게 주어진 정보만 가지고 이게 야구와 관련된 글인지 하키와 관련된 글인지 알아 내도록 GPT-3를 훈련 시킬 겁니다.

그 훈련된 AI모델은 나만의 모델이 될 겁니다.

그래서 앞으로 내가 어떤 글을 그 모델에게 보내면 그 Custom AI Model은 그게 야구와 관련된 글인지 하키와 관련된 글인지를 저에게 알려 줄 것입니다.


Fine Tuning과 관련 한 기초적인 내용을 아시려면 아래 블로그 글을 참조하세요.


https://coronasdk.tistory.com/1221


Guides - Fine tuning

https://beta.openai.com/docs/guides/fine-tuning OpenAI API An API for accessing new AI models developed by OpenAI beta.openai.com Fine-tuning Learn how to customize a model for your application. 당신의 어플리케이션을 위해 어떻게 모델을

coronasdk.tistory.com


그러면 GPT-3를 훈련 시키기 위한 데이터 세트 형식으로 위 데이터를 변경 시켜 보겠습니다.

Prompt 와 Completion 이 두가지 컬럼이 있어야 합니다.

Prompt에는 data 정보들이 있고 Completion에는 그 글이 야구와 관련된 글인지 하키와 관련된 글인지에 대한 정보들이 들거 갈 겁니다.


import pandas as pd

labels = [sports_dataset.target_names[x].split('.')[-1] for x in sports_dataset['target']]
texts = [text.strip() for text in sports_dataset['data']]
df = pd.DataFrame(zip(texts, labels), columns = ['prompt','completion']) #[:300]
df.head()

파이썬에서 데이터를 다루는 모델은 pandas를 많이 사용 합니다.


labels 부분을 보겠습니다.

위에서 sports_dataset['target'] 에는 0 과 1이라는 정보들이 있고 이 정보는 data에 있는 정보가 targetnames 의 첫번째 인수에 속하는 건지 두번째 인수에 속하는 건지를 알려 주는 것이라고 했습니다.

첫번째 인수는 rec.sport.baseball이고 두번째 인수는 rec.sport.hockey 입니다.


이 target 값에 대한 for 문이 도는데요 data 갯수가 1197이고 target의 각 인수들 (0,1) 은 각 데이터의 인수들과 매핑 돼 있으니까 이 for 문은 1197번 돌 겁니다. 이렇게 돌면서 target_names에서 해당 인수를 가져 와서 . 으로 그 텍스트를 분리 한 다음에 -1 번째 즉 맨 마지막 글자를 가지고 오게 됩니다. 그러면 baseball과 hockey라는 글자만 선택 되게 되죠.

즉 labels에는 baseball 과 hockey라는 글자들이 들어가게 되는데 이는 target 에 0이 있으면 baseball 1이 있으면 hockey가 들어가는 1197개의 인수를 가지고 있는 배열이 순서대로 들어가게 되는 겁니다.


그러면 이제 data에 있는 각 데이터를 순서대로 배열로 집어 넣으면 되겠죠?

texts = [text.strip() for text in sports_dataset['data']]

이 부분이 그 일을 합니다.

sports_dataset 에 있는 data 만큼 for 문을 돕니다. data는 1197개의 인수를 가지고 있으니 이 for 문도 1197번 돌 겁니다.

이 데이터를 그냥 texts 라는 변수에 배열 형태로 집어 넣는 겁니다. text.strip()은 해당 text의 앞 뒤에 있는 공백들을 제거 하는 겁니다.

이 부분도 중요 합니다. 데이터의 앞 뒤 공백을 제거해서 깨끗한 데이터를 만듭니다.


이제 data의 각 글을 가지고 있는 배열과 각 글들이 어느 주제에 속하는지에 대한 정보를 가지고 있는 배열들이 완성 됐습니다.

이 정보를 가지고 pandas로 GPT-3 AI 를 훈련 시킬 수 있는 형태의 데이터 세트로 만들겠습니다.


파이썬에서 zip() 함수는 두 배열을 튜플 형식으로 짝 지어 주는 함수 입니다. 

https://www.w3schools.com/python/ref_func_zip.asp


Python zip() Function

W3Schools offers free online tutorials, references and exercises in all the major languages of the web. Covering popular subjects like HTML, CSS, JavaScript, Python, SQL, Java, and many, many more.

www.w3schools.com

아래와 같이 두 배열의 인수들을 짝 지어 줍니다.

zip(texts, labels) <- 이렇게 하면 데이터와 topic이 짝 지어 지겠죠.

이 값은 pandas의 DataFrame의 첫번째 인수로 전달 되고 두번째 인수로는 컬럼 이름이 전달 됩니다. (columns = ['prompt','completion'])


그 다음 df.head() 로 이렇게 만들어진 DataFrame에서 처음에 오는 5개의 데이터를 출력해 봅니다.


의도한 대로 각 게시글과 그 게시글이 baseball에 속한 것인지 hockey에 속한 것인지에 대한 정보가 있네요.


이 cookbook에는 300개의 데이터만 사용할 것이라고 돼 있는데 어디에서 그게 돼 있는지 모르겠네요.

len() 을 찍어봐도 1197 개가 찍힙니다.

cookbook 설명대로 300개의 데이터만 사용하려면 아래와 같이 해야 할 것 같습니다.


import pandas as pd

labels = [sports_dataset.target_names[x].split('.')[-1] for x in sports_dataset['target']]
texts = [text.strip() for text in sports_dataset['data']]
df = pd.DataFrame(zip(texts, labels), columns = ['prompt','completion']) #[:300]
df = df.head(300)
print(df)

저는 이 300개의 데이터만 이용하겠습니다.

GPT-3 의 Fine-tuning 을 사용할 때 데이터 크기에 따라서 과금 될 거니까.. 그냥 조금만 하겠습니다. 지금은 공부하는 단계이니까 Custom model의 정확도 보다는 Custom model을 Fine tuning을 사용해서 만드는 과정을 배우면 되니까요.


그 다음은 이 DataFrame을 json 파일로 만드는 겁니다.


df.to_json("sport2.jsonl", orient='records', lines=True)

to_json() 함수를 사용해서 sport2.jsonl 이라는 파일을 만듭니다. 

orient='records' 라는 말은 리스트 형태가 된다는 얘기입니다.


orient   str

Indication of expected JSON string format.

  • Series:
    • default is ‘index’
    • allowed values are: {‘split’, ‘records’, ‘index’, ‘table’}.
  • DataFrame:
    • default is ‘columns’
    • allowed values are: {‘split’, ‘records’, ‘index’, ‘columns’, ‘values’, ‘table’}.
  • The format of the JSON string:
    • ‘split’ : dict like {‘index’ -> [index], ‘columns’ -> [columns], ‘data’ -> [values]}
    • ‘records’ : list like [{column -> value}, … , {column -> value}]
    • ‘index’ : dict like {index -> {column -> value}}
    • ‘columns’ : dict like {column -> {index -> value}}
    • ‘values’ : just the values array
    • ‘table’ : dict like {‘schema’: {schema}, ‘data’: {data}}

    Describing the data, where data component is like orient='records'.


    lines = True는 orient가 records일 경우 True로 설정해야 합니다.


    linesbool, default False

    If ‘orient’ is ‘records’ write out line-delimited json format. Will throw ValueError if incorrect ‘orient’ since others are not list-like.


    https://pandas.pydata.org/docs/reference/api/pandas.DataFrame.to_json.html


pandas.DataFrame.to_json — pandas 1.5.3 documentation

The time unit to encode to, governs timestamp and ISO8601 precision. One of ‘s’, ‘ms’, ‘us’, ‘ns’ for second, millisecond, microsecond, and nanosecond respectively. For on-the-fly compression of the output data. If ‘infer’ and ‘path_o

pandas.pydata.org


이 부분을 실행하면 해당 디렉토리에 sport2.jsonl 파일이 생성됩니다.


이 파일 내용은 아래와 같습니다.


prompt 에는 내용이 있고 completion에는 baseball나 hockey가 들어 있습니다. 총 300개의 prompt - completion 쌍이 있습니다.


Cookbook에는 다음 단계로 openai 를 업데이트 하라고 돼 있습니다. 

!pip install --upgrade openai

이렇게 해 줍니다. 저같은 경우는 자주 업데이트를 해 줘서 별로 변경되는 내용은 없었습니다.


이제 openai의 fine_tunes 함수를 사용할 차례입니다.


!openai tools fine_tunes.prepare_data -f sport2.jsonl -q

주피터 노트북에서는 위와 같이 입력하고 Command 창을 사용할 경우에는 !를 없앤 나머지 부분을 타이핑 하면 됩니다.


만약 이것을 실행했는데 아래와 같은 메세지가 보인다면 Environment Variable을 설정해 주면 됩니다.

이 문제를 해결하려면 아래 블로그 글을 확인하세요.

https://coronasdk.tistory.com/1295


openai 명령어를 command 창에서 인식을 하지 못 할 때...

아래와 같이 command 창에서 openai 를 인식하지 못하는 문제를 해결하는 방법을 알아 보겠습니다. 'openai' is not recognized as an internal or external command, operable program or batch file. 저같은 경우는 Windows에서 P

coronasdk.tistory.com

문제가 없다면 아래와 같은 결과가 나옵니다.


openai aools fine_tunes.prepare_data는 데이터를 검증하고 제안하고 형식을 다시 지정해 주는 툴입니다.

위 결과를 보면 Analyzing... (분석중)으로 시작해서 이 파일에는 총 300개의 prompt-completion 쌍이 있고 모델을 fine-tune 하려고 하는 것 같은데 저렴한 ada 모델을 사용하세요... 뭐 이렇게 분석과 제안내용이 표시됩니다.

그리고 너무 긴 글이 3개 있고 134, 200,281 번째 줄. .....이렇게 나오고 이 3개는 너무 길어서 제외한다고 나오네요.


이 결과로 sport2_prepared_train.jsonl 과 sport2_prepared_valid.jsonl 파일 두개를 만들어 냅니다.

그리고 이제 fine_tunes.create을 사용해서 fine-tuning을 하면 된다고 나오네요.


Fine-tuning을 하게 되면 curie 모델을 사용하면 대략 9분 46초 정도 걸릴 것이고 ada 모델을 사용하면 그보다 더 조금 걸릴 거라네요.


폴더를 다시 봤더니 정말 두개의 jsonl 파일이 더 생성 되었습니다.


sport2_prepared_train.jsonl에는 위에 너무 길다는 3개의 데이터를 없앤 나머지 297개의 데이터가 있습니다.

sport2_prepared_valid.jsonl에는 60개의 데이터가 있습니다.


train 데이터와 valid 데이터 이렇게 두개가 생성 되었네요. 이 두개를 생성한 이유는 나중에 새 데이터에 대한 예상 성능을 쉽게 측정하기 위해서 GPT-3 의 fine_tunes.prepare_data 함수가 만든 겁니다.


Fine-tuning

이제 다 준비가 됐습니다. 실제로 Fine tuning을 하면 됩니다.

참고로 지금 우리는 내용을 주면 이 내용이 야구에 대한건지 하키에 대한건지 분류 해 주는 fine tuned 된 모델을 생성하려고 합니다.

이 작업은 classification task에 속합니다.

그래서 train 과 valid 두 데이터 세트가 위에서 생성된 거구요.


이제 Fine-tuning을 하기 위해 아래 명령어를 사용하면 됩니다.


!openai api fine_tunes.create -t "sport2_prepared_train.jsonl" -v "sport2_prepared_valid.jsonl" --compute_classification_metrics --classification_positive_class " baseball" -m ada


fine_tunes.create 함수를 사용했고 training data로는 sport2_prepared_train.jsonl 파일이 있고 valid data로는 sport2.prepared_valid_jsonl이 제공된다고 돼 있습니다.

그 다음엔 compute_classification_metrics와 classification_positive_class "baseball" 이 주어 졌는데 이는 위에서 fine_tunes.prepare_data 에서 추천한 내용입니다. classification metics를 계산하기 위해 필요하기 때문에 추천 했습니다.


그리고 마지막에 -m ada는 ada 모델을 사용하겠다는 겁니다.


이 부분을 실행하면 요금이 청구가 됩니다.

Fine-tuning models 같은 경우 과금은 아래와 같이 됩니다.


ada 모델을 사용하니까 토큰 1천개당 0.0004불이 training 과정에 들게 됩니다.

Usage도 있네요 나중에 Fine Tune 된 Custom Model을 사용하게 되면 토큰 1천개당 0.0016 불이 과금 됩니다.


https://openai.com/pricing


Pricing

Simple and flexible. Only pay for what you use.

openai.com


저는 이 fine_tunes.create를 실행하고 30분이 넘었는데도 아무런 응답이 없어서 fine_tunes.list로 체크해 봤습니다.


그런데 이것도 답변이 없더라구요.

그래서 한참을 더 기다렸습니다.

결국 이날 되지 않아서 GPT-4 발표를 유투브에서 하길래 그 내용만 살펴 보다 끝났네요.

다음날 다시 Jupyterlab 실행 시키고 나서 !openai api fine_tunes.list 를 해 보았습니다.

이제 나왔네요.

저는 11일에도 한번 공부하다가 만든게 있어서 모델이 2개 나왔는데요.

그건 delete로 지워 버렸습니다.

!openai api models.delete -i ada:ft-personal-2023-03-11-15-30-13

결과는 아래와 같이나왔습니다.

{
  "deleted": true,
  "id": "ada:ft-personal-2023-03-11-15-30-13",
  "object": "model"
}

그 후 나온 list 에 대한 결과 입니다.

{
  "data": [
    {
      "created_at": 1678817966,
      "fine_tuned_model": "ada:ft-personal-2023-03-14-18-36-10",
      "hyperparams": {
        "batch_size": 1,
        "classification_positive_class": " baseball",
        "compute_classification_metrics": true,
        "learning_rate_multiplier": 0.1,
        "n_epochs": 4,
        "prompt_loss_weight": 0.01
      },
      "id": "ft-GI4Lb4z2d7TrYstNw15SXhlN",
      "model": "ada",
      "object": "fine-tune",
      "organization_id": "org-어카운트 organization ID",
      "result_files": [
        {
          "bytes": 51539,
          "created_at": 1678818971,
          "filename": "compiled_results.csv",
          "id": "file-5QHkdzACEhvgPxFAopnL4KUe",
          "object": "file",
          "purpose": "fine-tune-results",
          "status": "processed",
          "status_details": null
        }
      ],
      "status": "succeeded",
      "training_files": [
        {
          "bytes": 391121,
          "created_at": 1678817965,
          "filename": "sport2_prepared_train.jsonl",
          "id": "file-pxuc7tJA3rJ5mVI8HKWNe62p",
          "object": "file",
          "purpose": "fine-tune",
          "status": "processed",
          "status_details": null
        }
      ],
      "updated_at": 1678818971,
      "validation_files": [
        {
          "bytes": 89587,
          "created_at": 1678817966,
          "filename": "sport2_prepared_valid.jsonl",
          "id": "file-IDNYZdlWRpi6jhlKhqVs3OaQ",
          "object": "file",
          "purpose": "fine-tune",
          "status": "processed",
          "status_details": null
        }
      ]
    }
  ],
  "object": "list"
}

이번에 만든 모델 이름은 ada:ft-personal-2023-03-14-18-36-10 입니다.

result_files 에 보면 compiled_results.csv 을 생성했다고 하네요.

제 컴퓨터의 폴더를 보니까 아무것도 없더라구요. 아마 OpenAI 내에 보관 되 있는 것 같습니다.

그 다음은 training_files 와 validation_files에 대한 정보를 보여 줍니다.


참고로 Cook Book에서는 fine_tunes.create이 진행되는 과정에서 아래와 같은 메세지를 보여 준다고 합니다.

(저는 중간에 끄고 다른일을 봐서 이런 메세지는 못 봤습니다.)


참고로 이날 300개를 fine-tuning 한 가격은 0.21 달러입니다.

며칠 전에 1197개를 fine tuning 했을 때는 0.78 달러가 나왔었습니다.


[Advanced] Results and expected model performance

아래 명령어로 생성된 result 파일을 다운 받을 수 있습니다.


처음엔 result_files에 있는 ID를 넣었더니 No fine-tune job 이라는 에러 메세지가 나오네요.

여기에는 Fine tune id 를 넣어야 합니다.

그런데 저 같은 경우는 Bad file descriptor 에러 메세지가 나왔습니다.

jupyterlab을 껐다 다시 켜고 했는데도 똑 같더라구요.


그런데 제 컴터 폴더에 가 보니까 csv 파일이 생성 돼 있었습니다. 그런데 파일 사이즈는 0이더라구요. 내용이 아무것도 없는거죠.


그래서 fine_tunes.create을 다시 해 봤습니다. 새로운 모델을 생성해서 해 보려구요. 


이 작업은 시간이 많이 걸릴 것 같습니다.

fine_tunes.create은 일단 걸어 놨고 이 작업이 언제 끝날 지 모르겠네요.


GPT-4 에 대한 새로운 글들을 읽어보고 다시 시작해 봤습니다.

Jupyterlab에서 하지 않고 Command 창에서 해 봤는데 여기서도 똑 같네요.


직접 실습은 어려울 것 같고 Cookbook에 있는 설명을 보면서 공부해야 겠습니다.


results = pd.read_csv('result.csv')
results[results['classification/accuracy'].notnull()].tail(1)

일단 result.csv 파일을 생성하는데 성공하면 그 데이터를 pandas의 read_csv를 사용해서 읽어 옵니다.

그 다음줄은 그냥 한 줄 출력해 보는 라인 입니다.


결과는 아래와 같습니다.

The accuracy reaches 99.6%. On the plot below we can see how accuracy on the validation set increases during the training run.

정확도는 99.6%에 이릅니다. 아래 플롯에서 훈련 실행 중에 유효성 검사 세트의 정확도가 어떻게 증가하는지 확인할 수 있습니다.

results[results['classification/accuracy'].notnull()]['classification/accuracy'].plot()

그 다음은 이 데이터를 plot 해 봅니다. 결과 화면은 아래와 같습니다.


result.csv 파일을 살펴 봤구요.

이제 Fine-tuning으로 만든 새로운 모델을 직접 사용할 차례 입니다.


Using the model

We can now call the model to get the predictions.

이제 이 새로운 모델을 call 해서 예측을 해 볼 수 있습니다.


test = pd.read_json('sport2_prepared_valid.jsonl', lines=True)
test.head()


We need to use the same separator following the prompt which we used during fine-tuning. In this case it is \n\n###\n\n. Since we're concerned with classification, we want the temperature to be as low as possible, and we only require one token completion to determine the prediction of the model.


fine-tuning 중에 사용한 프롬프트 다음에 동일한 구분 기호를 사용해야 합니다. 이 경우 \n\n###\n\n입니다. 우리는 분류와 관련이 있기 때문에 temperature 가 가능한 한 낮아지기를 원하며 모델의 예측을 결정하기 위해 하나의 token completion만 필요합니다.


ft_model = 'ada:ft-openai-2021-07-30-12-26-20'
res = openai.Completion.create(model=ft_model, prompt=test['prompt'][0] + '\n\n###\n\n', max_tokens=1, temperature=0)
res['choices'][0]['text']

Cookbook 에서 Fine tuning으로 생성한 모델 이름을 ft_model 변수에 넣습니다.


그리고 위에 test에 있는 첫번째 prompt를 전달합니다. (우리는 이미 이 내용이 hockey 와 관련 돼 있다는 걸 알고 있습니다.)

이렇게 하면 결과는 이렇습니다.

' hockey'

새로 만든 모델을 써서 정답을 얻어 냈습니다.


To get the log probabilities, we can specify logprobs parameter on the completion request

로그 확률을 얻기 위해 완료 요청에 logprobs 매개변수를 지정할 수 있습니다.


res = openai.Completion.create(model=ft_model, prompt=test['prompt'][0] + '\n\n###\n\n', max_tokens=1, temperature=0, logprobs=2)
res['choices'][0]['logprobs']['top_logprobs'][0]
<OpenAIObject at 0x7fe114e435c8> JSON: {
  " baseball": -7.6311407,
  " hockey": -0.0006307676
}

이 결과는 입력값이 어느것과 더 가까운지를 숫자로 보여 줍니다. 

Baseball 보다는 hockey 에 훨썬 더 가깝다는 것을 알 수 있습니다.


We can see that the model predicts hockey as a lot more likely than baseball, which is the correct prediction. By requesting log_probs, we can see the prediction (log) probability for each class.


모델이 야구보다 하키를 훨씬 더 많이 예측한다는 것을 알 수 있습니다. 이것이 정확한 예측입니다. log_probs를 요청하면 각 클래스에 대한 예측(로그) 확률을 볼 수 있습니다.


Generalization

Interestingly, our fine-tuned classifier is quite versatile. Despite being trained on emails to different mailing lists, it also successfully predicts tweets.


흥미롭게도 fine-tuned classifier는 매우 다재다능합니다. 다른 메일링 리스트에 대한 이메일에 대한 교육을 받았음에도 불구하고 트윗을 성공적으로 예측합니다.

sample_hockey_tweet = """Thank you to the 
@Canes
 and all you amazing Caniacs that have been so supportive! You guys are some of the best fans in the NHL without a doubt! Really excited to start this new chapter in my career with the 
@DetroitRedWings
 !!"""
res = openai.Completion.create(model=ft_model, prompt=sample_hockey_tweet + '\n\n###\n\n', max_tokens=1, temperature=0, logprobs=2)
res['choices'][0]['text']


이 내용은 이전에 없던 내용 입니다..

내용에 NHL이라는 단어가 있네요. National Hockey league 겠죠?

그러면 이 이메일은 하키와 관련한 이메일 일 겁니다.

Fine tuning으로 만든 새로운 모델도 이것을 정확하게 맞춥니다.


' hockey'
sample_baseball_tweet="""BREAKING: The Tampa Bay Rays are finalizing a deal to acquire slugger Nelson Cruz from the Minnesota Twins, sources tell ESPN."""
res = openai.Completion.create(model=ft_model, prompt=sample_baseball_tweet + '\n\n###\n\n', max_tokens=1, temperature=0, logprobs=2)
res['choices'][0]['text']

그 다음 예제에서는 Tampa Bay Rays , Minnesota Twins 라는 내용이 나옵니다.

Minnesota Twins 는 한 때 박병호 선수가 있었던 메이저리그 야구 팀입니다.

당시에 제가 미네소타에 살고 있어서 구경하러 갔던 기억이 있네요.


' baseball'

GPT-3 도 이 내용이 야구와 관련 돼 있다는 걸 알아 차리네요.


이상으로 Fine tuning 하는 방법을 알아 봤습니다.

반응형
이전 1 다음