

Openai cookbook : DALL-E - How to generate and edit images with DALL-E
2023. 3. 17. 21:07 |
오늘은 그림을 그리는 OpenAI의 AI 화가 DALL-E API 입니다.
GitHub - openai/openai-cookbook: Examples and guides for using the OpenAI API
Examples and guides for using the OpenAI API. Contribute to openai/openai-cookbook development by creating an account on GitHub.
github.com
DALL-E
This notebook shows how to use OpenAI's DALL-E image API endpoints.
이 노트북은 OpenAI의 DALL-E 이미지 API endpoints를 사용하는 방법을 보여줍니다.
There are three API endpoints:
세 가지 API endpoints가 있습니다.
- Generations: generates an image or images based on an input caption
- Generations: 입력 캡션을 기반으로 이미지를 생성합니다.
- Edits: edits or extends an existing image
- 편집: 기존 이미지를 편집하거나 확장합니다.
- Variations: generates variations of an input image
- 변형: 입력 이미지의 변형을 생성합니다.
Setup
- Import the packages you'll need
- 필요한 패키지 가져오기
- Import your OpenAI API key: You can do this by running ``export OPENAI_API_KEY="your API key"\ in your terminal.
- OpenAI API key 가져오기
- Set a directory to save images to
- 이미지를 저장할 디렉토리 설정
이제 소스 코드를 보겠습니다.
# imports
import openai  # OpenAI Python library to make API calls
import requests  # used to download images
import os  # used to access filepaths
from PIL import Image  # used to print and edit images

# set API key
openai.api_key = os.environ.get("OPENAI_API_KEY")
먼저 필요한 모듈들을 import 합니다.
openai를 import 해 openaai api를 사용할 수 있도록 합니다.
그 다음에 requests 모듈을 import 했습니다. 이 모듈은 openai 에 이미지가 생성 된 후 이 이미지를 나의 local 컴퓨터로 다운로드 받기 위해 필요합니다.
이 모듈은 파이썬에서 HTTP request를 보낼 수 있도록 합니다. HTTP를 사용해서 OpenAI쪽에 생성돼 있는 이미지를 다운 로드 받게 됩니다.
https://www.w3schools.com/python/module_requests.asp
Python Requests Module
W3Schools offers free online tutorials, references and exercises in all the major languages of the web. Covering popular subjects like HTML, CSS, JavaScript, Python, SQL, Java, and many, many more.
www.w3schools.com
그 다음은 os 모듈 입니다. 나의 local computer에 있는 환경 변수 값도 불러 오고 이미지가 저장될 폴더 위치도 설정하고 저장되는 이미지 파일 이름도 설정하는 등의 일들을 하는데 사용 됩니다.
https://docs.python.org/3/library/os.html
os — Miscellaneous operating system interfaces
Source code: Lib/os.py This module provides a portable way of using operating system dependent functionality. If you just want to read or write a file see open(), if you want to manipulate paths, s...
docs.python.org
그리고 마지막으로 Image PIL 모듈에 있는 Image 함수를 import 합니다.
이 PIL 모듈은 파이썬에서 이미지를 다룰 때 사용하는 모듈입니다.
https://pillow.readthedocs.io/en/stable/
Pillow
Pillow is the friendly PIL fork by Alex Clark and Contributors. PIL is the Python Imaging Library by Fredrik Lundh and Contributors. Pillow for enterprise is available via the Tidelift Subscription...
pillow.readthedocs.io
https://pillow.readthedocs.io/en/stable/handbook/tutorial.html
Tutorial
Using the Image class: The most important class in the Python Imaging Library is the Image class, defined in the module with the same name. You can create instances of this class in several ways; e...
pillow.readthedocs.io
# set a directory to save DALL-E images to
image_dir_name = "images"
image_dir = os.path.join(os.curdir, image_dir_name)

# create the directory if it doesn't yet exist
if not os.path.isdir(image_dir):
    os.mkdir(image_dir)

# print the directory to save to
print(f"{image_dir=}")
그 다음은 생성한 이미지를 저장할 폴더의 위치를 정해 줍니다.
폴더 이름은 images 가 되고 그 위치는 현재 디렉토리에 있습니다.
if 문은 만약에 현재 디렉토리 안에 images라는 폴더가 없다면 mkdir() 을 이용해서 폴더를 생성하게 됩니다.
print() 결과는 아래와 같습니다.
image_dir='.\\images'
Generations
The generation API endpoint creates an image based on a text prompt.
generation API endpoint는 텍스트 프롬프트를 기반으로 이미지를 생성합니다.
Required inputs:
- prompt (str): A text description of the desired image(s). The maximum length is 1000 characters.
- 프롬프트(str): 원하는 이미지에 대한 텍스트 설명입니다. 최대 길이는 1000자입니다.
Optional inputs:
- n (int): The number of images to generate. Must be between 1 and 10. Defaults to 1.
- n (int): 생성할 이미지의 수. 1에서 10 사이여야 합니다. 기본값은 1입니다.
- size (str): The size of the generated images. Must be one of "256x256", "512x512", or "1024x1024". Smaller images are faster. Defaults to "1024x1024".
- size (str): 생성된 이미지의 크기. "256x256", "512x512" 또는 "1024x1024" 중 하나여야 합니다.이미지가 작으면 더 빠릅니다.. 기본값은 "1024x1024"입니다.
- response_format (str): The format in which the generated images are returned. Must be one of "url" or "b64_json". Defaults to "url".
- response_format(str): 생성된 이미지가 반환되는 형식입니다. "url" 또는 "b64_json" 중 하나여야 합니다. 기본값은 "url"입니다.
- user (str): A unique identifier representing your end-user, which will help OpenAI to monitor and detect abuse. Learn more.
* user(str): OpenAI가 남용을 모니터링하고 감지하는 데 도움이 되는 최종 사용자를 나타내는 고유 식별자입니다.
OpenAI API
An API for accessing new AI models developed by OpenAI
platform.openai.com
# create an image
# set the prompt
prompt = "Create picture for a Youtube channel Banner image named AI Madang, express the concept of Artificial Intellegent state-of-the-art technology and the concept of a play ground where human can play happily."
# call the OpenAI API
generation_response = openai.Image.create(
prompt=prompt,
n=1,
size="1024x1024",
response_format="url",
)
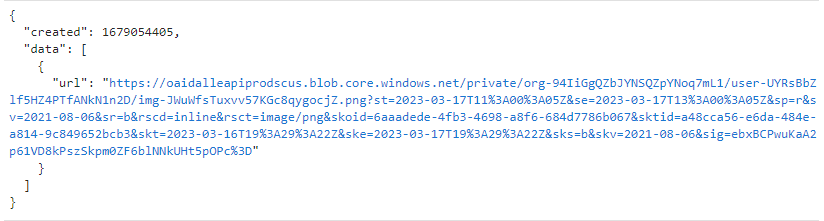
# print response
print(generation_response)이 코드는 OpenAI 의 openai.Image.create() API를 사용해서 원하는 이미지를 만드는 과정입니다.
일단 내가 원하는 이미지를 prompt 변수에 담습니다.
저는 AI Madang 이라는 유투브 채널을 만들려고 하는데 그 채널의 Banner image로 사용할 최첨단 기술과 인간들의 놀이터 느낌이 나는 그림을 만들어 달라고 할 계획입니다.
그 다음은 openai.Image.create() API call 을 하는 부분 입니다. prompt가 들어가고 n은 그림 갯수를 나타내니까 그림은 1개만 만들라는 겁니다. 그리고 size는 1024X1024 입니다. response_format 은 url 이구요.
이 url을 이용해서 requests 모듈로 HTTP를 통해 이미지를 가져 오고 이것을 os 모듈을 이용해서 내 컴퓨터의 원하는 폴더에 저장 하는 작업을 할 겁니다.
그 이미지를 display 할 때 PIL 모듈의 Image 함수를 사용할 거구요.
저 같은 경우는 print 결과가 아래와 같이 나왔습니다.
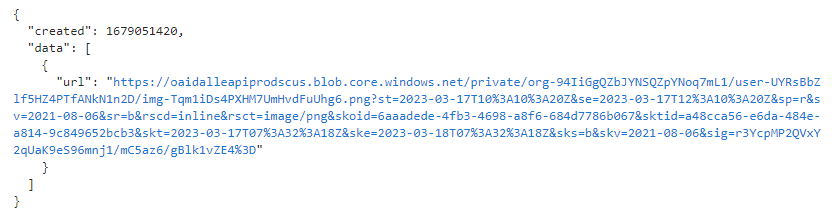
OpenAI 에서 이미지가 생성 돼 있고 그 이미지가 위치해 있는 URL 을 받았습니다.
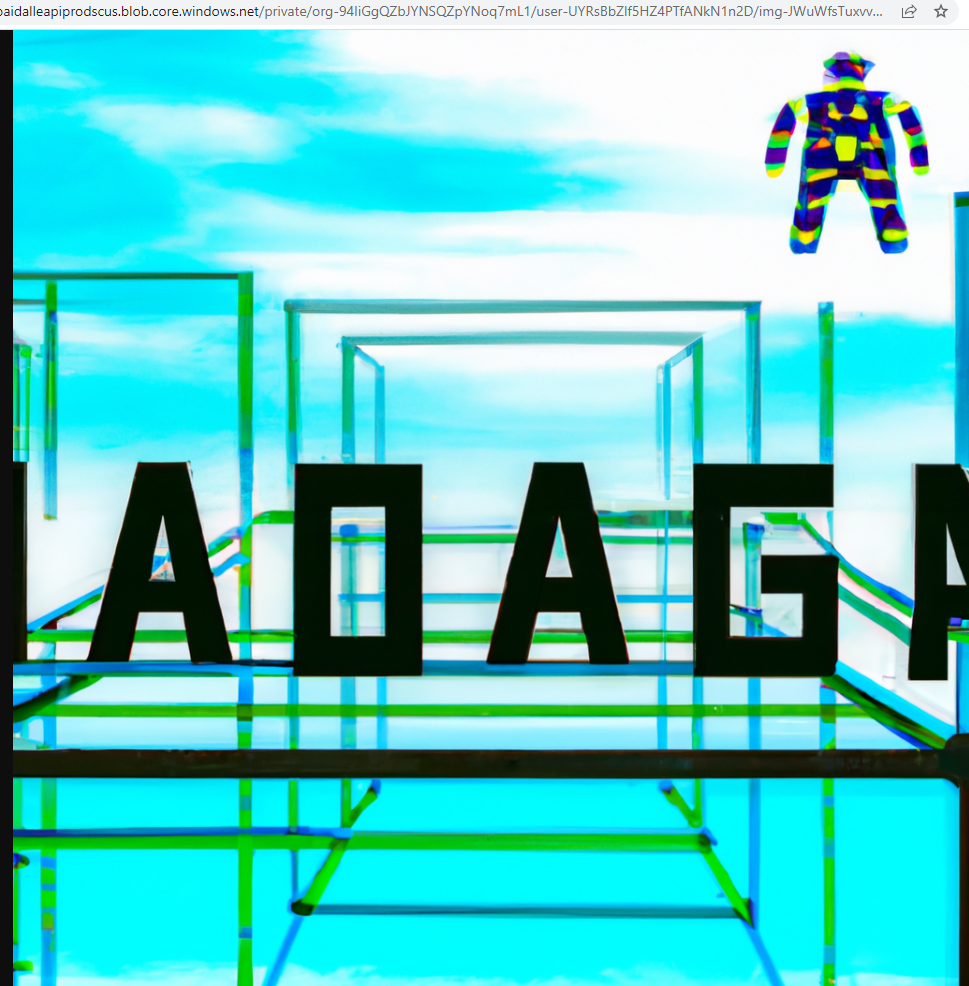
저 URL을 클릭하면 openai가 생성한 이미지가 나옵니다.
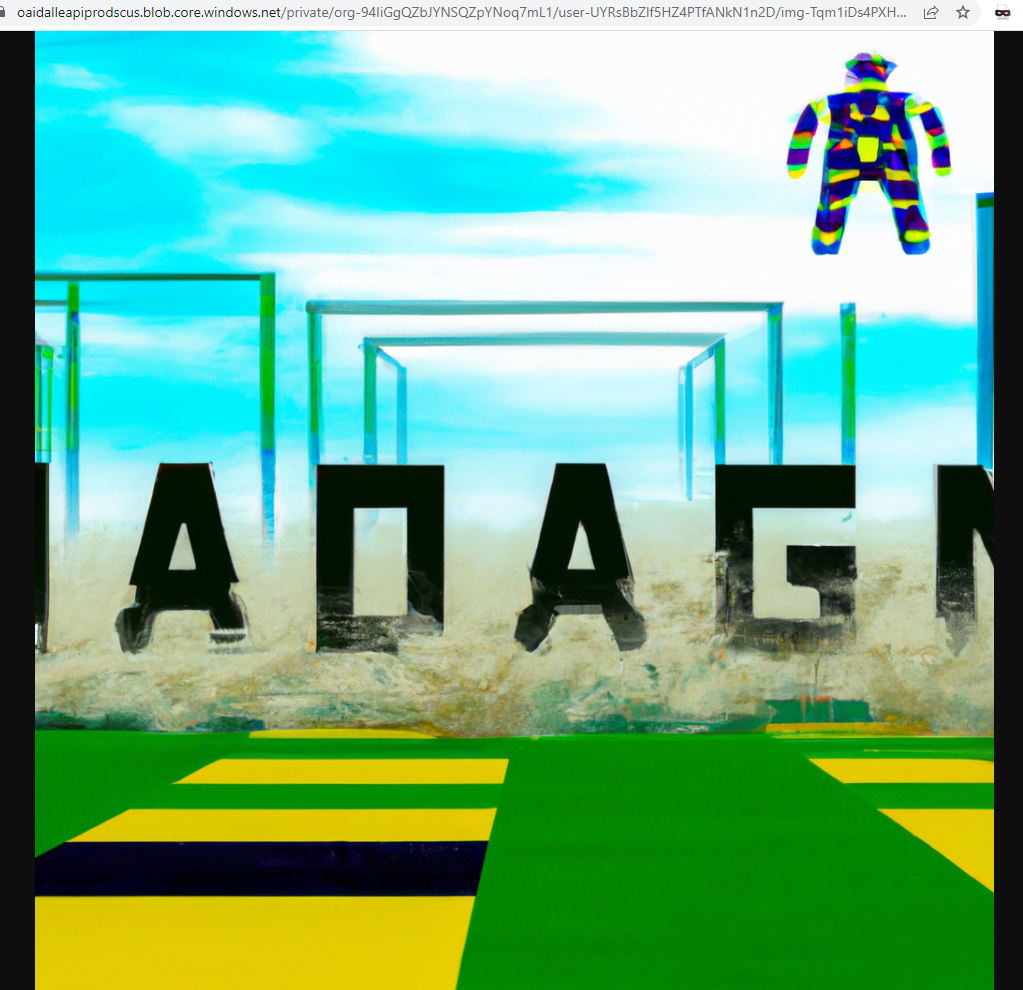
이미지가 마음에 안 들어서 몇 번 반복 했는데..... 여전히 마음에 안 드네요.
아직까지 저런 어려운 내용은 제대로 소화를 못 하는 것 같습니다.
어쨌든 오늘은 DALL-E API 를 공부하는 과정이니 그냥 넘어 가겠습니다.
Note: If you get this error - AttributeError: module 'openai' has no attribute 'Image' - you'll need to upgrade your OpenAI package to the latest version. You can do this by running pip install openai --upgrade in your terminal.
참고: AttributeError: module 'openai' has no attribute 'Image' 오류가 발생하면 OpenAI 패키지를 최신 버전으로 업그레이드해야 합니다. 터미널에서 pip install openai --upgrade를 실행하여 이를 수행할 수 있습니다.
# save the image
generated_image_name = "generated_image2.png"  # any name you like; the filetype should be .png
generated_image_filepath = os.path.join(image_dir, generated_image_name)
generated_image_url = generation_response["data"][0]["url"]  # extract image URL from response
generated_image = requests.get(generated_image_url).content  # download the image

with open(generated_image_filepath, "wb") as image_file:
    image_file.write(generated_image)  # write the image to the file
이제 이 이미지를 로컬에 저장하는 과정입니다.
generated_image2.png 라고 이름을 정할 생각입니다.
generated_image_filepath 라는 변수에 위에서 만들었던 images 라는 폴더 경로와 여기서 만들었던 이미지 파일 이름을 결합 시킵니다.
그리고 이미지가 있는 url 주소를 generated_image_url 에 담습니다.
그리고 requests 모듈의 get() 함수를 사용해서 그 이미지를 위 generated_image_url 로 다운로드 합니다.
그 다음 open() 메소드는 PIL 모듈에 있는 함수 입니다.
https://pillow.readthedocs.io/en/stable/reference/Image.html#PIL.Image.open
Image Module
The Image module provides a class with the same name which is used to represent a PIL image. The module also provides a number of factory functions, including functions to load images from files, a...
pillow.readthedocs.io
wb 는 binary format으로 열라는 겁니다.
파이썬에서는 기본적으로 text 모드로 열게 되어 있는데 b 라는 의미는 이 텍스트가 아니라 바이너리 모드라는 의미 입니다. w 는 writing 입니다. 이와 반대로 r 은 reading 입니다. 읽기 모드가 아닌 쓰기 모드로 열라는 겁니다.
이렇게 하면 나중에 수정할 수 있습니다.
write() 함수를 사용해서 파일로 저장합니다. 이 함수는 Python 함수 입니다.
https://www.w3schools.com/python/ref_file_write.asp
Python File write() Method
W3Schools offers free online tutorials, references and exercises in all the major languages of the web. Covering popular subjects like HTML, CSS, JavaScript, Python, SQL, Java, and many, many more.
www.w3schools.com
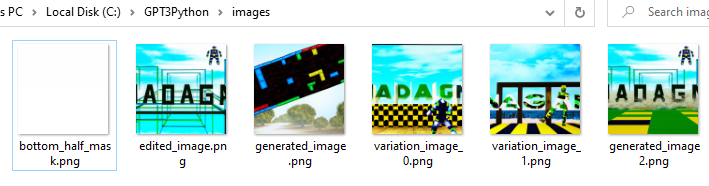
이제 생성된 이미지가 내 컴퓨터 안에 완전히 다운로드 됐습니다.
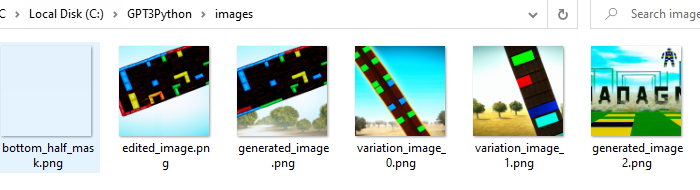
맨 오른쪽에 이 이미지가 있습니다. 나머지는 전에 연습 할 때 생성한 이미지들입니다.
# print the image
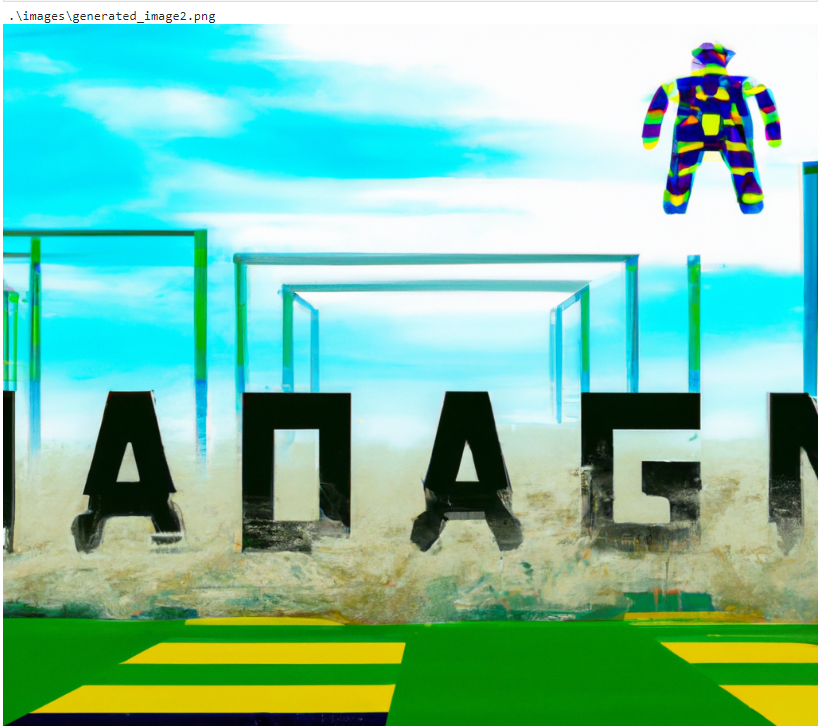
print(generated_image_filepath)
display(Image.open(generated_image_filepath))이제 이 그림을 JupyterLab 화면에 display 해 보겠습니다.
print() 로는 파일 경로와 이름을 표시하고 display()는 이미지를 표시합니다.
실행 결과 입니다.
Variations
The variations endpoint generates new images (variations) similar to an input image.
변형(variation) endpoint 는 입력 이미지와 유사한 새 이미지(변형)를 생성합니다.
Here we'll generate variations of the image generated above.
여기서는 위에서 생성된 이미지의 변형을 생성합니다.
Required inputs:
- image (str): The image to use as the basis for the variation(s). Must be a valid PNG file, less than 4MB, and square.
- image(str): 변형의 기초로 사용할 이미지입니다. 유효한 PNG 파일이어야 하며 4MB 미만의 정사각형이어야 합니다.
Optional inputs:
- n (int): The number of images to generate. Must be between 1 and 10. Defaults to 1.
- n (int): 생성할 이미지의 수. 1에서 10 사이여야 합니다. 기본값은 1입니다.
- size (str): The size of the generated images. Must be one of "256x256", "512x512", or "1024x1024". Smaller images are faster. Defaults to "1024x1024".
- size (str): 생성된 이미지의 크기. "256x256", "512x512" 또는 "1024x1024" 중 하나여야 합니다. 작은 이미지가 더 빠릅니다. 기본값은 "1024x1024"입니다.
- response_format (str): The format in which the generated images are returned. Must be one of "url" or "b64_json". Defaults to "url".
- response_format(str): 생성된 이미지가 반환되는 형식입니다. "url" 또는 "b64_json" 중 하나여야 합니다. 기본값은 "url"입니다.
- user (str): A unique identifier representing your end-user, which will help OpenAI to monitor and detect abuse. Learn more.
OpenAI API
An API for accessing new AI models developed by OpenAI
platform.openai.com
user(str): OpenAI가 남용을 모니터링하고 감지하는 데 도움이 되는 최종 사용자를 나타내는 고유 식별자입니다.
# create variations

# call the OpenAI API, using `create_variation` rather than `create`
variation_response = openai.Image.create_variation(
    image=generated_image,  # generated_image is the image generated above
    n=2,
    size="1024x1024",
    response_format="url",
)

# print response
print(variation_response)
이 코드는 위에서 생성된 이미지를 openai.Image.create_variation() API 를 사용해서 변형 시키는 겁니다.
이미지는 2개를 생성하고 크기는 1024X1024 입니다. response_format 은 url이구요.
프린트한 결과는 아래와 같습니다.
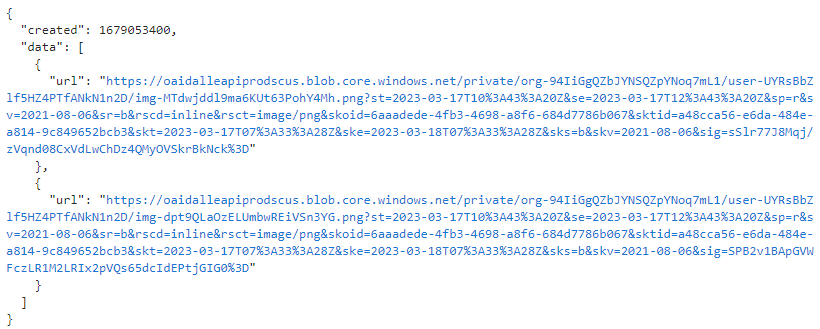
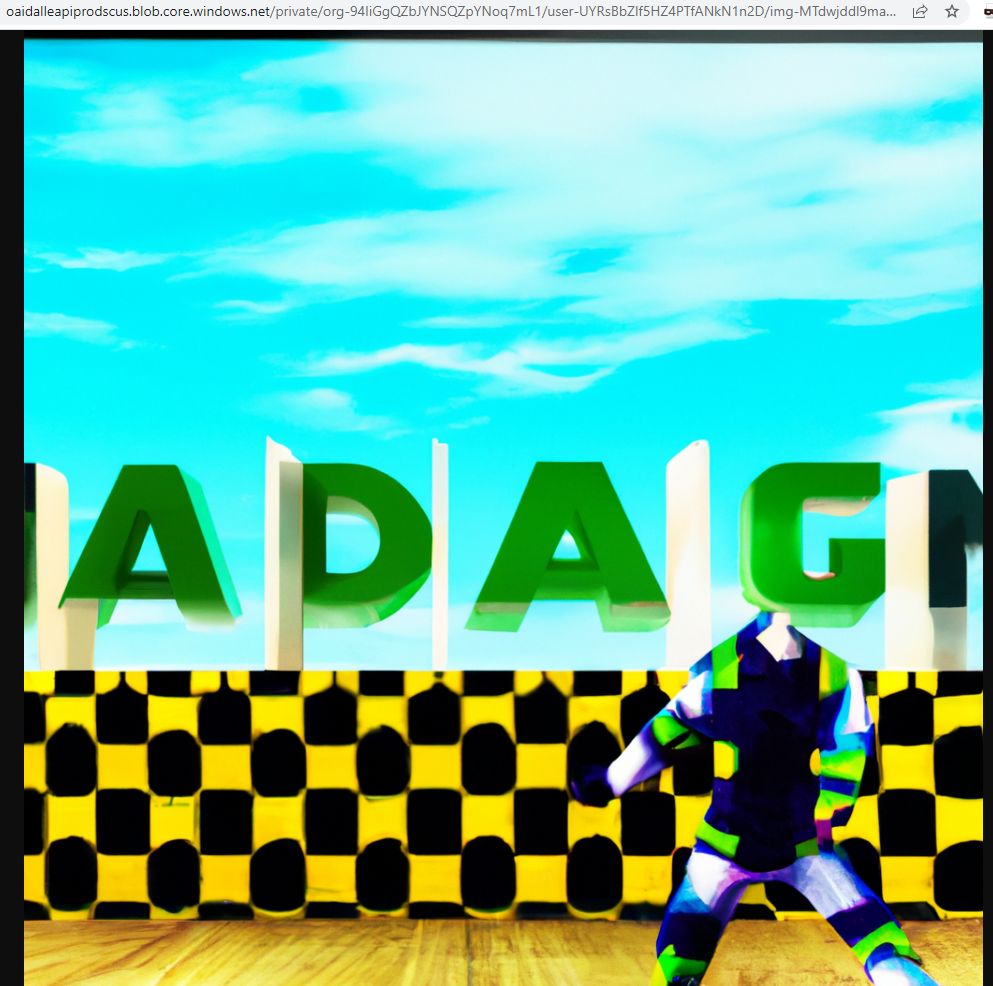
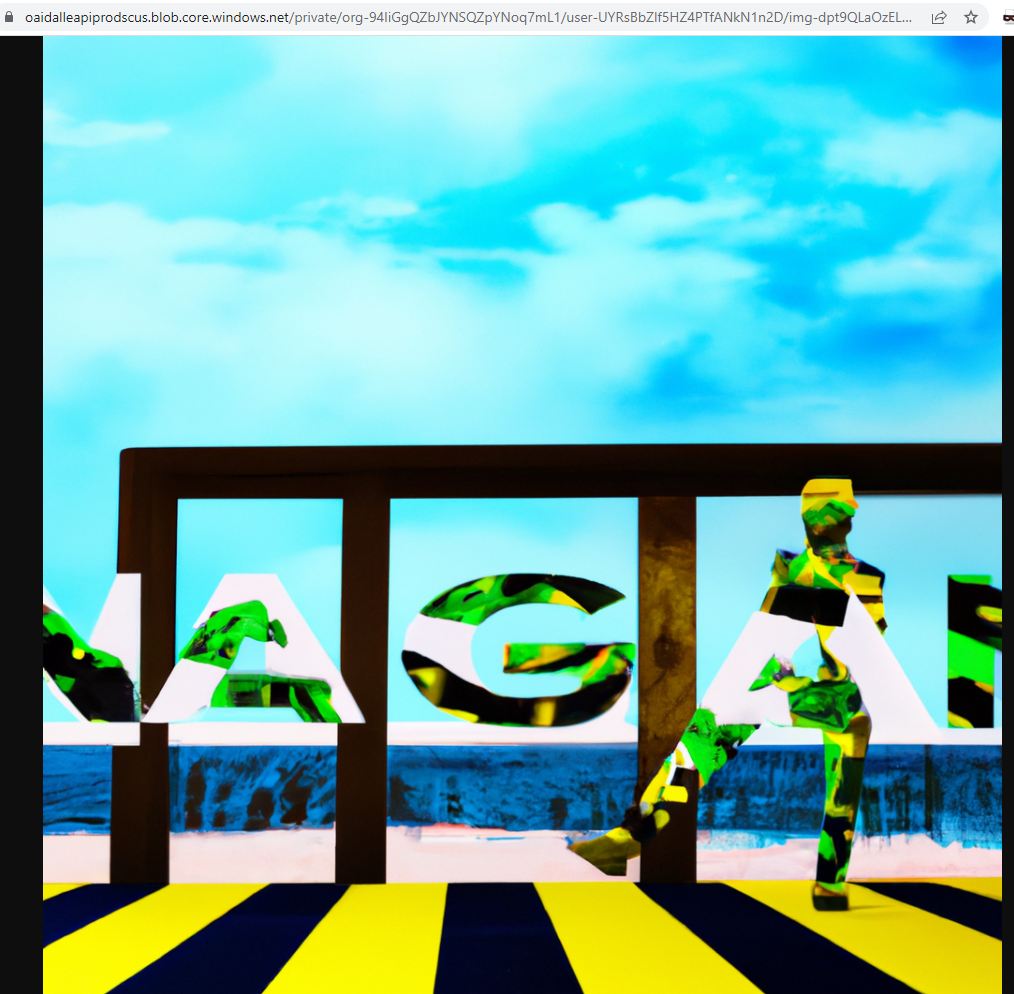
이미지를 2개 만들라고 했더니 URL도 두개가 나오네요.
클릭해 봤더니 다음과 같은 이미지들이 나옵니다.
# save the images
variation_urls = [datum["url"] for datum in variation_response["data"]]  # extract URLs
variation_images = [requests.get(url).content for url in variation_urls]  # download images
variation_image_names = [f"variation_image_{i}.png" for i in range(len(variation_images))]  # create names
variation_image_filepaths = [os.path.join(image_dir, name) for name in variation_image_names]  # create filepaths
for image, filepath in zip(variation_images, variation_image_filepaths):  # loop through the variations
    with open(filepath, "wb") as image_file:  # open the file
        image_file.write(image)  # write the image to the file
다음 코드는 이 두 이미지 파일을 로컬에 save 하는 과정입니다.
위의 과정과 똑 같은데 이미지가 두개 이므로 이것을 처리하기 위해 for 문을 사용했습니다.
실행 결과 입니다.

내 컴퓨터 안에 두개의 파일이 추가 됐습니다.
깜빡하고 이름을 바꾸지 않았더니 기존에 있는 이미지에 덮어 썼네요.
기존 이미지 두개는 날아갔습니다. 뭐 지금은 공부하는 중이니 상관은 없습니다.
실전에서는 아주 조심해야 겠네요. 자동으로 이름에 surfix 나 prefix 같은 것을 달아 주고 또 기존에 같은 이미지가 있으면 새 이미지에 surfix나 prefix 를 붙여주는 로직을 만들어야 겠죠.
# print the original image
print(generated_image_filepath)
display(Image.open(generated_image_filepath))

# print the new variations
for variation_image_filepaths in variation_image_filepaths:
    print(variation_image_filepaths)
    display(Image.open(variation_image_filepaths))
이 그림을 display 하는 스크립트 입니다.
위에서 한것과 똑 같은데 2개를 display 하기 때문에 for 문을 사용했습니다.
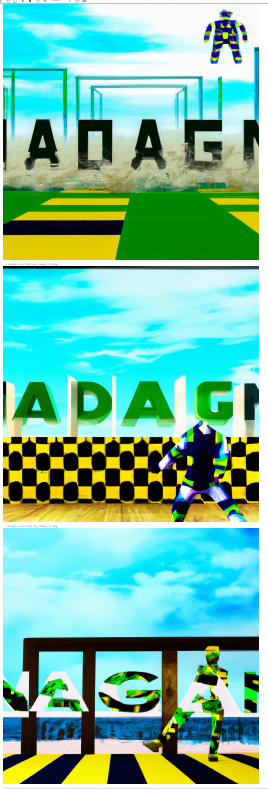
원본 파일을 display 하고 for 문 안에서는 변형 이미지 파일 2개를 display 합니다.
결과는 생성했던 3개 파일 모두 display 됩니다.
Edits
The edit endpoint uses DALL-E to generate a specified portion of an existing image. Three inputs are needed: the image to edit, a mask specifying the portion to be regenerated, and a prompt describing the desired image.
edit endpoint는 DALL-E를 사용하여 기존 이미지의 지정된 부분을 generate 합니다. 편집할 이미지, 재생성할 부분을 지정하는 마스크, 원하는 이미지를 설명하는 프롬프트의 세 가지 입력이 필요합니다.
Required inputs:
- image (str): The image to edit. Must be a valid PNG file, less than 4MB, and square.
- image (str): 편집할 이미지. 유효한 PNG 파일이어야 하며 4MB 미만의 정사각형이어야 합니다.
- mask (str): An additional image whose fully transparent areas (e.g. where alpha is zero) indicate where image should be edited. Must be a valid PNG file, less than 4MB, and have the same dimensions as image.
- 마스크(str): 완전히 투명한 영역(예: 알파가 0인 경우)이 이미지를 편집해야 하는 위치를 나타내는 추가 이미지입니다. 4MB 미만의 유효한 PNG 파일이어야 하며 이미지와 크기가 같아야 합니다.
- prompt (str): A text description of the desired image(s). The maximum length is 1000 characters.
- 프롬프트(str): 원하는 이미지에 대한 텍스트 설명입니다. 최대 길이는 1000자입니다.
Optional inputs:
- n (int): The number of images to generate. Must be between 1 and 10. Defaults to 1.
- n (int): 생성할 이미지의 수. 1에서 10 사이여야 합니다. 기본값은 1입니다.
- size (str): The size of the generated images. Must be one of "256x256", "512x512", or "1024x1024". Smaller images are faster. Defaults to "1024x1024".
- size (str): 생성된 이미지의 크기. "256x256", "512x512" 또는 "1024x1024" 중 하나여야 합니다. 작은 이미지가 더 빠릅니다. 기본값은 "1024x1024"입니다.
- response_format (str): The format in which the generated images are returned. Must be one of "url" or "b64_json". Defaults to "url".
- response_format(str): 생성된 이미지가 반환되는 형식입니다. "url" 또는 "b64_json" 중 하나여야 합니다. 기본값은 "url"입니다.
- user (str): A unique identifier representing your end-user, which will help OpenAI to monitor and detect abuse. Learn more.
OpenAI API
An API for accessing new AI models developed by OpenAI
platform.openai.com
user(str): OpenAI가 남용을 모니터링하고 감지하는 데 도움이 되는 최종 사용자를 나타내는 고유 식별자입니다.
Set Edit Area
An edit requires a "mask" to specify which portion of the image to regenerate. Any pixel with an alpha of 0 (transparent) will be regenerated. The code below creates a 1024x1024 mask where the bottom half is transparent.
편집에는 재생성할 이미지 부분을 지정하는 "마스크"가 필요합니다. 알파가 0(투명)인 모든 픽셀이 재생성됩니다. 아래 코드는 아래쪽 절반이 투명한 1024x1024 마스크를 만듭니다.
# create a mask
width = 1024
height = 1024
mask = Image.new("RGBA", (width, height), (0, 0, 0, 1))  # create an opaque image mask

# set the bottom half to be transparent
for x in range(width):
    for y in range(height // 2, height):  # only loop over the bottom half of the mask
        # set alpha (A) to zero to turn pixel transparent
        alpha = 0
        mask.putpixel((x, y), (0, 0, 0, alpha))

# save the mask
mask_name = "bottom_half_mask.png"
mask_filepath = os.path.join(image_dir, mask_name)
mask.save(mask_filepath)
이렇게 생성한 마스크는 아래 반쪽만 알파갑을 준 것입니다. 그냥 눈으로 보면 별 티는 안 납니다.
Perform Edit
Now we supply our image, caption and mask to the API to get 5 examples of edits to our image
이제 이미지, 캡션 및 마스크를 API에 제공하여 이미지 편집의 5가지 예를 얻습니다.
# edit an image

# call the OpenAI API
edit_response = openai.Image.create_edit(
    image=open(generated_image_filepath, "rb"),  # from the generation section
    mask=open(mask_filepath, "rb"),  # from right above
    prompt=prompt,  # from the generation section
    n=1,
    size="1024x1024",
    response_format="url",
)

# print response
print(edit_response)
openai.Image.create_edit() API 를 사용해서 원본 이미지를 편집을 합니다.
결과는 아래와 같습니다.
URL을 클릭을 하니 아래와 같은 이미지가 나옵니다.
# save the image
edited_image_name = "edited_image.png"  # any name you like; the filetype should be .png
edited_image_filepath = os.path.join(image_dir, edited_image_name)
edited_image_url = edit_response["data"][0]["url"]  # extract image URL from response
edited_image = requests.get(edited_image_url).content  # download the image

with open(edited_image_filepath, "wb") as image_file:
    image_file.write(edited_image)  # write the image to the file
이 이미지 파일을 로컬에 저장합니다.
edited_image.png 파일이 생겼습니다.
사실은 기존에 있던 파일에 덮어 쓰기를 했습니다.
보시면 원본파일은 generated_image2.png 에서 아래 절반이 바뀐 것을 보실 수 있습니다.
# print the original image
print(generated_image_filepath)
display(Image.open(generated_image_filepath))

# print edited image
print(edited_image_filepath)
display(Image.open(edited_image_filepath))
이 부분은 Jupyterlab에 display 하는 부분 입니다.
원본과 편집본 두개를 display 합니다.
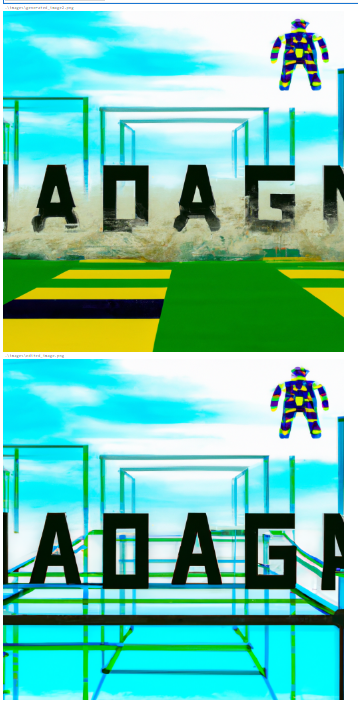
이렇게 하니까 아래 절 반이 바뀐 것을 쉽게 알 수가 있네요.
여기까지 OpenAI 의 DALL-E API 를 공부해 봤습니다.
'Open AI > CookBook' 카테고리의 다른 글
| Openai cookbook : Azure OpenAI - How to fine-tune GPT-3 with Azure OpenAI (0) | 2023.03.19 |
|---|---|
| Openai cookbook : Azure OpenAI - How to get embeddings from Azure OpenAI (0) | 2023.03.19 |
| Openai cookbook : Azure OpenAI - How to get completions from Azure OpenAI (0) | 2023.03.18 |
| Azure OpenAI 를 사용하기 위한 사전 요구 사항들 - 사용 요청 거부 됨 (0) | 2023.03.18 |
| Openai cookbook : Fine-tuning GPT-3 - Fine-tuned classification (0) | 2023.03.15 |
| Openai cookbook : Fine-tuning GPT-3 - Guide: best practices for fine-tuning GPT-3 to classify text (0) | 2023.03.08 |
| Openai cookbook : ChatGPT , How to format inputs to ChatGPT models (2) | 2023.03.04 |
| Openai cookbook : GPT-3 , Code Editing examples (0) | 2023.03.04 |
| Openai cookbook : GPT-3 , Code explanation examples (0) | 2023.03.04 |
| Openai cookbook : GPT-3 , Code writing examples (0) | 2023.03.04 |

