

https://huggingface.co/learn/nlp-course/chapter0/1?fw=pt
Introduction - Hugging Face NLP Course
2. Using 🤗 Transformers 3. Fine-tuning a pretrained model 4. Sharing models and tokenizers 5. The 🤗 Datasets library 6. The 🤗 Tokenizers library 9. Building and sharing demos new
huggingface.co
Introduction
Welcome to the Hugging Face course! This introduction will guide you through setting up a working environment. If you’re just starting the course, we recommend you first take a look at Chapter 1, then come back and set up your environment so you can try the code yourself.
Hugging Face 코스에 오신 것을 환영합니다! 이 소개에서는 작업 환경을 설정하는 과정을 안내합니다. 과정을 막 시작하는 경우 먼저 1장을 살펴보고 다시 돌아와서 코드를 직접 사용해 볼 수 있도록 환경을 설정하는 것이 좋습니다.
All the libraries that we’ll be using in this course are available as Python packages, so here we’ll show you how to set up a Python environment and install the specific libraries you’ll need.
이 과정에서 사용할 모든 라이브러리는 Python 패키지로 제공되므로 여기서는 Python 환경을 설정하고 필요한 특정 라이브러리를 설치하는 방법을 보여 드리겠습니다.
We’ll cover two ways of setting up your working environment, using a Colab notebook or a Python virtual environment. Feel free to choose the one that resonates with you the most. For beginners, we strongly recommend that you get started by using a Colab notebook.
Colab 노트북이나 Python 가상 환경을 사용하여 작업 환경을 설정하는 두 가지 방법을 다루겠습니다. 당신에게 가장 공감되는 것을 자유롭게 선택하십시오. 초보자의 경우 Colab 노트북을 사용하여 시작하는 것이 좋습니다.
Note that we will not be covering the Windows system. If you’re running on Windows, we recommend following along using a Colab notebook. If you’re using a Linux distribution or macOS, you can use either approach described here.
Windows 시스템은 다루지 않습니다. Windows에서 실행하는 경우 Colab 노트북을 사용하여 따라하는 것이 좋습니다. Linux 배포판이나 macOS를 사용하는 경우 여기에 설명된 접근 방식 중 하나를 사용할 수 있습니다.
Most of the course relies on you having a Hugging Face account. We recommend creating one now: create an account.
대부분의 과정은 Hugging Face 계정이 있어야 합니다. 지금 계정을 만드는 것이 좋습니다. 계정을 만드세요.
Using a Google Colab notebook
Using a Colab notebook is the simplest possible setup; boot up a notebook in your browser and get straight to coding!
Colab 노트북을 사용하는 것이 가장 간단한 설정입니다. 브라우저에서 노트북을 부팅하고 바로 코딩을 시작해 보세요!
If you’re not familiar with Colab, we recommend you start by following the introduction. Colab allows you to use some accelerating hardware, like GPUs or TPUs, and it is free for smaller workloads.
Colab에 익숙하지 않다면 소개부터 시작하는 것이 좋습니다. Colab을 사용하면 GPU 또는 TPU와 같은 일부 가속 하드웨어를 사용할 수 있으며 소규모 워크로드에는 무료로 제공됩니다.
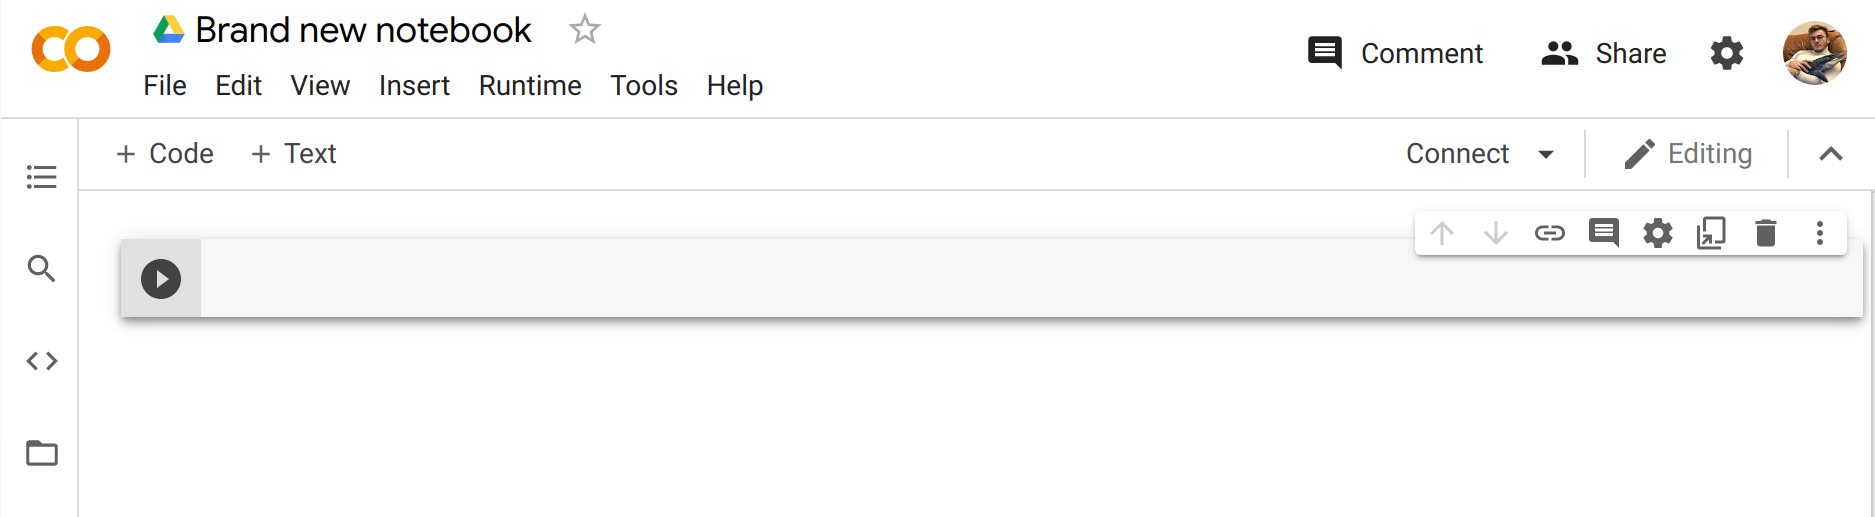
Once you’re comfortable moving around in Colab, create a new notebook and get started with the setup:
Colab에서 편안하게 이동하고 나면 새 노트북을 만들고 설정을 시작하세요.
The next step is to install the libraries that we’ll be using in this course. We’ll use pip for the installation, which is the package manager for Python. In notebooks, you can run system commands by preceding them with the ! character, so you can install the 🤗 Transformers library as follows:
다음 단계는 이 과정에서 사용할 라이브러리를 설치하는 것입니다. Python의 패키지 관리자인 pip를 설치에 사용하겠습니다. 노트북에서는 앞에 !를 붙여 시스템 명령을 실행할 수 있습니다. 캐릭터이므로 다음과 같이 🤗 Transformers 라이브러리를 설치할 수 있습니다.
!pip install transformers
You can make sure the package was correctly installed by importing it within your Python runtime:
Python 런타임 내에서 패키지를 가져와 패키지가 올바르게 설치되었는지 확인할 수 있습니다.
import transformers

This installs a very light version of 🤗 Transformers. In particular, no specific machine learning frameworks (like PyTorch or TensorFlow) are installed. Since we’ll be using a lot of different features of the library, we recommend installing the development version, which comes with all the required dependencies for pretty much any imaginable use case:
이것은 🤗 Transformers의 매우 가벼운 버전을 설치합니다. 특히, 특정 기계 학습 프레임워크(예: PyTorch 또는 TensorFlow)가 설치되지 않습니다. 우리는 라이브러리의 다양한 기능을 사용할 것이므로 상상할 수 있는 거의 모든 사용 사례에 필요한 모든 종속성이 포함된 개발 버전을 설치하는 것이 좋습니다.
!pip install transformers[sentencepiece]
This will take a bit of time, but then you’ll be ready to go for the rest of the course!
약간의 시간이 걸리겠지만, 그러면 나머지 과정을 진행할 준비가 된 것입니다!
Using a Python virtual environment
If you prefer to use a Python virtual environment, the first step is to install Python on your system. We recommend following this guide to get started.
Python 가상 환경을 사용하려는 경우 첫 번째 단계는 시스템에 Python을 설치하는 것입니다. 시작하려면 이 가이드를 따르는 것이 좋습니다.
Once you have Python installed, you should be able to run Python commands in your terminal. You can start by running the following command to ensure that it is correctly installed before proceeding to the next steps: python --version. This should print out the Python version now available on your system.
Python을 설치하고 나면 터미널에서 Python 명령을 실행할 수 있습니다. 다음 단계를 진행하기 전에 python --version 명령을 실행하여 올바르게 설치되었는지 확인할 수 있습니다. 그러면 현재 시스템에서 사용할 수 있는 Python 버전이 인쇄됩니다.
When running a Python command in your terminal, such as python --version, you should think of the program running your command as the “main” Python on your system. We recommend keeping this main installation free of any packages, and using it to create separate environments for each application you work on — this way, each application can have its own dependencies and packages, and you won’t need to worry about potential compatibility issues with other applications.
python --version과 같은 Python 명령을 터미널에서 실행할 때 명령을 실행하는 프로그램을 시스템의 "기본" Python으로 생각해야 합니다. 이 기본 설치에 패키지를 사용하지 않고 이를 사용하여 작업하는 각 애플리케이션에 대해 별도의 환경을 만드는 것이 좋습니다. 이렇게 하면 각 애플리케이션이 자체 종속성과 패키지를 가질 수 있습니다.다른 응용 프로그램과의 잠재적인 호환성 문제에 대해 걱정할 필요가 없습니다.
In Python this is done with virtual environments, which are self-contained directory trees that each contain a Python installation with a particular Python version alongside all the packages the application needs. Creating such a virtual environment can be done with a number of different tools, but we’ll use the official Python package for that purpose, which is called venv.
Python에서는 애플리케이션에 필요한 모든 패키지와 함께 특정 Python 버전이 포함된 Python 설치가 포함된 독립형 디렉터리 트리인 가상 환경을 통해 이 작업이 수행됩니다. 이러한 가상 환경을 만드는 것은 다양한 도구를 사용하여 수행할 수 있지만 우리는 해당 목적을 위해 venv라고 하는 공식 Python 패키지를 사용하겠습니다.
First, create the directory you’d like your application to live in — for example, you might want to make a new directory called transformers-course at the root of your home directory:
먼저, 애플리케이션을 보관할 디렉터리를 만듭니다. 예를 들어 홈 디렉터리의 루트에 Transformers-course라는 새 디렉터리를 만들 수 있습니다.
mkdir ~/transformers-course
cd ~/transformers-course
From inside this directory, create a virtual environment using the Python venv module:
이 디렉터리 내에서 Python venv 모듈을 사용하여 가상 환경을 만듭니다.
python -m venv .env
나는 윈도우 환경에서 실행하고 있으며 가상 환경 이름은 hfnlp라고 하겠음.

You should now have a directory called .env in your otherwise empty folder:
이제 빈 폴더에 .env라는 디렉터리가 있어야 합니다.
ls -a. .. .env
내 윈도우 로컬 환경에서는 아래와 같이 dir로 디렉토리 내용을 볼 수 있음. hfnlp 폴더가 생성 돼 있음.

You can jump in and out of your virtual environment with the activate and deactivate scripts:
활성화 및 비활성화 스크립트를 사용하여 가상 환경에 들어가고 나올 수 있습니다.
# Activate the virtual environment
source .env/bin/activate

# Deactivate the virtual environment
source .env/bin/deactivate
윈도우에서는 Scripts라는 폴더에 있는 activate를 실행하면 됨
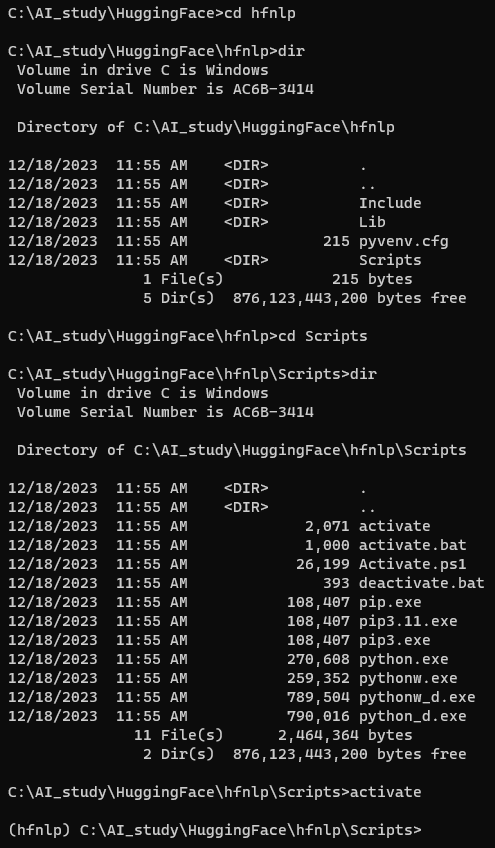
이 가상환경에서 나오려면 deactivate 하면 됨.

You can make sure that the environment is activated by running the which python command: if it points to the virtual environment, then you have successfully activated it!
which python 명령을 실행하여 환경이 활성화되었는지 확인할 수 있습니다. 가상 환경을 가리키면 성공적으로 활성화된 것입니다!
which python
/home/<user>/transformers-course/.env/bin/python
윈도우 환경에서는 비슷한 명령어로 where python이 있음.

Installing dependencies
As in the previous section on using Google Colab instances, you’ll now need to install the packages required to continue. Again, you can install the development version of 🤗 Transformers using the pip package manager:
Google Colab 인스턴스 사용에 대한 이전 섹션과 마찬가지로 이제 계속하려면 필요한 패키지를 설치해야 합니다. 이번에도 pip 패키지 관리자를 사용하여 🤗 Transformers의 개발 버전을 설치할 수 있습니다.
pip install "transformers[sentencepiece]"
You’re now all set up and ready to go!
이제 모든 설정이 완료되었으며 사용할 준비가 되었습니다!
'Hugging Face > NLP Course' 카테고리의 다른 글
| HF-NLP-Transformer models : End-of-chapter quiz (1) | 2023.12.24 |
|---|---|
| HF-NLP-Transformer models : Summary (0) | 2023.12.24 |
| HF-NLP-Transformer models : Bias and limitations (1) | 2023.12.24 |
| HF-NLP-Transformer models : Sequence-to-sequence models[sequence-to-sequence-models] (1) | 2023.12.24 |
| HF-NLP-Transformer models : Decoder models (2) | 2023.12.24 |
| HF-NLP-Transformer models : Encoder models (1) | 2023.12.24 |
| HF-NLP-Transformer models : How do Transformers work? (1) | 2023.12.24 |
| HF-NLP-Transformer models : Transformers, what can they do? (0) | 2023.12.23 |
| HF-NLP-Transformer models : Natural Language Processing (0) | 2023.12.19 |
| HF-NLP-Transformer models : Introduction (0) | 2023.12.19 |