https://huggingface.co/learn/nlp-course/chapter1/1?fw=pt
Introduction - Hugging Face NLP Course
2. Using 🤗 Transformers 3. Fine-tuning a pretrained model 4. Sharing models and tokenizers 5. The 🤗 Datasets library 6. The 🤗 Tokenizers library 9. Building and sharing demos new
huggingface.co
Introduction
Welcome to the 🤗 Course!
https://youtu.be/00GKzGyWFEs?si=_fwBMxuDBpygyJSj
This course will teach you about natural language processing (NLP) using libraries from the Hugging Face ecosystem — 🤗 Transformers, 🤗 Datasets, 🤗 Tokenizers, and 🤗 Accelerate — as well as the Hugging Face Hub. It’s completely free and without ads.
이 과정에서는 Hugging Face 생태계의 라이브러리( 🤗 Transformers, 🤗 Datasets, 🤗 Tokenizers 및 🤗 Accelerate)와 Hugging Face Hub를 사용하여 자연어 처리(NLP)에 대해 설명합니다. 완전 무료이며 광고도 없습니다.
What to expect?
Here is a brief overview of the course:
강좌에 대한 간략한 개요는 다음과 같습니다.

- Chapters 1 to 4 provide an introduction to the main concepts of the 🤗 Transformers library. By the end of this part of the course, you will be familiar with how Transformer models work and will know how to use a model from the Hugging Face Hub, fine-tune it on a dataset, and share your results on the Hub!
- 1장부터 4장까지는 🤗 Transformers 라이브러리의 주요 개념을 소개합니다. 과정의 이 부분이 끝나면 Transformer 모델의 작동 방식에 익숙해지고 Hugging Face Hub의 모델을 사용하는 방법, 데이터세트에서 이를 미세 조정하고 허브에서 결과를 공유하는 방법을 알게 됩니다!
- Chapters 5 to 8 teach the basics of 🤗 Datasets and 🤗 Tokenizers before diving into classic NLP tasks. By the end of this part, you will be able to tackle the most common NLP problems by yourself.
- 5~8장에서는 고전적인 NLP 작업을 시작하기 전에 🤗 데이터세트 및 🤗 토크나이저의 기본 사항을 가르칩니다. 이 부분이 끝나면 가장 일반적인 NLP 문제를 스스로 해결할 수 있게 됩니다.
- Chapters 9 to 12 go beyond NLP, and explore how Transformer models can be used to tackle tasks in speech processing and computer vision. Along the way, you’ll learn how to build and share demos of your models, and optimize them for production environments. By the end of this part, you will be ready to apply 🤗 Transformers to (almost) any machine learning problem!
- 9~12장에서는 NLP를 넘어 음성 처리 및 컴퓨터 비전 작업을 처리하는 데 Transformer 모델을 사용할 수 있는 방법을 살펴봅니다. 그 과정에서 모델의 데모를 구축 및 공유하고 생산 환경에 맞게 최적화하는 방법을 배우게 됩니다. 이 부분이 끝나면 🤗 Transformers를 (거의) 모든 기계 학습 문제에 적용할 수 있습니다!
This course: 이 과정
- Requires a good knowledge of Python
- Python에 대한 충분한 지식이 필요합니다.
- Is better taken after an introductory deep learning course, such as fast.ai’s Practical Deep Learning for Coders or one of the programs developed by DeepLearning.AI
- Does not expect prior PyTorch or TensorFlow knowledge, though some familiarity with either of those will help
- fast.ai의 Practical Deep Learning for Coders 또는 DeepLearning.AI에서 개발한 프로그램 중 하나와 같은 입문 딥 러닝 과정을 수강하는 것이 좋습니다.
- PyTorch 또는 TensorFlow에 대한 사전 지식을 기대하지 않지만 둘 중 하나에 익숙하면 도움이 됩니다.
Home
Learn the skills to start or advance your AI career | World-class education | Hands-on training | Collaborative community of peers and mentors
www.deeplearning.ai
After you’ve completed this course, we recommend checking out DeepLearning.AI’s Natural Language Processing Specialization, which covers a wide range of traditional NLP models like naive Bayes and LSTMs that are well worth knowing about!
이 과정을 마친 후에는 Naive Bayes 및 LSTM과 같이 알아 둘 가치가 있는 광범위한 기존 NLP 모델을 다루는 DeepLearning.AI의 자연어 처리 전문 분야를 확인하는 것이 좋습니다!
Who are we?
About the authors: 저자 소개
Abubakar Abid completed his PhD at Stanford in applied machine learning. During his PhD, he founded Gradio, an open-source Python library that has been used to build over 600,000 machine learning demos. Gradio was acquired by Hugging Face, which is where Abubakar now serves as a machine learning team lead.
Abubakar Abid는 스탠포드에서 응용 기계 학습 분야의 박사 학위를 취득했습니다. 박사 과정 동안 그는 600,000개 이상의 기계 학습 데모를 구축하는 데 사용된 오픈 소스 Python 라이브러리인 Gradio를 설립했습니다. Gradio는 현재 Abubakar가 기계 학습 팀 리더로 일하고 있는 Hugging Face에 인수되었습니다.
Matthew Carrigan is a Machine Learning Engineer at Hugging Face. He lives in Dublin, Ireland and previously worked as an ML engineer at Parse.ly and before that as a post-doctoral researcher at Trinity College Dublin. He does not believe we’re going to get to AGI by scaling existing architectures, but has high hopes for robot immortality regardless.
Matthew Carrigan은 Hugging Face의 머신러닝 엔지니어입니다. 그는 아일랜드 더블린에 거주하며 이전에는 Parse.ly에서 ML 엔지니어로 근무했고 그 전에는 Trinity College Dublin에서 박사후 연구원으로 근무했습니다. 그는 기존 아키텍처를 확장하는 것으로는 AGI에 도달할 것이라고 믿지 않지만 그럼에도 불구하고 로봇 불멸에 대한 높은 희망을 가지고 있습니다.
Lysandre Debut is a Machine Learning Engineer at Hugging Face and has been working on the 🤗 Transformers library since the very early development stages. His aim is to make NLP accessible for everyone by developing tools with a very simple API.
Lysandre Debut는 Hugging Face의 기계 학습 엔지니어이며 초기 개발 단계부터 🤗 Transformers 라이브러리 작업을 해왔습니다. 그의 목표는 매우 간단한 API로 도구를 개발하여 모든 사람이 NLP에 액세스할 수 있도록 하는 것입니다.
Sylvain Gugger is a Research Engineer at Hugging Face and one of the core maintainers of the 🤗 Transformers library. Previously he was a Research Scientist at fast.ai, and he co-wrote Deep Learning for Coders with fastai and PyTorch with Jeremy Howard. The main focus of his research is on making deep learning more accessible, by designing and improving techniques that allow models to train fast on limited resources.
Sylvain Gugger는 Hugging Face의 연구 엔지니어이자 🤗 Transformers 라이브러리의 핵심 관리자 중 한 명입니다. 이전에 그는 fast.ai의 연구 과학자였으며, fastai와 함께 Coders를 위한 Deep Learning, Jeremy Howard와 함께 PyTorch를 공동 집필했습니다. 그의 연구의 주요 초점은 모델이 제한된 리소스에서 빠르게 훈련할 수 있는 기술을 설계하고 개선하여 딥 러닝의 접근성을 높이는 것입니다.
Dawood Khan is a Machine Learning Engineer at Hugging Face. He’s from NYC and graduated from New York University studying Computer Science. After working as an iOS Engineer for a few years, Dawood quit to start Gradio with his fellow co-founders. Gradio was eventually acquired by Hugging Face.
Dawood Khan은 Hugging Face의 머신러닝 엔지니어입니다. 그는 뉴욕 출신이고 뉴욕 대학교에서 컴퓨터 공학을 전공했습니다. 몇 년 동안 iOS 엔지니어로 일한 후 Dawood는 동료 공동 창립자들과 함께 Gradio를 시작하기 위해 회사를 그만뒀습니다. Gradio는 결국 Hugging Face에 인수되었습니다.
Merve Noyan is a developer advocate at Hugging Face, working on developing tools and building content around them to democratize machine learning for everyone.
Merve Noyan은 Hugging Face의 개발자 옹호자로서 모든 사람을 위한 기계 학습을 민주화하기 위해 도구를 개발하고 관련 콘텐츠를 구축하는 작업을 하고 있습니다.
Lucile Saulnier is a machine learning engineer at Hugging Face, developing and supporting the use of open source tools. She is also actively involved in many research projects in the field of Natural Language Processing such as collaborative training and BigScience.
Lucile Saulnier는 Hugging Face의 머신 러닝 엔지니어로, 오픈 소스 도구 사용을 개발하고 지원합니다. 그녀는 또한 협업 훈련, BigScience 등 자연어 처리 분야의 많은 연구 프로젝트에 적극적으로 참여하고 있습니다.
Lewis Tunstall is a machine learning engineer at Hugging Face, focused on developing open-source tools and making them accessible to the wider community. He is also a co-author of the O’Reilly book Natural Language Processing with Transformers.
Lewis Tunstall은 Hugging Face의 기계 학습 엔지니어로, 오픈 소스 도구를 개발하고 이를 더 넓은 커뮤니티에 액세스할 수 있도록 하는 데 중점을 두고 있습니다. 그는 또한 O'Reilly의 책인 Transformers를 사용한 자연어 처리의 공동 저자이기도 합니다.
Leandro von Werra is a machine learning engineer in the open-source team at Hugging Face and also a co-author of the O’Reilly book Natural Language Processing with Transformers. He has several years of industry experience bringing NLP projects to production by working across the whole machine learning stack..
Leandro von Werra는 Hugging Face 오픈 소스 팀의 머신 러닝 엔지니어이자 O'Reilly의 Natural Language Process with Transformers 책의 공동 저자이기도 합니다. 그는 기계 학습 스택 전반에 걸쳐 NLP 프로젝트를 프로덕션으로 가져오는 수년간의 업계 경험을 보유하고 있습니다.
FAQ
Here are some answers to frequently asked questions:
자주 묻는 질문(FAQ)에 대한 답변은 다음과 같습니다.
- Does taking this course lead to a certification? Currently we do not have any certification for this course. However, we are working on a certification program for the Hugging Face ecosystem — stay tuned!
- 이 강좌를 수강하면 인증을 받을 수 있나요? 현재 이 과정에 대한 인증이 없습니다. 그러나 우리는 Hugging Face 생태계에 대한 인증 프로그램을 개발 중입니다. 계속 지켜봐 주시기 바랍니다!
- How much time should I spend on this course? Each chapter in this course is designed to be completed in 1 week, with approximately 6-8 hours of work per week. However, you can take as much time as you need to complete the course.
- 이 강좌에 얼마나 많은 시간을 투자해야 합니까? 이 과정의 각 장은 주당 약 6~8시간씩 1주일 내에 완료하도록 설계되었습니다. 그러나 과정을 완료하는 데 필요한 만큼의 시간을 투자할 수 있습니다.
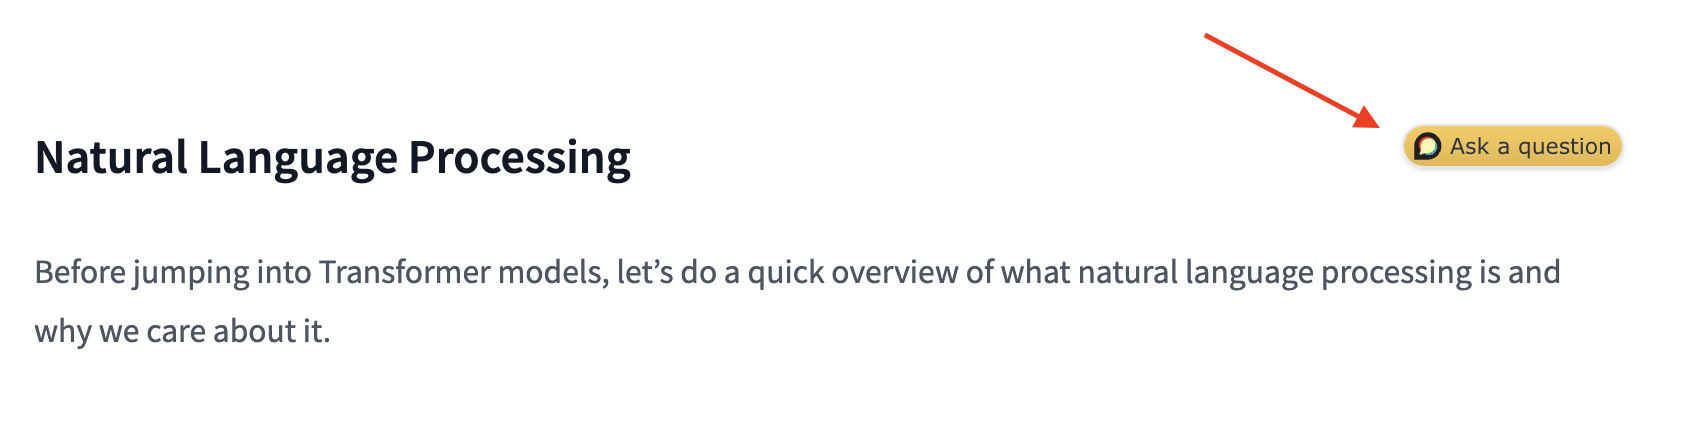
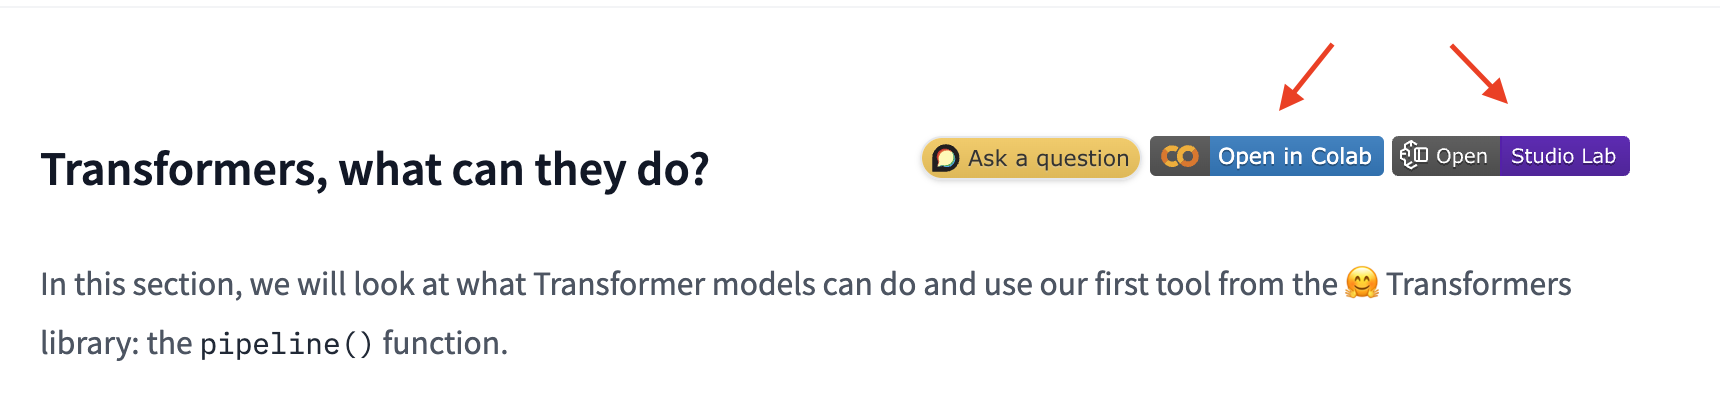
- Where can I ask a question if I have one? If you have a question about any section of the course, just click on the ”Ask a question” banner at the top of the page to be automatically redirected to the right section of the Hugging Face forums:
- 질문이 있으면 어디로 문의해야 하나요? 코스의 특정 섹션에 대해 질문이 있는 경우 페이지 상단의 "질문하기" 배너를 클릭하면 자동으로 Hugging Face 포럼의 해당 섹션으로 리디렉션됩니다.
https://discuss.huggingface.co/t/chapter-1-questions
Chapter 1 questions
Use this topic for any question about Chapter 1 of the course.
discuss.huggingface.co
Note that a list of project ideas is also available on the forums if you wish to practice more once you have completed the course.
과정을 마친 후 더 연습하고 싶다면 포럼에서 프로젝트 아이디어 목록을 확인할 수도 있습니다.
- Where can I get the code for the course? For each section, click on the banner at the top of the page to run the code in either Google Colab or Amazon SageMaker Studio Lab:
- 강의 코드는 어디서 받을 수 있나요? 각 섹션에 대해 페이지 상단의 배너를 클릭하여 Google Colab 또는 Amazon SageMaker Studio Lab에서 코드를 실행하세요.
The Jupyter notebooks containing all the code from the course are hosted on the huggingface/notebooks repo. If you wish to generate them locally, check out the instructions in the course repo on GitHub.
강좌의 모든 코드가 포함된 Jupyter Notebook은 Huggingface/Notebooks 저장소에서 호스팅됩니다. 로컬에서 생성하려면 GitHub의 코스 저장소에 있는 지침을 확인하세요.
- How can I contribute to the course? There are many ways to contribute to the course! If you find a typo or a bug, please open an issue on the course repo. If you would like to help translate the course into your native language, check out the instructions here.
- 강좌에 어떻게 기여할 수 있나요? 강좌에 참여하는 방법에는 여러 가지가 있습니다! 오타나 버그를 발견한 경우 코스 저장소에서 문제를 열어주세요. 강좌를 모국어로 번역하는 데 도움을 주고 싶다면 여기에서 지침을 확인하세요.
- What were the choices made for each translation? Each translation has a glossary and TRANSLATING.txt file that details the choices that were made for machine learning jargon etc. You can find an example for German here.
- 각 번역에 대해 어떤 선택이 이루어졌나요? 각 번역에는 기계 학습 전문 용어 등에 대한 선택 사항을 자세히 설명하는 용어집과 TRANSLATING.txt 파일이 있습니다. 여기에서 독일어에 대한 예를 찾을 수 있습니다.
- Can I reuse this course? Of course! The course is released under the permissive Apache 2 license. This means that you must give appropriate credit, provide a link to the license, and indicate if changes were made. You may do so in any reasonable manner, but not in any way that suggests the licensor endorses you or your use. If you would like to cite the course, please use the following BibTeX:
- 이 강좌를 재사용할 수 있나요? 물론! 이 과정은 허용되는 Apache 2 라이센스에 따라 공개됩니다. 이는 적절한 출처를 표시하고 라이선스에 대한 링크를 제공하고 변경 사항이 있는지 표시해야 함을 의미합니다. 귀하는 합리적인 방식으로 그렇게 할 수 있지만, 라이센스 제공자가 귀하 또는 귀하의 사용을 보증하는 방식으로 그렇게 할 수는 없습니다. 강좌를 인용하려면 다음 BibTeX를 사용하세요.
@misc{huggingfacecourse,
  author = {Hugging Face},
  title = {The Hugging Face Course, 2022},
  howpublished = "\url{https://huggingface.co/course}",
  year = {2022},
  note = "[Online; accessed <today>]"
}
Let's Go
Are you ready to roll? In this chapter, you will learn:
굴릴 준비가 되셨나요? 이 장에서는 다음 내용을 학습합니다.
- How to use the pipeline() function to solve NLP tasks such as text generation and classification
- 파이프라인() 함수를 사용하여 텍스트 생성 및 분류와 같은 NLP 작업을 해결하는 방법
- About the Transformer architecture
- Transformer 아키텍처 정보
- How to distinguish between encoder, decoder, and encoder-decoder architectures and use cases
- 인코더, 디코더, 인코더-디코더 아키텍처와 사용 사례를 구별하는 방법
'Hugging Face > NLP Course' 카테고리의 다른 글
| HF-NLP-Transformer models : End-of-chapter quiz (1) | 2023.12.24 |
|---|---|
| HF-NLP-Transformer models : Summary (0) | 2023.12.24 |
| HF-NLP-Transformer models : Bias and limitations (1) | 2023.12.24 |
| HF-NLP-Transformer models : Sequence-to-sequence models[sequence-to-sequence-models] (1) | 2023.12.24 |
| HF-NLP-Transformer models : Decoder models (1) | 2023.12.24 |
| HF-NLP-Transformer models : Encoder models (1) | 2023.12.24 |
| HF-NLP-Transformer models : How do Transformers work? (1) | 2023.12.24 |
| HF-NLP-Transformer models : Transformers, what can they do? (0) | 2023.12.23 |
| HF-NLP-Transformer models : Natural Language Processing (0) | 2023.12.19 |
| HF-NLP-Setup Introduction (0) | 2023.12.19 |