개발자로서 현장에서 일하면서 새로 접하는 기술들이나 알게된 정보 등을 정리하기 위한 블로그입니다. 운 좋게 미국에서 큰 회사들의 프로젝트에서 컬설턴트로 일하고 있어서 새로운 기술들을 접할 기회가 많이 있습니다. 미국의 IT 프로젝트에서 사용되는 툴들에 대해 많은 분들과 정보를 공유하고 싶습니다.
In this example we'll try to go over all operations needed to get completions working using the Azure endpoints. This example focuses on completions but also touches on some other operations that are also available using the API. This example is meant to be a quick way of showing simple operations and is not meant as a tutorial.
이 예제에서는 Azure 엔드포인트를 사용하여 작업을 completions하는 데 필요한 모든 작업을 살펴보겠습니다. 이 예제는 completions에 중점을 두지만 API를 사용하여 사용할 수 있는 다른 작업도 다룹니다. 이 예제는 간단한 작업을 보여주는 빠른 방법이며 튜토리얼이 아닙니다.
import openai
from openai import cli
Setup
For the following sections to work properly we first have to setup some things. Let's start with theapi_baseandapi_version. To find yourapi_basego tohttps://portal.azure.com, find your resource and then under "Resource Management" -> "Keys and Endpoints" look for the "Endpoint" value.
다음 섹션이 제대로 작동하려면 먼저 몇 가지를 설정해야 합니다. api_base 및 api_version부터 시작하겠습니다. api_base를 찾으려면 https://portal.azure.com으로 이동하여 리소스를 찾은 다음 "리소스 관리" -> ""Keys and Endpoints""에서 "Endpoint" 값을 찾습니다.
==> 이 부분이 Azure OpenAI 사용 권한이 필요한 부분 입니다.
openai.api_version = '2022-12-01'
openai.api_base = '' # Please add your endpoint here
다음으로 api_type 및 api_key를 설정해야 합니다. 포털에서 키를 얻거나 Microsoft Active Directory 인증을 통해 얻을 수 있습니다. 이에 따라 api_type은 azure 또는 azure_ad입니다.
Setup: Portal
Let's first look at getting the key from the portal. Go tohttps://portal.azure.com, find your resource and then under "Resource Management" -> "Keys and Endpoints" look for one of the "Keys" values.
먼저 포털에서 키를 가져오는 방법을 살펴보겠습니다. https://portal.azure.com으로 이동하여 리소스를 찾은 다음 "Resource Management" -> "Keys and Endpoints"에서 "Keys" 값 중 하나를 찾습니다.
openai.api_type = 'azure'
openai.api_key = ''  # Please add your api key here
(Optional) Setup: Microsoft Active Directory Authentication
Let's now see how we can get a key via Microsoft Active Directory Authentication. Uncomment the following code if you want to use Active Directory Authentication instead of keys from the portal.
(선택 사항) 설정: Microsoft Active Directory 인증 이제 Microsoft Active Directory 인증을 통해 키를 얻는 방법을 살펴보겠습니다. 포털의 키 대신 Active Directory 인증을 사용하려면 다음 코드의 주석을 제거하십시오.
In this section we are going to create a deployment using thetext-davinci-002model that we can then use to create completions.
이 섹션에서는 completions 를 생성하는 데 사용할 수 있는 text-davinci-002 모델을 사용하여 배포를 생성할 것입니다.
Deployments: Create manually
Create a new deployment by going to your Resource in your portal under "Resource Management" -> "Model deployments". Selecttext-davinci-002as the model.
"리소스 관리" -> "모델 배포"에서 포털의 리소스로 이동하여 새 배포를 만듭니다. text-davinci-002를 모델로 선택합니다.
(Optional) Deployments: Create programatically
We can also create a deployment using code:
코드를 사용하여 배포를 만들 수도 있습니다.
model = "text-davinci-002"

# Now let's create the deployment
print(f'Creating a new deployment with model: {model}')
result = openai.Deployment.create(model=model, scale_settings={"scale_type":"standard"})
deployment_id = result["id"]
print(f'Successfully created deployment with id: {deployment_id}')
(Optional) Deployments: Wait for deployment to succeed
Now let's check the status of the newly created deployment and wait till it is succeeded.
이제 새로 생성된 배포의 상태를 확인하고 성공할 때까지 기다리겠습니다.
print(f'Checking for deployment status.')
resp = openai.Deployment.retrieve(id=deployment_id)
status = resp["status"]
print(f'Deployment {deployment_id} has status: {status}')
while status not in ["succeeded", "failed"]:
    resp = openai.Deployment.retrieve(id=deployment_id)
    status = resp["status"]
    print(f'Deployment {deployment_id} has status: {status}')
Completions
Now let's send a sample completion to the deployment.
이제 배포에 샘플 완료를 보내겠습니다.
prompt = "The food was delicious and the waiter"
completion = openai.Completion.create(deployment_id=deployment_id,
                                     prompt=prompt, stop=".", temperature=0)

print(f"{prompt}{completion['choices'][0]['text']}.")
api_base 와 api_version 을 구하는 방법도 모르겠어서 여기 저기 구글링을 해 보았습니다.
(이제는 Binging 을 한다고 말해야 하나?)
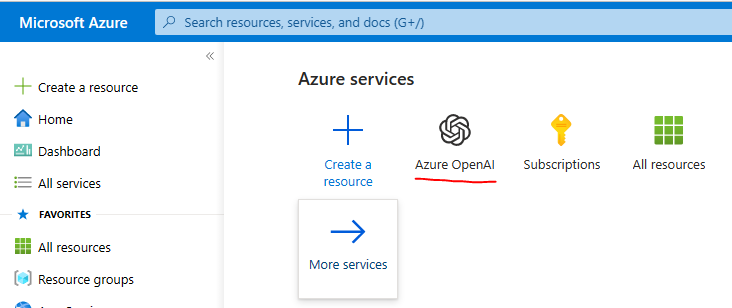
우선 Microsoft Azure 로 들어가서 Azure OpenAI 서비스를 선택합니다.
(Microsoft Azure 에 가입 돼 있어야 합니다. 일단 가입은 무료입니다.)
Azure OpenAI 라고 검색을 하시면 위와 같은 아이콘을 보실 수 있습니다.
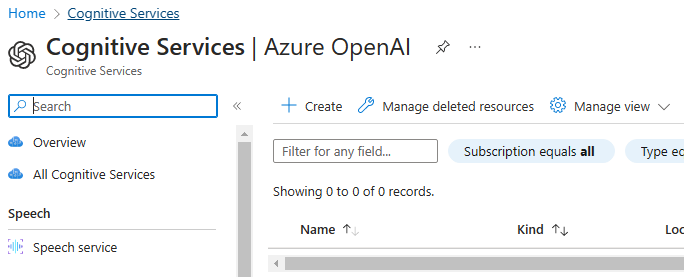
클릭하면 이런 화면이 뜹니다.
여기서 Create 을 클릭하시면 ......
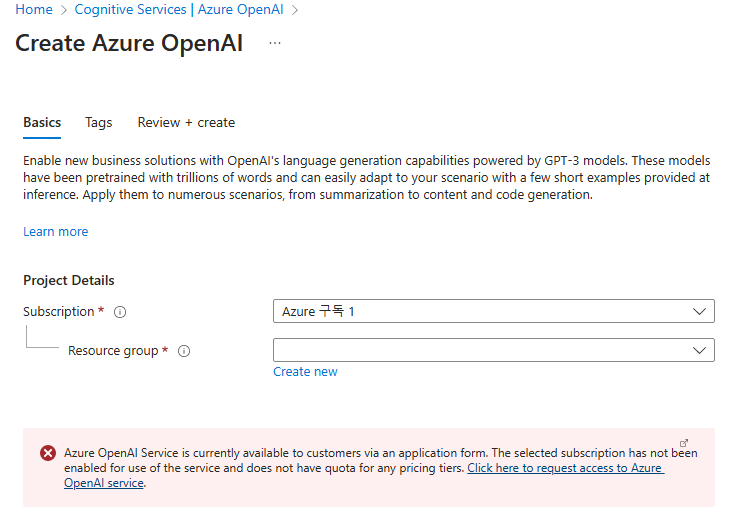
이런 화면이 뜹니다.
밑에 붉은 background 에 있는 글을 보세요.
Azure OpenAI Service is currently available to customers via an application form. The selected subscription has not been enabled for use of the service and does not have quota for any pricing tiers.Click here to request access to Azure OpenAI service.
Azure OpenAI 서비스는 현재 신청 양식을 통해 고객에게 제공됩니다. 선택한 구독은 서비스 사용을 위해 활성화되지 않았으며 가격 책정 계층에 대한 할당량이 없습니다. Azure OpenAI 서비스에 대한 액세스를 요청하려면 여기를 클릭하십시오.
Azure OpenAI 를 사용하려면 따로 신청을 하셔야 합니다.
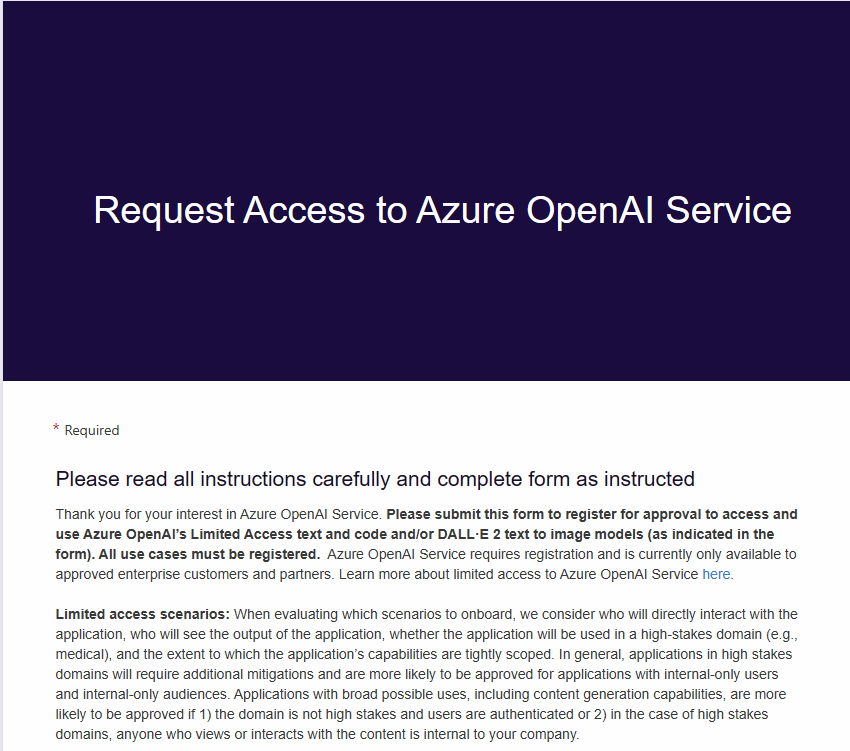
여기서 링크를 클릭하면 아래와 같은 페이지로 갑니다.
저는 여기서 신청서 양식을 다 작성을 하고 마지막에 긴 설문도 다 작성을 하고 Submit을 눌렀습니다.
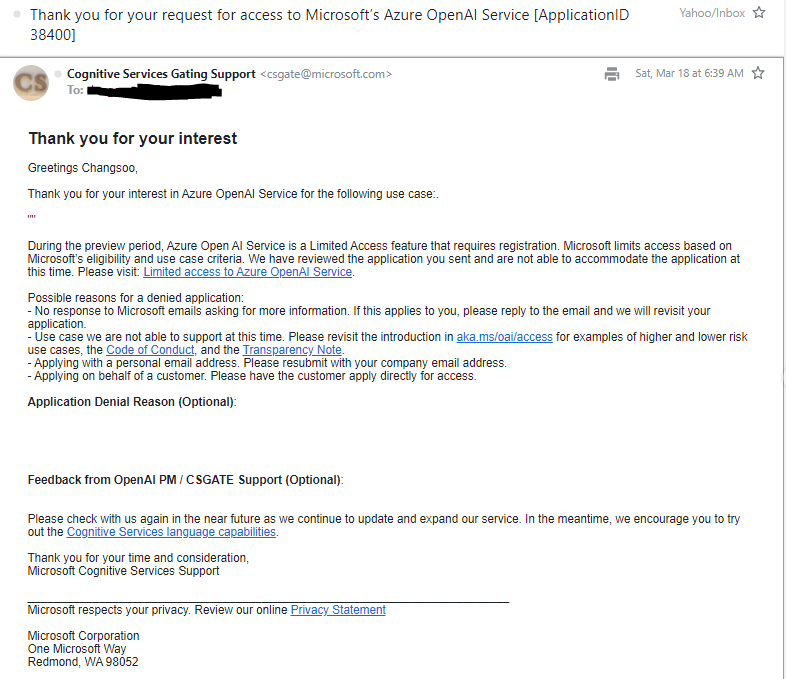
그러면 아래와 같은 화면이 나옵니다.
신청은 했는데 이게 승인이 될지 거부가 될지 그리고 승인이 되면 언제 될지 모르겠네요.
일단 현재로서는 실습을 하지는 못 하겠고 Cookbook 에 있는 글을 통해서 공부만 해 둬야 겠습니다.
아래는 Azure OpenAI 를 사용해서 Azure에서 리소스를 생성하고 배치하는 방법을 알려 주는 How-to 페이지 입니다.
여기서도 Prerequisites 로 Auzre 에 가입하고 위 신청서를 작성해야 한다고 나오네요.
This notebook shows how to use OpenAI's DALL-E image API endpoints.
이 노트북은 OpenAI의 DALL-E 이미지 API endpoints를 사용하는 방법을 보여줍니다.
There are three API endpoints:
세 가지 API endpoints가 있습니다.
Generations:generates an image or images based on an input caption
Generations: 입력 캡션을 기반으로 이미지를 생성합니다.
Edits:edits or extends an existing image
편집: 기존 이미지를 편집하거나 확장합니다.
Variations:generates variations of an input image
변형: 입력 이미지의 변형을 생성합니다.
Setup
Import the packages you'll need
필요한 패키지 가져오기
Import your OpenAI API key: You can do this by running ``export OPENAI_API_KEY="your API key"\in your terminal.
OpenAI API key 가져오기
Set a directory to save images to
이미지를 저장할 디렉토리 설정
이제 소스 코드를 보겠습니다.
# imports
import openai  # OpenAI Python library to make API calls
import requests  # used to download images
import os  # used to access filepaths
from PIL import Image  # used to print and edit images

# set API key
openai.api_key = os.environ.get("OPENAI_API_KEY")
먼저 필요한 모듈들을 import 합니다.
openai를 import 해 openaai api를 사용할 수 있도록 합니다.
그 다음에 requests 모듈을 import 했습니다. 이 모듈은 openai 에 이미지가 생성 된 후 이 이미지를 나의 local 컴퓨터로 다운로드 받기 위해 필요합니다.
이 모듈은 파이썬에서 HTTP request를 보낼 수 있도록 합니다. HTTP를 사용해서 OpenAI쪽에 생성돼 있는 이미지를 다운 로드 받게 됩니다.
# set a directory to save DALL-E images to
image_dir_name = "images"
image_dir = os.path.join(os.curdir, image_dir_name)

# create the directory if it doesn't yet exist
if not os.path.isdir(image_dir):
    os.mkdir(image_dir)

# print the directory to save to
print(f"{image_dir=}")
그 다음은 생성한 이미지를 저장할 폴더의 위치를 정해 줍니다.
폴더 이름은 images 가 되고 그 위치는 현재 디렉토리에 있습니다.
if 문은 만약에 현재 디렉토리 안에 images라는 폴더가 없다면 mkdir() 을 이용해서 폴더를 생성하게 됩니다.
print() 결과는 아래와 같습니다.
image_dir='.\\images'
Generations
The generation API endpoint creates an image based on a text prompt.
generation API endpoint는 텍스트 프롬프트를 기반으로 이미지를 생성합니다.
Required inputs:
prompt (str): A text description of the desired image(s). The maximum length is 1000 characters.
프롬프트(str): 원하는 이미지에 대한 텍스트 설명입니다. 최대 길이는 1000자입니다.
Optional inputs:
n (int): The number of images to generate. Must be between 1 and 10. Defaults to 1.
n (int): 생성할 이미지의 수. 1에서 10 사이여야 합니다. 기본값은 1입니다.
size (str): The size of the generated images. Must be one of "256x256", "512x512", or "1024x1024". Smaller images are faster. Defaults to "1024x1024".
size (str): 생성된 이미지의 크기. "256x256", "512x512" 또는 "1024x1024" 중 하나여야 합니다.이미지가 작으면 더 빠릅니다.. 기본값은 "1024x1024"입니다.
response_format (str): The format in which the generated images are returned. Must be one of "url" or "b64_json". Defaults to "url".
response_format(str): 생성된 이미지가 반환되는 형식입니다. "url" 또는 "b64_json" 중 하나여야 합니다. 기본값은 "url"입니다.
user (str): A unique identifier representing your end-user, which will help OpenAI to monitor and detect abuse.Learn more.
* user(str): OpenAI가 남용을 모니터링하고 감지하는 데 도움이 되는 최종 사용자를 나타내는 고유 식별자입니다.
# create an image

# set the prompt
prompt = "Create picture for a Youtube channel Banner image named AI Madang, express the concept of Artificial Intellegent state-of-the-art technology and the concept of a play ground where human can play happily."

# call the OpenAI API
generation_response = openai.Image.create(
    prompt=prompt,
    n=1,
    size="1024x1024",
    response_format="url",
)

# print response
print(generation_response)
이 코드는 OpenAI 의 openai.Image.create() API를 사용해서 원하는 이미지를 만드는 과정입니다.
일단 내가 원하는 이미지를 prompt 변수에 담습니다.
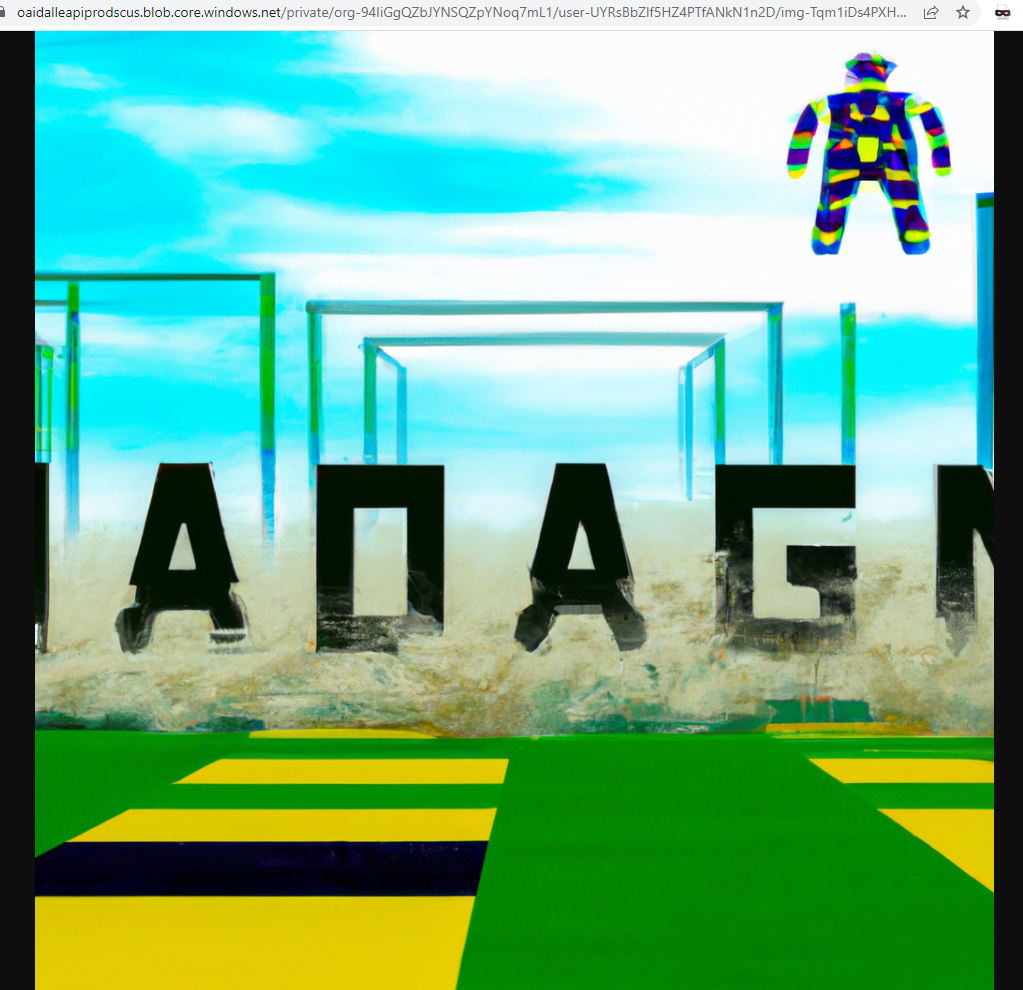
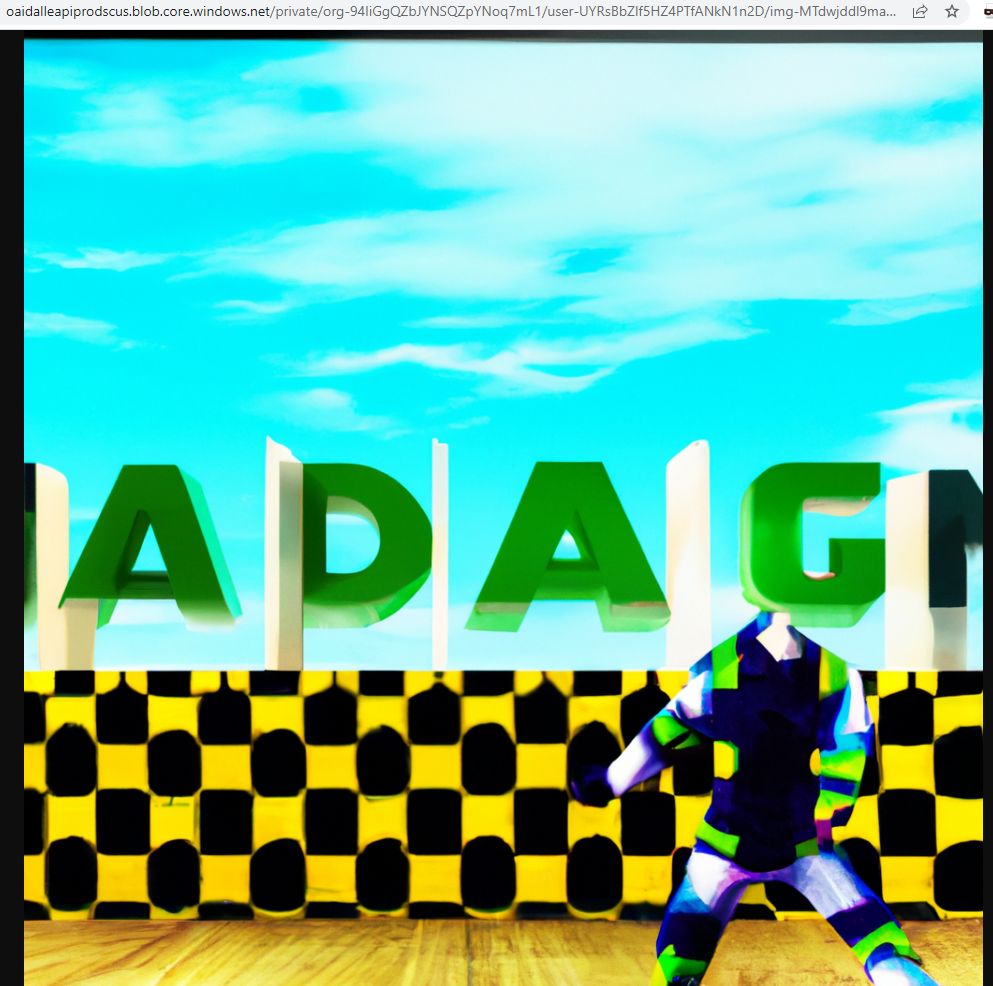
저는 AI Madang 이라는 유투브 채널을 만들려고 하는데 그 채널의 Banner image로 사용할 최첨단 기술과 인간들의 놀이터 느낌이 나는 그림을 만들어 달라고 할 계획입니다.
그 다음은 openai.Image.create() API call 을 하는 부분 입니다. prompt가 들어가고 n은 그림 갯수를 나타내니까 그림은 1개만 만들라는 겁니다. 그리고 size는 1024X1024 입니다. response_format 은 url 이구요.
이 url을 이용해서 requests 모듈로 HTTP를 통해 이미지를 가져 오고 이것을 os 모듈을 이용해서 내 컴퓨터의 원하는 폴더에 저장 하는 작업을 할 겁니다.
그 이미지를 display 할 때 PIL 모듈의 Image 함수를 사용할 거구요.
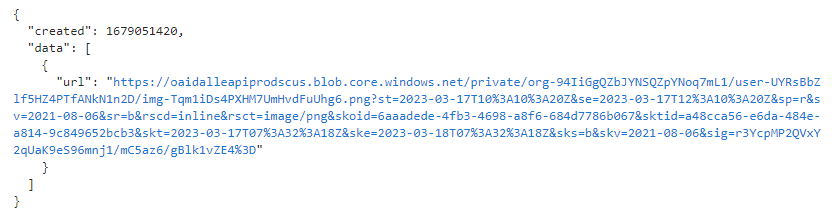
저 같은 경우는 print 결과가 아래와 같이 나왔습니다.
OpenAI 에서 이미지가 생성 돼 있고 그 이미지가 위치해 있는 URL 을 받았습니다.
저 URL을 클릭하면 openai가 생성한 이미지가 나옵니다.
이미지가 마음에 안 들어서 몇 번 반복 했는데..... 여전히 마음에 안 드네요.
아직까지 저런 어려운 내용은 제대로 소화를 못 하는 것 같습니다.
어쨌든 오늘은 DALL-E API 를 공부하는 과정이니 그냥 넘어 가겠습니다.
Note: If you get this error -AttributeError: module 'openai' has no attribute 'Image'- you'll need to upgrade your OpenAI package to the latest version. You can do this by runningpip install openai --upgradein your terminal.
참고: AttributeError: module 'openai' has no attribute 'Image' 오류가 발생하면 OpenAI 패키지를 최신 버전으로 업그레이드해야 합니다. 터미널에서 pip install openai --upgrade를 실행하여 이를 수행할 수 있습니다.
# save the image
generated_image_name = "generated_image2.png"  # any name you like; the filetype should be .png
generated_image_filepath = os.path.join(image_dir, generated_image_name)
generated_image_url = generation_response["data"][0]["url"]  # extract image URL from response
generated_image = requests.get(generated_image_url).content  # download the image

with open(generated_image_filepath, "wb") as image_file:
    image_file.write(generated_image)  # write the image to the file
이제 이 이미지를 로컬에 저장하는 과정입니다.
generated_image2.png 라고 이름을 정할 생각입니다.
generated_image_filepath 라는 변수에 위에서 만들었던 images 라는 폴더 경로와 여기서 만들었던 이미지 파일 이름을 결합 시킵니다.
그리고 이미지가 있는 url 주소를 generated_image_url 에 담습니다.
그리고 requests 모듈의 get() 함수를 사용해서 그 이미지를 위 generated_image_url 로 다운로드 합니다.
user(str): OpenAI가 남용을 모니터링하고 감지하는 데 도움이 되는 최종 사용자를 나타내는 고유 식별자입니다.
# create variations

# call the OpenAI API, using `create_variation` rather than `create`
variation_response = openai.Image.create_variation(
    image=generated_image,  # generated_image is the image generated above
    n=2,
    size="1024x1024",
    response_format="url",
)

# print response
print(variation_response)
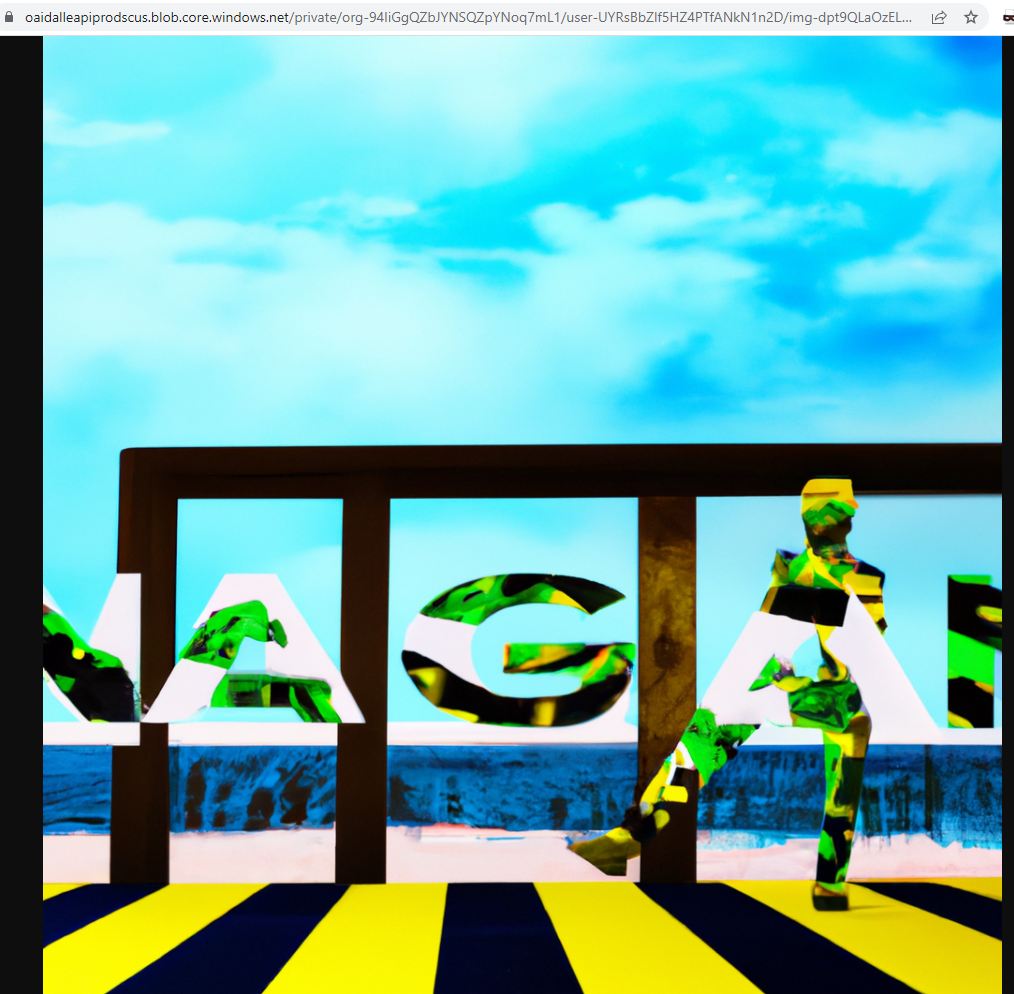
이 코드는 위에서 생성된 이미지를 openai.Image.create_variation() API 를 사용해서 변형 시키는 겁니다.
이미지는 2개를 생성하고 크기는 1024X1024 입니다. response_format 은 url이구요.
프린트한 결과는 아래와 같습니다.
이미지를 2개 만들라고 했더니 URL도 두개가 나오네요.
클릭해 봤더니 다음과 같은 이미지들이 나옵니다.
# save the images
variation_urls = [datum["url"] for datum in variation_response["data"]]  # extract URLs
variation_images = [requests.get(url).content for url in variation_urls]  # download images
variation_image_names = [f"variation_image_{i}.png" for i in range(len(variation_images))]  # create names
variation_image_filepaths = [os.path.join(image_dir, name) for name in variation_image_names]  # create filepaths
for image, filepath in zip(variation_images, variation_image_filepaths):  # loop through the variations
    with open(filepath, "wb") as image_file:  # open the file
        image_file.write(image)  # write the image to the file
다음 코드는 이 두 이미지 파일을 로컬에 save 하는 과정입니다.
위의 과정과 똑 같은데 이미지가 두개 이므로 이것을 처리하기 위해 for 문을 사용했습니다.
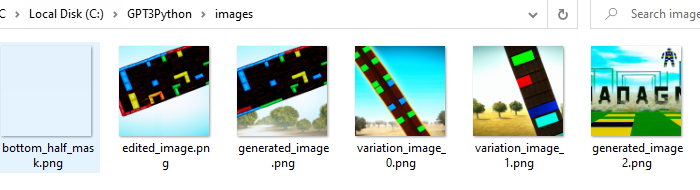
실행 결과 입니다.
내 컴퓨터 안에 두개의 파일이 추가 됐습니다.
깜빡하고 이름을 바꾸지 않았더니 기존에 있는 이미지에 덮어 썼네요.
기존 이미지 두개는 날아갔습니다. 뭐 지금은 공부하는 중이니 상관은 없습니다.
실전에서는 아주 조심해야 겠네요. 자동으로 이름에 surfix 나 prefix 같은 것을 달아 주고 또 기존에 같은 이미지가 있으면 새 이미지에 surfix나 prefix 를 붙여주는 로직을 만들어야 겠죠.
# print the original image
print(generated_image_filepath)
display(Image.open(generated_image_filepath))

# print the new variations
for variation_image_filepaths in variation_image_filepaths:
    print(variation_image_filepaths)
    display(Image.open(variation_image_filepaths))
이 그림을 display 하는 스크립트 입니다.
위에서 한것과 똑 같은데 2개를 display 하기 때문에 for 문을 사용했습니다.
원본 파일을 display 하고 for 문 안에서는 변형 이미지 파일 2개를 display 합니다.
결과는 생성했던 3개 파일 모두 display 됩니다.
Edits
The edit endpoint uses DALL-E to generate a specified portion of an existing image. Three inputs are needed: the image to edit, a mask specifying the portion to be regenerated, and a prompt describing the desired image.
edit endpoint는 DALL-E를 사용하여 기존 이미지의 지정된 부분을 generate합니다. 편집할 이미지, 재생성할 부분을 지정하는 마스크, 원하는 이미지를 설명하는 프롬프트의 세 가지 입력이 필요합니다.
Required inputs:
image (str): The image to edit. Must be a valid PNG file, less than 4MB, and square.
image (str): 편집할 이미지. 유효한 PNG 파일이어야 하며 4MB 미만의 정사각형이어야 합니다.
mask (str): An additional image whose fully transparent areas (e.g. where alpha is zero) indicate whereimageshould be edited. Must be a valid PNG file, less than 4MB, and have the same dimensions asimage.
마스크(str): 완전히 투명한 영역(예: 알파가 0인 경우)이 이미지를 편집해야 하는 위치를 나타내는 추가 이미지입니다. 4MB 미만의 유효한 PNG 파일이어야 하며 이미지와 크기가 같아야 합니다.
prompt (str): A text description of the desired image(s). The maximum length is 1000 characters.
프롬프트(str): 원하는 이미지에 대한 텍스트 설명입니다. 최대 길이는 1000자입니다.
Optional inputs:
n (int): The number of images to generate. Must be between 1 and 10. Defaults to 1.
n (int): 생성할 이미지의 수. 1에서 10 사이여야 합니다. 기본값은 1입니다.
size (str): The size of the generated images. Must be one of "256x256", "512x512", or "1024x1024". Smaller images are faster. Defaults to "1024x1024".
size (str): 생성된 이미지의 크기. "256x256", "512x512" 또는 "1024x1024" 중 하나여야 합니다. 작은 이미지가 더 빠릅니다. 기본값은 "1024x1024"입니다.
response_format (str): The format in which the generated images are returned. Must be one of "url" or "b64_json". Defaults to "url".
response_format(str): 생성된 이미지가 반환되는 형식입니다. "url" 또는 "b64_json" 중 하나여야 합니다. 기본값은 "url"입니다.
user (str): A unique identifier representing your end-user, which will help OpenAI to monitor and detect abuse.Learn more.
user(str): OpenAI가 남용을 모니터링하고 감지하는 데 도움이 되는 최종 사용자를 나타내는 고유 식별자입니다.
Set Edit Area
An edit requires a "mask" to specify which portion of the image to regenerate. Any pixel with an alpha of 0 (transparent) will be regenerated. The code below creates a 1024x1024 mask where the bottom half is transparent.
편집에는 재생성할 이미지 부분을 지정하는 "마스크"가 필요합니다. 알파가 0(투명)인 모든 픽셀이 재생성됩니다. 아래 코드는 아래쪽 절반이 투명한 1024x1024 마스크를 만듭니다.
# create a mask
width = 1024
height = 1024
mask = Image.new("RGBA", (width, height), (0, 0, 0, 1))  # create an opaque image mask

# set the bottom half to be transparent
for x in range(width):
    for y in range(height // 2, height):  # only loop over the bottom half of the mask
        # set alpha (A) to zero to turn pixel transparent
        alpha = 0
        mask.putpixel((x, y), (0, 0, 0, alpha))

# save the mask
mask_name = "bottom_half_mask.png"
mask_filepath = os.path.join(image_dir, mask_name)
mask.save(mask_filepath)
이렇게 생성한 마스크는 아래 반쪽만 알파갑을 준 것입니다. 그냥 눈으로 보면 별 티는 안 납니다.
Perform Edit
Now we supply our image, caption and mask to the API to get 5 examples of edits to our image
이제 이미지, 캡션 및 마스크를 API에 제공하여 이미지 편집의 5가지 예를 얻습니다.
# edit an image

# call the OpenAI API
edit_response = openai.Image.create_edit(
    image=open(generated_image_filepath, "rb"),  # from the generation section
    mask=open(mask_filepath, "rb"),  # from right above
    prompt=prompt,  # from the generation section
    n=1,
    size="1024x1024",
    response_format="url",
)

# print response
print(edit_response)
openai.Image.create_edit() API 를 사용해서 원본 이미지를 편집을 합니다.
결과는 아래와 같습니다.
URL을 클릭을 하니 아래와 같은 이미지가 나옵니다.
# save the image
edited_image_name = "edited_image.png"  # any name you like; the filetype should be .png
edited_image_filepath = os.path.join(image_dir, edited_image_name)
edited_image_url = edit_response["data"][0]["url"]  # extract image URL from response
edited_image = requests.get(edited_image_url).content  # download the image

with open(edited_image_filepath, "wb") as image_file:
    image_file.write(edited_image)  # write the image to the file
이 이미지 파일을 로컬에 저장합니다.
edited_image.png 파일이 생겼습니다.
사실은 기존에 있던 파일에 덮어 쓰기를 했습니다.
보시면 원본파일은 generated_image2.png 에서 아래 절반이 바뀐 것을 보실 수 있습니다.
# print the original image
print(generated_image_filepath)
display(Image.open(generated_image_filepath))

# print edited image
print(edited_image_filepath)
display(Image.open(edited_image_filepath))
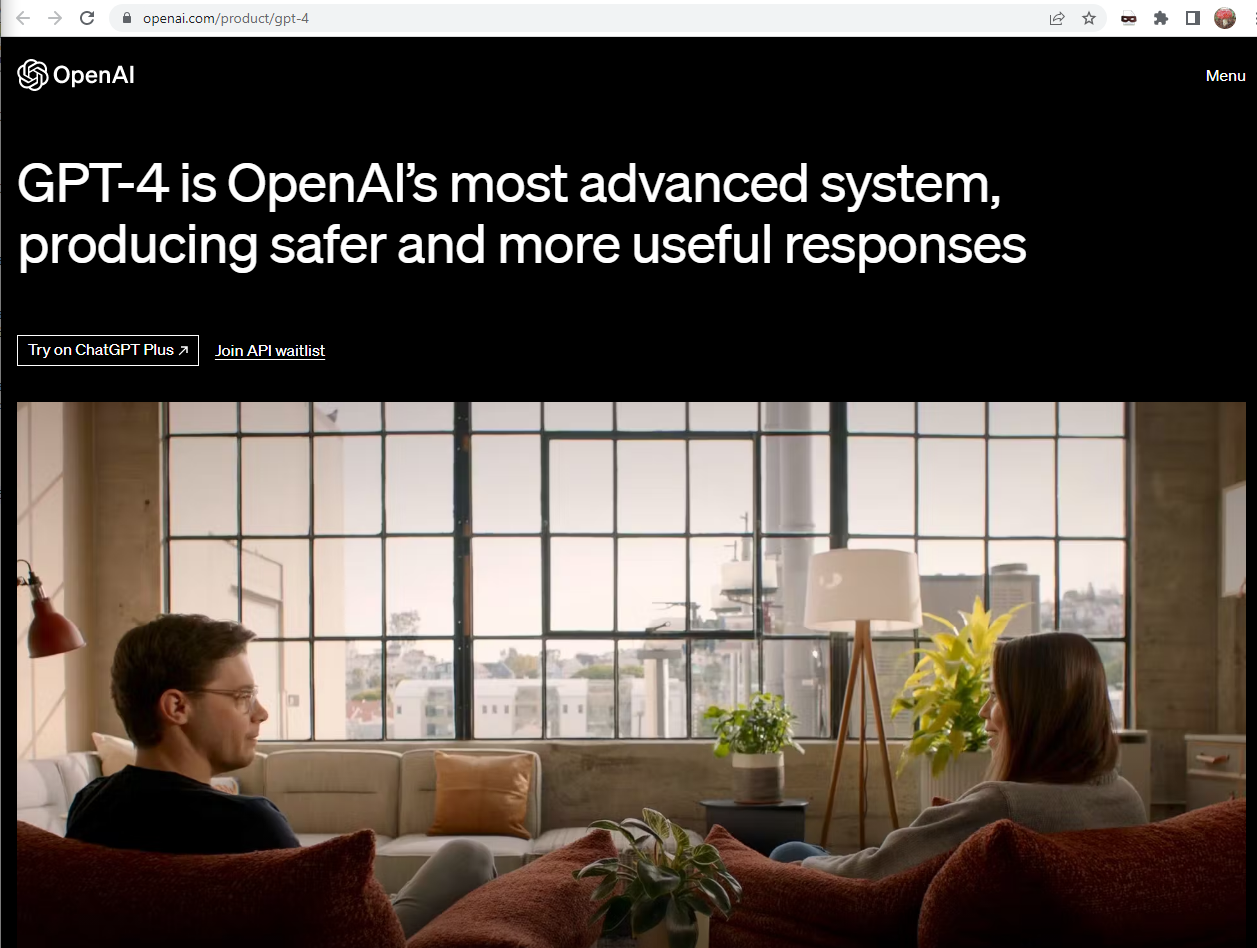
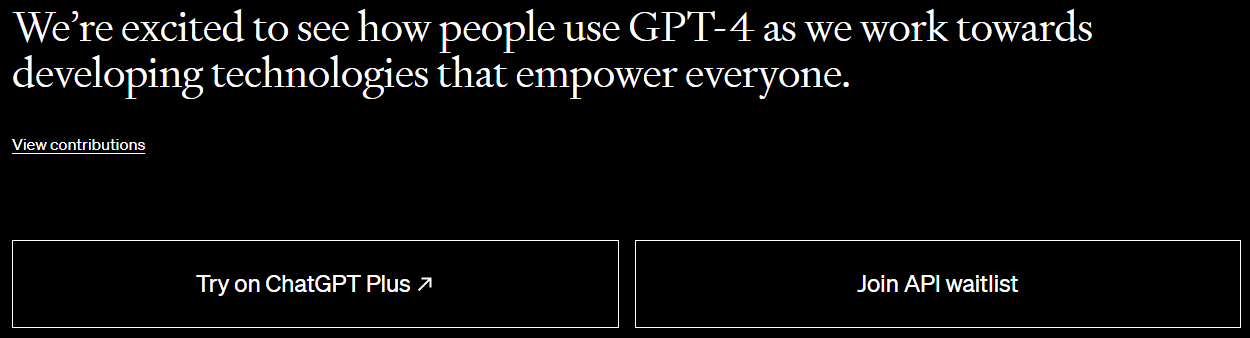
제목에서는 GPT-4 가 Open AI의 가장 진보된 시스템이고 더 안전하고 유용한 답변을 한다고 돼 있습니다.
이 GPT-4 API를 사용하려면 API waitlist에 등록 해야 합니다.
GPT-4는 폭넓은 일반 지식과 문제 해결 능력 덕분에 어려운 문제를 더 정확하게 풀 수 있습니다.
라고 말을 하고 있고 그 아래 GPT-4에서 개선 된 부분들에 대해 나옵니다.
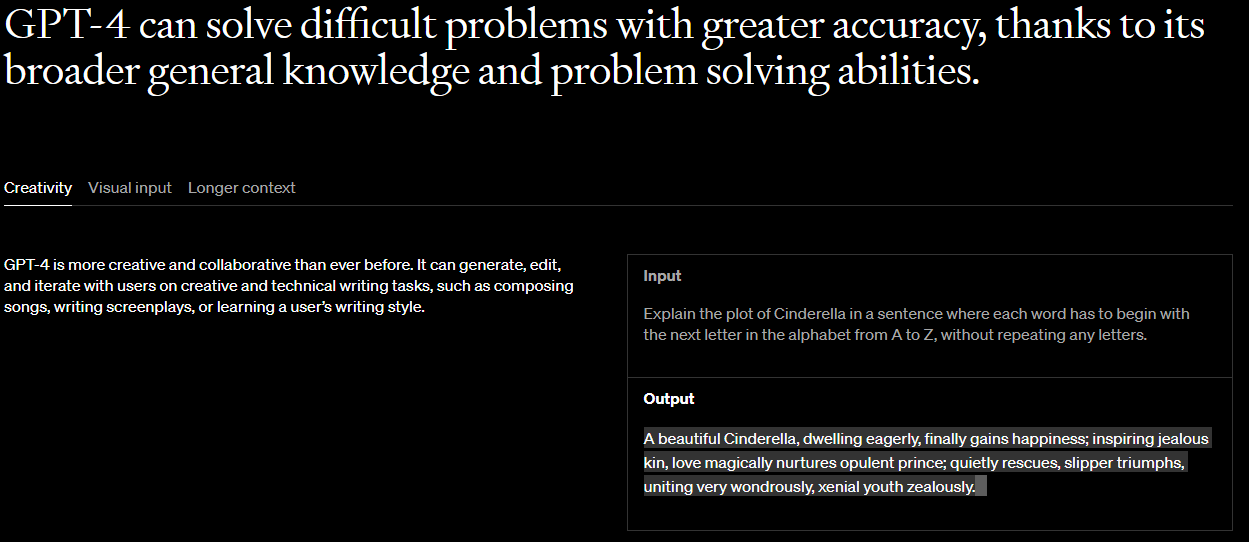
우선 Creativity와 Visual input 그리고 Longer context 이렇게 3개의 탭이 있습니다.
Creativity 부터 볼까요?
GPT4 is more creative and collaborative than ever before. It can generate, edit, and iterate with users on creative and technical writing tasks, such as composing songs, writing screenplays, or learning a user’s writing style.
GPT-4는 그 어느 때보다 창의적이고 협력적입니다. 노래 작곡, 시나리오 작성 또는 사용자의 작문 스타일 학습과 같은 창의적이고 기술적인 작문 작업에서 사용자와 함께 생성, 편집 및 반복할 수 있습니다.
Input Explain the plot of Cinderella in a sentence where each word has to begin with the next letter in the alphabet from A to Z, without repeating any letters.
Output A beautiful Cinderella, dwelling eagerly, finally gains happiness; inspiring jealous kin, love magically nurtures opulent prince; quietly rescues, slipper triumphs, uniting very wondrously, xenial youth zealously.
input으로 아래와 같은 요구를 했습니다.
문자를 반복하지 않고 A부터 Z까지 알파벳의 다음 문자로 각 단어가 시작되어야 하는 문장으로 신데렐라의 줄거리를 설명합니다.
그랬더니 신데렐라의 줄거리를 진짜 A 부터 Z까지 시작하는 단어들을 차례대로 사용해서 설명을 했습니다.
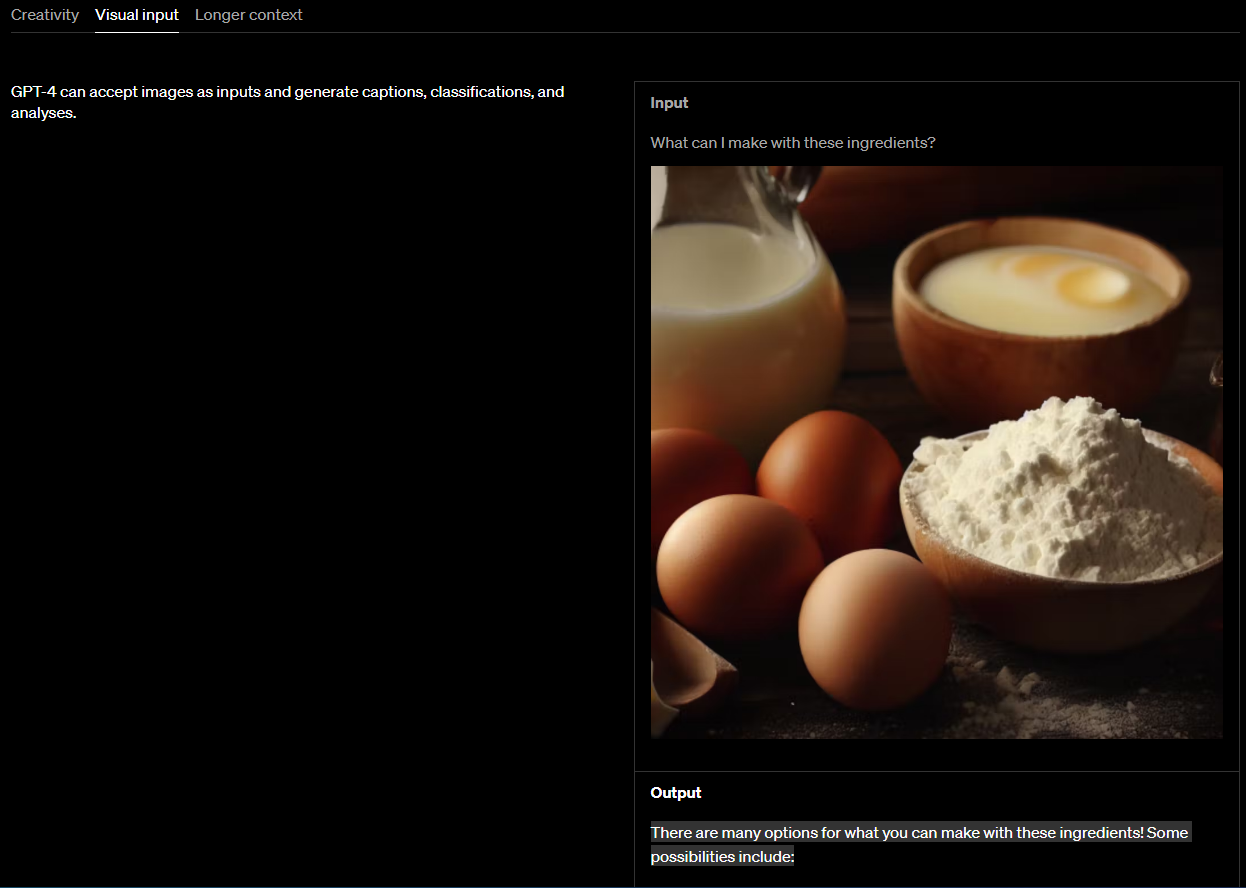
두번째는 Visual input 분야 입니다.
이미지 파일을 주고 이 재료들을 가지고 무엇을 만들 수 있냐고 물었더니...
Output There are many options for what you can make with these ingredients! Some possibilities include:
- Pancakes or waffles - Crepes - French toast - Omelette or frittata - Quiche - Custard or pudding - Cake or cupcakes - Muffins or bread- Cookies or biscuits
These are just a few examples, but the possibilities are endless! few examples, but the possibilities are endless!
이런 답변을 했네요. 그림만 보고 그 안에 있는 재료들을 판단해서 거기에 맞는 가능한 요리들을 보여 줬습니다.
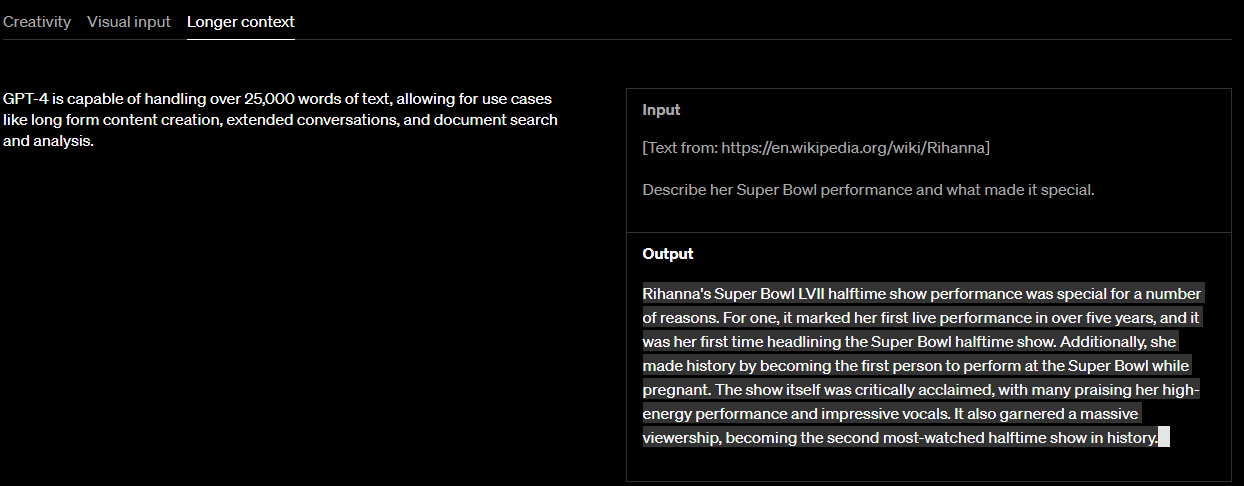
그 다음은 아주 긴 input 값을 받을 수 있다는 내용입니다.
GPT-4 is capable of handling over 25,000 words of text, allowing for use cases like long form content creation, extended conversations, and document search and analysis.
GPT-4는 25,000단어 이상의 텍스트를 처리할 수 있어 긴 형식의 콘텐츠 생성, 확장된 대화, 문서 검색 및 분석과 같은 사용 사례를 허용합니다.
예제로는 리하나의 위키피디아의 내용을 입력값으로 주고 이번 Super Bowl 공연에 대해 물어보고 GPT-4 가 대답하는 내용이 있습니다.
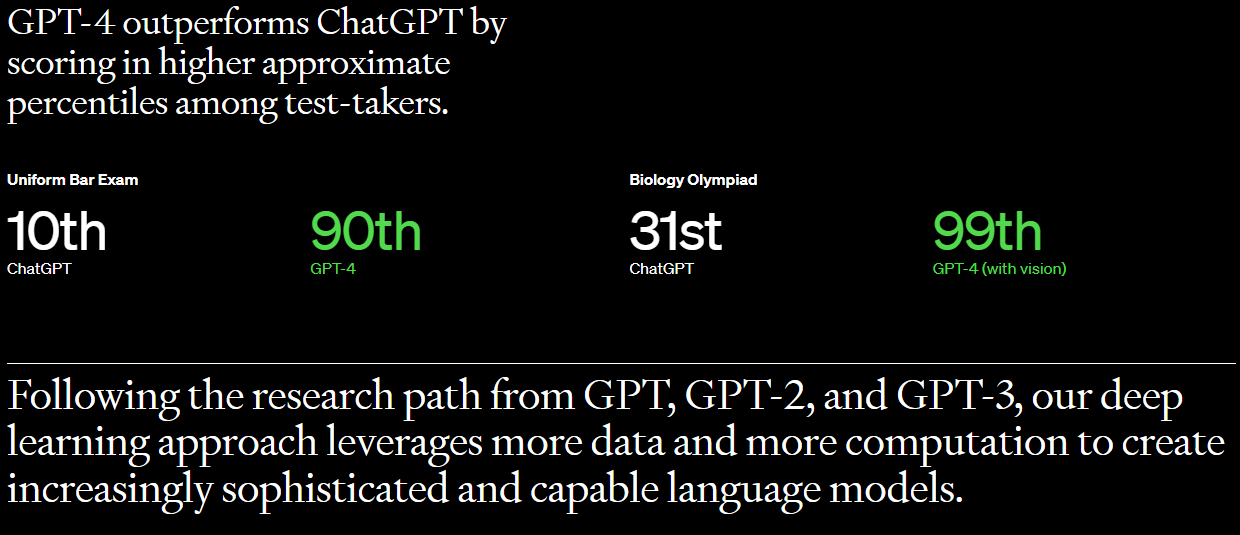
그 다음에는 GPT-4 는 작년 말에 발표 되서 센세이션을 일으켰던 ChatGPT 보다 더 성능이 좋다는 내용이 있습니다.
Uniform Bar Exam 과 Biology Olympiad 라는 테스트 경진 대회에서 GPT-4 가 ChatGPT 보다 더 높은 점수를 기록했다는 내용 입니다.
참고로 ChatGPT는 GPT-3.5 버전입니다.
밑의 설명은 GPT가 버전 2, 3, 3.5, 4 이렇게 진행돼 오면서 점점 더 정교하고 유능한 모델이 되어 가고 있다는 내용입니다.
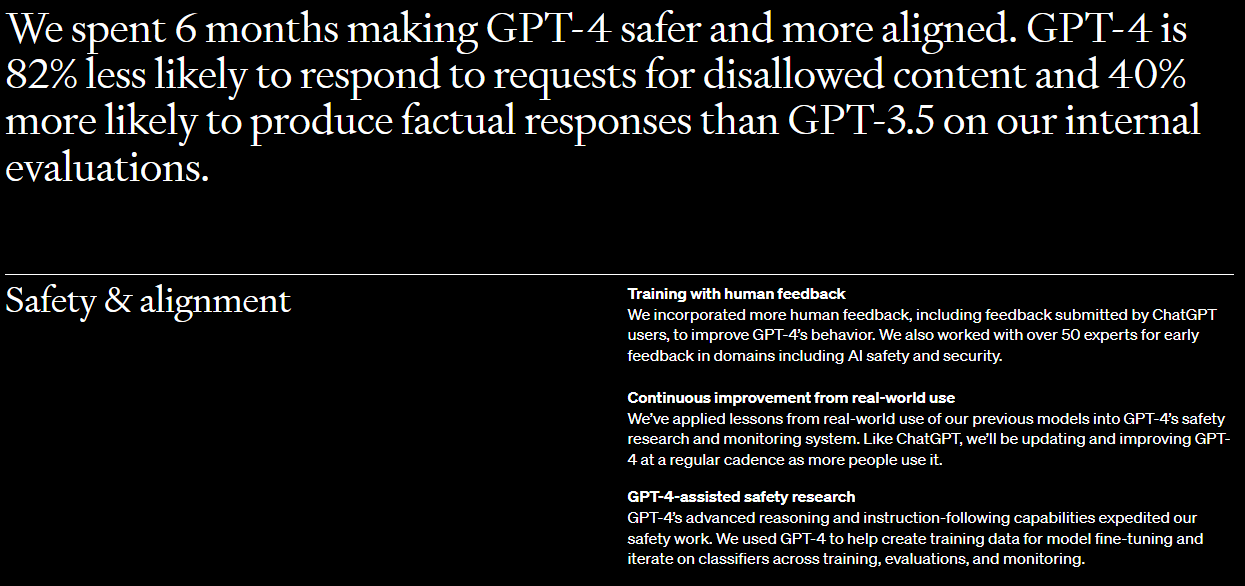
We spent 6 months making GPT-4 safer and more aligned. GPT4 is 82% less likely to respond to requests for disallowed content and 40% more likely to produce factual responses than GPT-3.5 on our internal evaluations.
우리는 6개월 동안 GPT-4를 더 안전하고 더 잘 정렬되도록 만들었습니다. GPT-4는 허용되지 않는 콘텐츠에 대한 요청에 응답할 가능성이 82% 적고 내부 평가에서 GPT-3.5보다 사실에 입각한 응답을 할 가능성이 40% 더 높습니다.
Safety & alignment
Training with human feedback We incorporated more human feedback, including feedback submitted by ChatGPT users, to improve GPT-4’s behavior. We also worked with over 50 experts for early feedback in domains including AI safety and security.
GPT-4의 동작을 개선하기 위해 ChatGPT 사용자가 제출한 피드백을 포함하여 더 많은 사람의 피드백을 통합했습니다. 또한 AI 안전 및 보안을 포함한 도메인의 초기 피드백을 위해 50명 이상의 전문가와 협력했습니다.
Continuous improvement from real-world use We’ve applied lessons from real-world use of our previous models into GPT-4’s safety research and monitoring system. Like ChatGPT, we’ll be updating and improving GPT-4 at a regular cadence as more people use it.
우리는 이전 모델의 실제 사용에서 얻은 교훈을 GPT-4의 안전 연구 및 모니터링 시스템에 적용했습니다. ChatGPT와 마찬가지로 더 많은 사람들이 사용함에 따라 정기적으로 GPT-4를 업데이트하고 개선할 것입니다.
GPT-4-assisted safety research GPT-4’s advanced reasoning and instruction-following capabilities expedited our safety work. We used GPT-4 to help create training data for model fine-tuning and iterate on classifiers across training, evaluations, and monitoring.
GPT-4의 고급 추론 및 지시에 따른 기능은 우리의 안전 작업을 가속화했습니다. GPT-4를 사용하여 모델 미세 조정을 위한 훈련 데이터를 생성하고 훈련, 평가 및 모니터링 전반에 걸쳐 분류기를 반복했습니다.
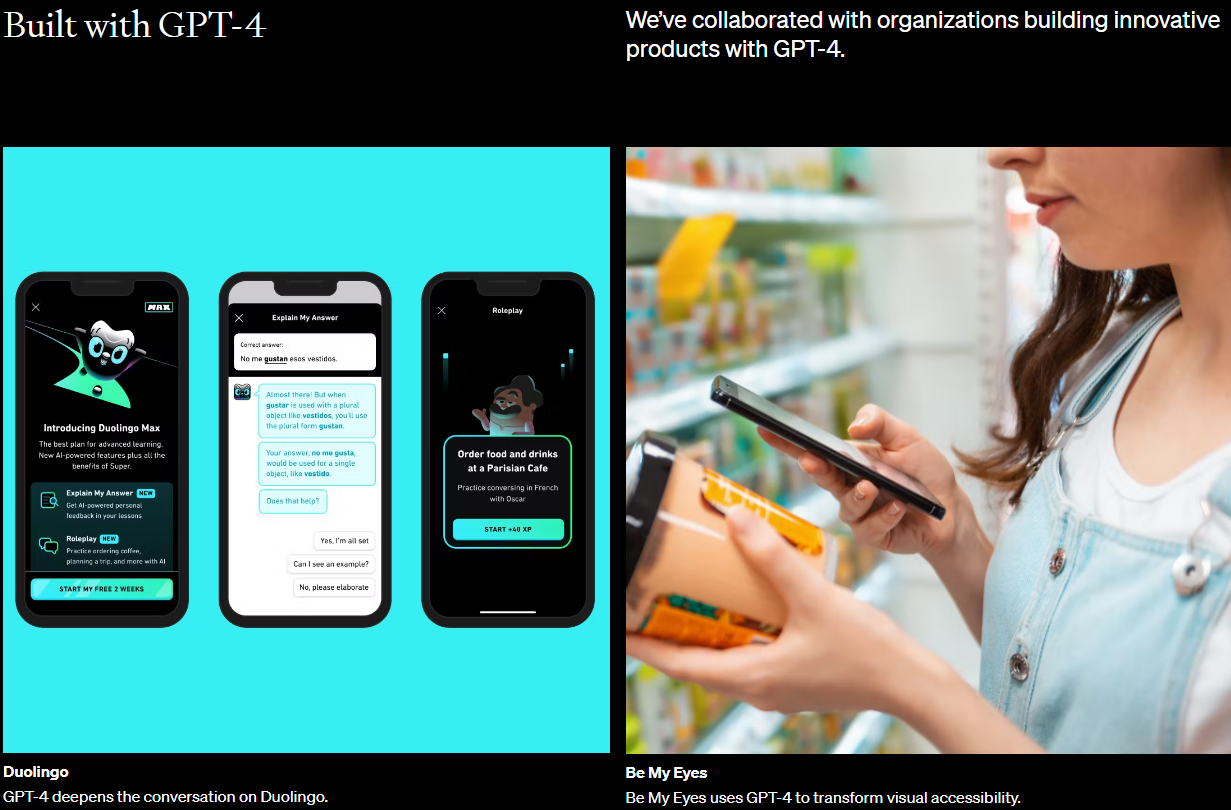
그 다음 아래 부터는 실제 이 GPT-4를 사용해서 제품을 생산 판매 하고 있는 회사와 그 제품을 나열 했습니다.
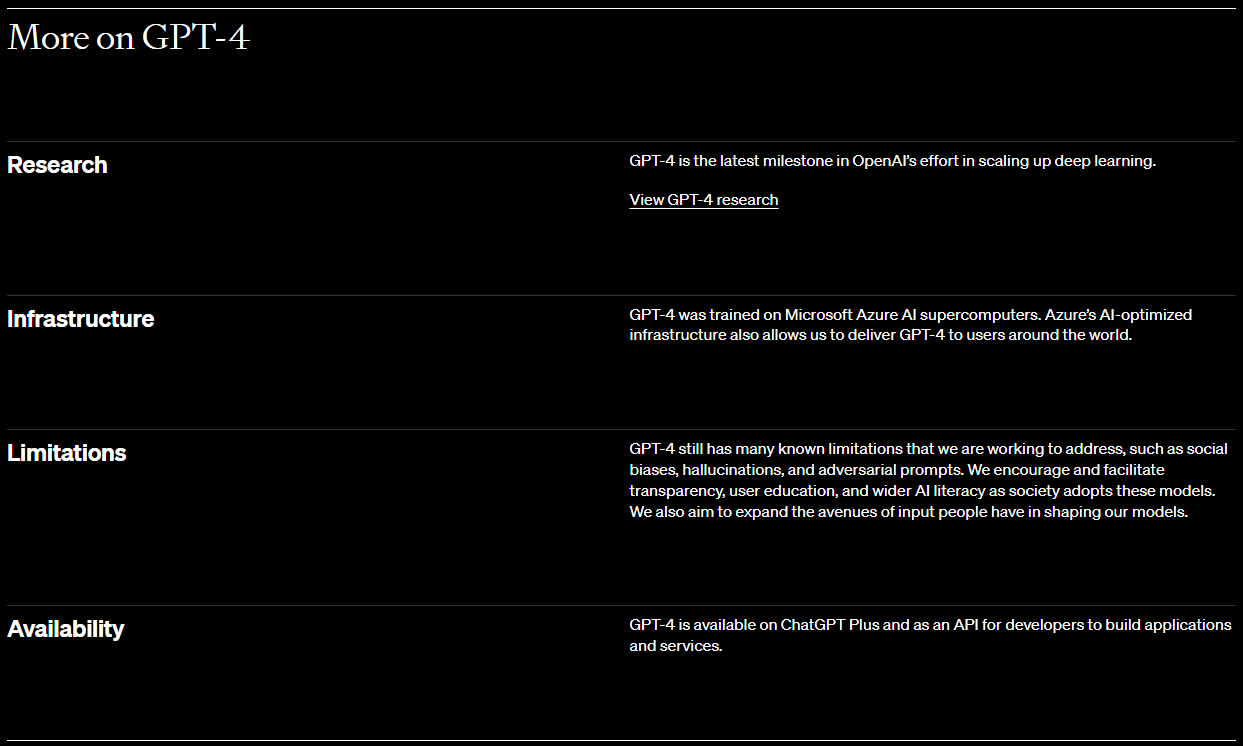
GPT-4는 Microsoft Azure AI 슈퍼컴퓨터에서 교육을 받았습니다. Azure의 AI 최적화 인프라를 통해 전 세계 사용자에게 GPT-4를 제공할 수도 있습니다.
Limitations
GPT-4에는 사회적 편견, 환각, 적대적 프롬프트와 같이 우리가 해결하기 위해 노력하고 있는 많은 알려진 한계가 있습니다. 우리는 사회가 이러한 모델을 채택함에 따라 투명성, 사용자 교육 및 광범위한 AI 활용 능력을 장려하고 촉진합니다. 우리는 또한 우리 모델을 형성하는 데 사람들이 입력할 수 있는 방법을 확장하는 것을 목표로 합니다.
Availability
GPT-4는 ChatGPT Plus에서 사용할 수 있으며 개발자가 애플리케이션 및 서비스를 구축하기 위한 API로 사용할 수 있습니다.
여기서는 GPT-4에 대해 설명하는데 모든 단어를 G로 시작하는 단어를 사용해서 설명해 봐.. 뭐 이런 작업도 보여 주고 시를 쓰는 장면도 보여 주고 하더라구요. GPT-3 에서는 하지 못했던 좀 더 성장한 GPT 기능을 보여 줬구요.
뭐니뭐니해서 GPT-4에서 가장 달라진 점은 Language 이외의 멀티미디어 기능 지원등이 있었습니다.
GPT-4 가 이미지를 인식해서 그 이미지에 대한 설명도 하고 작업도 하고 그러더라구요.
자세한 사항은 위 유투브 클립을 한번 보세요.
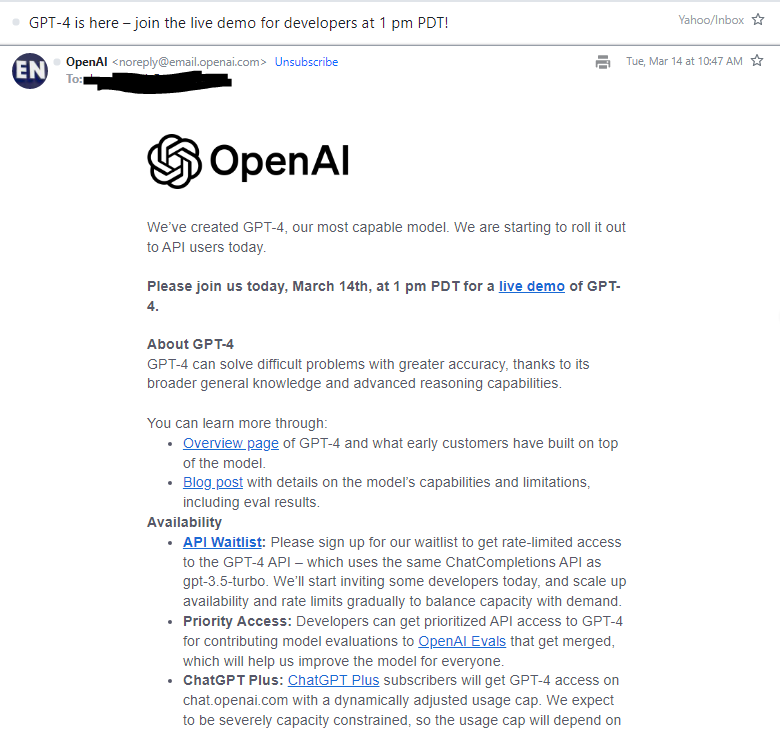
이메일 내용은 아래와 같았습니다.
We’ve created GPT-4, our most capable model. We are starting to roll it out to API users today.
Please join us today, March 14th, at 1 pm PDT for a live demo of GPT-4.
우리는 GPT-4를 만들었습니다. 가장 유능한 모델이죠. 우리는 오늘부터 API 사용자들에게 이 모델을 배포하기 시작했습니다.
About GPT-4
GPT-4 can solve difficult problems with greater accuracy, thanks to its broader general knowledge and advanced reasoning capabilities.
GPT-4는 광범위한 일반 지식과 고급 추론 기능 덕분에 어려운 문제를 더 정확하게 풀 수 있습니다.
You can learn more through: 아래 글들을 통해서 이를 배울 수 있습니다.
Overview pageof GPT-4 and what early customers have built on top of the model.
GPT-4의 개요 페이지 - 초기 고객이 모델 위에 구축한 것.
Blog postwith details on the model’s capabilities and limitations, including eval results.
평가 결과를 포함하여 모델의 기능 및 제한 사항에 대한 세부 정보가 포함된 블로그 게시물
Availability
API Waitlist:Please sign up for our waitlist to get rate-limited access to the GPT-4 API – which uses the same ChatCompletions API as gpt-3.5-turbo. We’ll start inviting some developers today, and scale up availability and rate limits gradually to balance capacity with demand.
API 대기자 명단: gpt-3.5-turbo와 동일한 ChatCompletions API를 사용하는 GPT-4 API에 대한 rate-limited 액세스 권한을 얻으려면 대기자 명단에 등록하십시오. 오늘 일부 개발자를 초대하고 용량과 수요의 균형을 맞추기 위해 가용성 및 rate-limited을 점진적으로 확장할 것입니다.
Priority Access:Developers can get prioritized API access to GPT-4 for contributing model evaluations toOpenAI Evalsthat get merged, which will help us improve the model for everyone.
Priority Access: 개발자는 병합되는 OpenAI 평가에 대한 모델 평가에 기여하기 위해 GPT-4에 대한 prioritized API 액세스를 얻을 수 있으며, 이는 모든 사람을 위해 모델을 개선하는 데 도움이 됩니다.
ChatGPT Plus:ChatGPT Plussubscribers will get GPT-4 access on chat.openai.com with a dynamically adjusted usage cap. We expect to be severely capacity constrained, so the usage cap will depend on demand and system performance. API access will still be through the waitlist.
ChatGPT Plus: ChatGPT Plus 가입자는 chat.openai.com에서 동적으로 조정된 사용 한도와 함께 GPT-4 액세스 권한을 얻습니다. 용량이 심각하게 제한될 것으로 예상되므로 사용량 한도는 수요와 시스템 성능에 따라 달라집니다. API 액세스는 여전히 대기자 명단을 통해 이루어집니다.
API Pricing
gpt-4with an 8K context window (about 13 pages of text) will cost$0.03per 1K prompt tokens, and$0.06per 1K completion tokens.
Please join us for alive demoof GPT-4 at 1pm PDT today, where Greg Brockman (co-founder & President of OpenAI) will showcase GPT-4’s capabilities and the future of building with the OpenAI API.
오늘 오후 1시(PDT) GPT-4 라이브 데모에 참여하세요. Greg Brockman(OpenAI 공동 창립자 겸 사장)이 GPT-4의 기능과 OpenAI API로 구축하는 미래를 선보일 예정입니다.
Error: No API key provided. You can set your API key in code using 'openai.api_key = <API-KEY>', or you can set the environment variable OPENAI_API_KEY=<API-KEY>). If your API key is stored in a file, you can point the openai module at it with 'openai.api_key_path = <PATH>'. You can generate API keys in the OpenAI web interface. See https://onboard.openai.com for details, or email support@openai.com if you have any questions.
오류: API 키가 제공되지 않았습니다. 'openai.api_key = <API-KEY>'를 사용하여 코드에서 API 키를 설정하거나 환경 변수 OPENAI_API_KEY=<API-KEY>)를 설정할 수 있습니다. API 키가 파일에 저장되어 있는 경우 'openai.api_key_path = <PATH>'로 openai 모듈을 가리킬 수 있습니다. OpenAI 웹 인터페이스에서 API 키를 생성할 수 있습니다. 자세한 내용은 https://onboard.openai.com을 참조하거나 질문이 있는 경우 support@openai.com으로 이메일을 보내십시오.
해결 방법이 몇가지 나오는데 저 같은 경우는 환경변수를 세팅 해서 해결 했습니다.
System Properties에서 Environment Variables 버튼을 클릭합니다.
그 다음 밑에 있는 패널인 System variables에서 New 버튼을 클릭합니다.
이렇게 환경 변수에 OPENAI_API_KEY 를 세팅 한 후 모두 OK 버튼을 눌러서 닫습니다.
이렇게 하면 OpenAI CLI 를 사용할 수 있게 됩니다.
사용하기 전에 기존에 실행중이던 JupyterNotebook 이나 JupyterLab local server 는 shutdown 하시고 윈도우즈 Command Prompt 창도 닫습니다.
그리고 새로운 윈도우즈 명령창 (Command Prompt) 에서 Jupyter 를 실행하신 다음에 사용하시면 됩니다.
This document is a draft of a guide that will be added to the next revision of the OpenAI documentation. If you have any feedback, feel free to let us know.
이 문서는 OpenAI 문서의 다음 개정판에 추가될 가이드의 초안입니다. 의견이 있으시면 언제든지 알려주십시오.
One note: this doc shares metrics for text-davinci-002, but that model is not yet available for fine-tuning.
참고: 이 문서는 text-davinci-002에 대한 메트릭을 공유하지만 해당 모델은 아직 미세 조정에 사용할 수 없습니다.
Best practices for fine-tuning GPT-3 to classify text
GPT-3’s understanding of language makes it excellent at text classification. Typically, the best way to classify text with GPT-3 is to fine-tune GPT-3 on training examples. Fine-tuned GPT-3 models can meet and exceed state-of-the-art records on text classification benchmarks.
GPT-3의 언어 이해력은 텍스트 분류에 탁월합니다. 일반적으로 GPT-3으로 텍스트를 분류하는 가장 좋은 방법은 training examples 로 GPT-3을 fine-tune하는 것입니다. Fine-tuned GPT-3 모델은 텍스트 분류 벤치마크에서 최신 기록을 충족하거나 능가할 수 있습니다.
This article shares best practices for fine-tuning GPT-3 to classify text.
이 문서에서는 GPT-3을 fine-tuning 하여 텍스트를 분류하는 모범 사례를 공유합니다.
The OpenAI fine-tuning guide explains how to fine-tune your own custom version of GPT-3. You provide a list of training examples (each split into prompt and completion) and the model learns from those examples to predict the completion to a given prompt.
OpenAIfine-tuning guide는 사용자 지정 GPT-3 버전을 fine-tune하는 방법을 설명합니다. 교육 예제 목록(각각 prompt와 completion로 분할)을 제공하면 모델이 해당 예제에서 학습하여 주어진 prompt에 대한 completion를 예측합니다.
{"prompt": "dog toy -->", "completion": " inedible"}
During fine-tuning, the model reads the training examples and after each token of text, it predicts the next token. This predicted next token is compared with the actual next token, and the model’s internal weights are updated to make it more likely to predict correctly in the future. As training continues, the model learns to produce the patterns demonstrated in your training examples.
fine-tuning 중에 모델은 교육 예제를 읽고 텍스트의 각 토큰을 받아들여 그 다음 토큰이 무엇이 올 지 예측을 하게 됩니다. 이 예측된 다음 토큰은 실제 다음 토큰과 비교되고 모델의 내부 가중치가 업데이트되어 향후에 올바르게 예측할 가능성이 높아집니다. 학습이 계속됨에 따라 모델은 학습 예제에 표시된 패턴을 생성하는 방법을 배웁니다.
After your custom model is fine-tuned, you can call it via the API to classify new examples:
사용자 지정 모델이 fine-tuned된 후 API를 통해 호출하여 새 예제를 분류할 수 있습니다.
As ‘ edible’ is 1 token and ‘ inedible’ is 3 tokens, in this example, we request just one completion token and count ‘ in’ as a match for ‘ inedible’.
'edible'은 토큰 1개이고 'inedible'은 토큰 3개이므로 이 예에서는 완료 토큰 하나만 요청하고 'inedible'에 대한 일치 항목으로 'in'을 계산합니다.
Example API call to get probabilities for the 5 most likely tokens
가장 유사한 토큰 5개에 대한 probabilities를 얻기 위한 API call 예제
api_response = openai.Completion.create(
    model="{fine-tuned model goes here, without brackets}",
    prompt="toothpaste -->",
    temperature=0,
    max_tokens=1,
    logprobs=5
)
dict_of_logprobs = api_response['choices'][0]['logprobs']['top_logprobs'][0].to_dict()
dict_of_probs = {k: 2.718**v for k, v in dict_of_logprobs.items()}
Training data
The most important determinant of success is training data.
Fine-tuning 성공의 가장 중요한 결정 요인은 학습 데이터입니다.
Your training data should be:
학습 데이터는 다음과 같아야 합니다.
Large (ideally thousands or tens of thousands of examples)
대규모(이상적으로는 수천 또는 수만 개의 예)
High-quality (consistently formatted and cleaned of incomplete or incorrect examples)
고품질(불완전하거나 잘못된 예를 일관되게 형식화하고 정리)
Representative (training data should be similar to the data upon which you’ll use your model)
대표(학습 데이터는 모델을 사용할 데이터와 유사해야 함)
Sufficiently specified (i.e., containing enough information in the input to generate what you want to see in the output)
충분히 특정화 되어야 함 (즉, 출력에서 보고 싶은 것을 생성하기 위해 입력에 충분한 정보 포함)
If you aren’t getting good results, the first place to look is your training data. Try following the tips below about data formatting, label selection, and quantity of training data needed. Also review our list of common mistakes.
좋은 결과를 얻지 못한 경우 가장 먼저 살펴봐야 할 곳은 훈련 데이터입니다. 데이터 형식, 레이블 선택 및 필요한 학습 데이터 양에 대한 아래 팁을 따르십시오. common mistakes 목록도 검토하십시오.
How to format your training data
Prompts for a fine-tuned model do not typically need instructions or examples, as the model can learn the task from the training examples. Including instructions shouldn’t hurt performance, but the extra text tokens will add cost to each API call.
모델이 교육 예제에서 작업을 학습할 수 있으므로 fine-tuned 모델에 대한 프롬프트에는 일반적으로 지침(instruction)이나 예제가 필요하지 않습니다. 지침(instruction)을 포함해도 성능이 저하되지는 않지만 추가 텍스트 토큰으로 인해 각 API 호출에 비용이 추가됩니다.
Prompt
Tokens
Recommended
“burger -->"
3
✅
“Label the following item as either edible or inedible.
Item: burger Label:”
20
❌
“Item: cake Category: edible
Item: pan Category: inedible
Item: burger Category:”
26
❌
Instructions can still be useful when fine-tuning a single model to do multiple tasks. For example, if you train a model to classify multiple features from the same text string (e.g., whether an item is edible or whether it’s handheld), you’ll need some type of instruction to tell the model which feature you want labeled.
지침(instruction)은 여러 작업을 수행하기 위해 단일 모델을 fine-tuning할 때 여전히 유용할 수 있습니다. 예를 들어, 동일한 텍스트 문자열에서 여러 기능을 분류하도록 모델을 훈련하는 경우(예: 항목이 먹을 수 있는지 또는 휴대 가능한지 여부) 라벨을 지정하려는 기능을 모델에 알려주는 일종의 지침이 필요합니다.
Example training data:
Prompt
Completion
“burger --> edible:”
“ yes”
“burger --> handheld:”
“ yes”
“car --> edible:”
“ no”
“car --> handheld:”
“ no”
Example prompt for unseen example:
Prompt
Completion
“cheese --> edible:”
???
Note that for most models, the prompt + completion for each example must be less than 2048 tokens (roughly two pages of text). For text-davinci-002, the limit is 4000 tokens (roughly four pages of text).
대부분의 모델에서 각 예제에 대한 prompt + completion은 2048 토큰(약 2페이지의 텍스트) 미만이어야 합니다. text-davinci-002의 경우 한도는 4000개 토큰(약 4페이지의 텍스트)입니다.
Separator sequences
For classification, end your text prompts with a text sequence to tell the model that the input text is done and the classification should begin. Without such a signal, the model may append additional invented text before appending a class label, resulting in outputs like:
분류를 위해 입력 텍스트가 완료되고 분류가 시작되어야 함을 모델에 알리는 텍스트 시퀀스로 텍스트 프롬프트를 종료합니다. 이러한 신호가 없으면 모델은 클래스 레이블을 appending하기 전에 추가 invented text 를 append하여 다음과 같은 결과를 얻을 수 있습니다.
burger edible (accurate)
burger and fries edible (not quite was asked for)
burger-patterned novelty tie inedible (inaccurate)
burger burger burger burger (no label generated)
Examples of separator sequences
Prompt
Recommended
“burger”
❌
“burger -->”
✅
“burger
###
“
✅
“burger >>>”
✅
“burger
Label:”
✅
Be sure that the sequence you choose is very unlikely to otherwise appear in your text (e.g., avoid ‘###’ or ‘->’ when classifying Python code). Otherwise, your choice of sequence usually doesn’t matter much.
선택한 sequence가 텍스트에 다른 방법으로 사용되는 부호인지 확인하세요. (예: Python 코드를 분류할 때 '###' 또는 '->'를 피하십시오). 그러한 경우가 아니라면 시퀀스 선택은 일반적으로 그다지 중요하지 않습니다.
How to pick labels
One common question is what to use as class labels.
일반적인 질문 중 하나는 클래스 레이블로 무엇을 사용할 것인가입니다.
In general, fine-tuning can work with any label, whether the label has semantic meaning (e.g., “ edible”) or not (e.g., “1”). That said, in cases with little training data per label, it’s possible that semantic labels work better, so that the model can leverage its knowledge of the label’s meaning.
일반적으로 fine-tuning은 레이블에 semantic 의미(예: "식용")가 있든 없든(예: "1") 모든 레이블에서 작동할 수 있습니다. 즉, 레이블당 학습 데이터가 적은 경우 시맨틱 레이블이 더 잘 작동하여 모델이 레이블의 의미에 대한 지식을 활용할 수 있습니다.
When convenient, we recommend single-token labels. You can check the number of tokens in a string with the OpenAI tokenizer. Single-token labels have a few advantages:
가능하면 단일 토큰 레이블을 사용하는 것이 좋습니다. OpenAI 토크나이저를 사용하여 문자열의 토큰 수를 확인할 수 있습니다. 단일 토큰 레이블에는 다음과 같은 몇 가지 장점이 있습니다.
Lowest cost . 적은 비용
Easier to get their probabilities, which are useful for metrics confidence scores, precision, recall
메트릭 신뢰도 점수, 정밀도, recall에 유용한 확률을 쉽게 얻을 수 있습니다.
No hassle from specifying stop sequences or post-processing completions in order to compare labels of different length
다른 길이의 레이블을 비교하기 위해 중지 시퀀스 또는 후처리 완료를 지정하는 번거로움이 없습니다.
Example labels
Prompt
Label
Recommended
“burger -->”
“ edible”
✅
“burger -->”
“ 1”
✅
“burger -->”
“ yes”
✅
“burger -->”
“ A burger can be eaten”
❌ (but still works)
One useful fact: all numbers <500 are single tokens. 500 이하는 single token입니다.
If you do use multi-token labels, we recommend that each label begin with a different token. If multiple labels begin with the same token, an unsure model might end up biased toward those labels due to greedy sampling.
multi-token label을 사용하는 경우 각 레이블이 서로 다른 토큰으로 시작하는 것이 좋습니다. 여러 레이블이 동일한 토큰으로 시작하는 경우 greedy 샘플링으로 인해 불확실한 모델이 해당 레이블로 편향될 수 있습니다.
How much training data do you need
How much data you need depends on the task and desired performance.
필요한 데이터의 양은 작업과 원하는 성능에 따라 다릅니다.
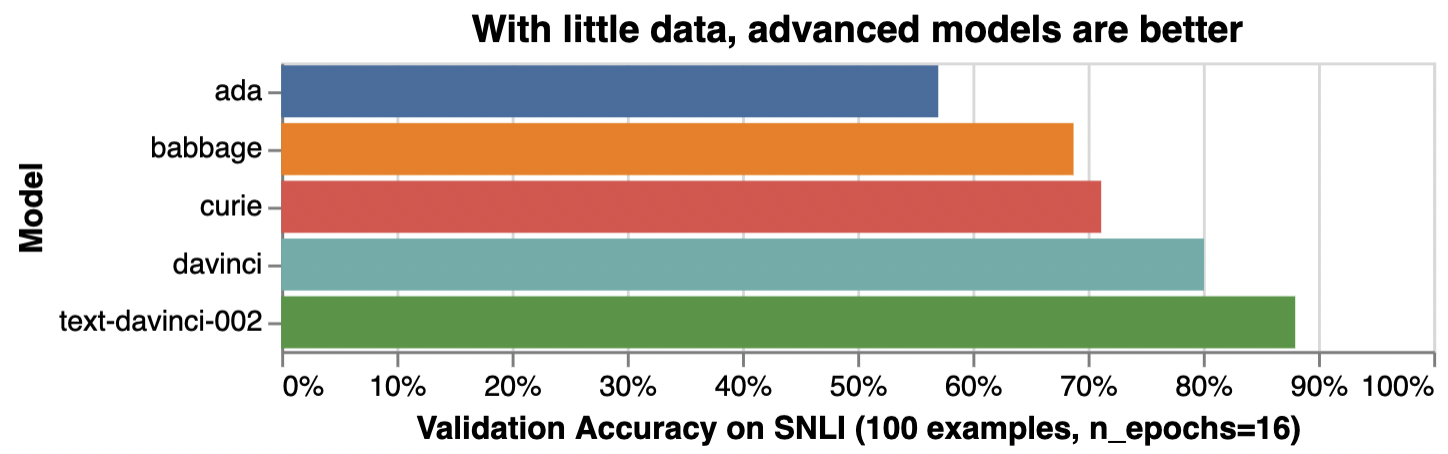
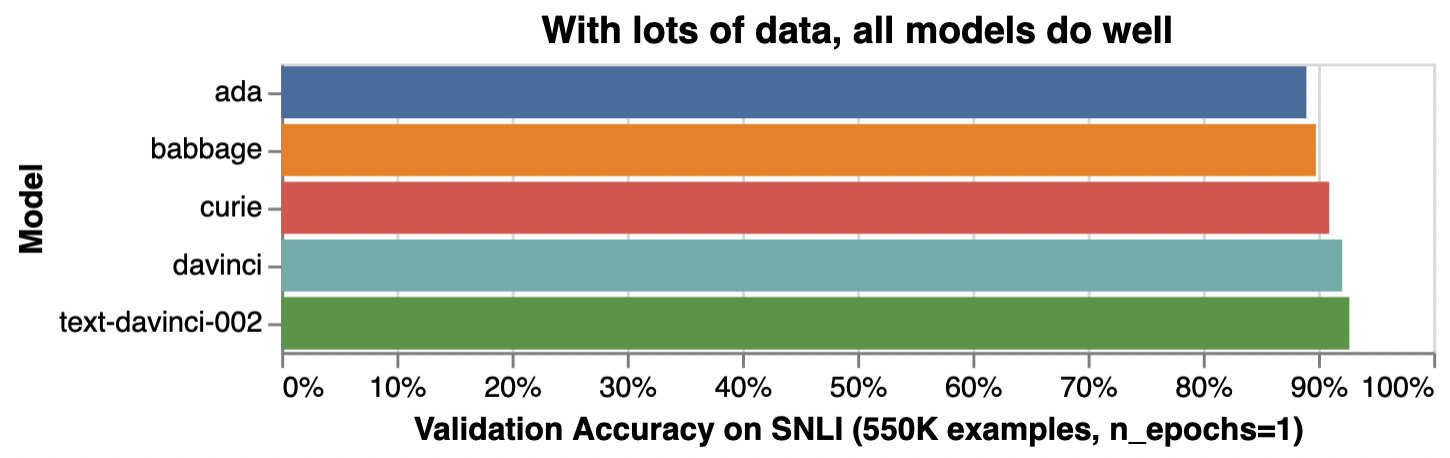
Below is an illustrative example of how adding training examples improves classification accuracy.
아래는 학습 예제를 추가하여 분류 정확도를 향상시키는 방법을 보여주는 예시입니다.
Illustrative examples of text classification performance on the Stanford Natural Language Inference (SNLI) Corpus, in which ordered pairs of sentences are classified by their logical relationship: either contradicted, entailed (implied), or neutral. Default fine-tuning parameters were used when not otherwise specified.
SNLI(Stanford Natural Language Inference) 코퍼스의 텍스트 분류 성능에 대한 예시로, 정렬된 문장 쌍이 논리적 관계(모순됨, 함축됨(암시됨) 또는 중립)에 따라 분류됩니다. 달리 지정되지 않은 경우 기본 fine-tuning 매개변수가 사용되었습니다.
Very roughly, we typically see that a few thousand examples are needed to get good performance:
아주 대략적으로 말해서 좋은 성능을 얻으려면 일반적으로 수천 개의 예제가 필요하다는 것을 알 수 있습니다.
Examples per label
Performance (rough estimate)
Hundreds
Decent
Thousands
Good
Tens of thousands or more
Great
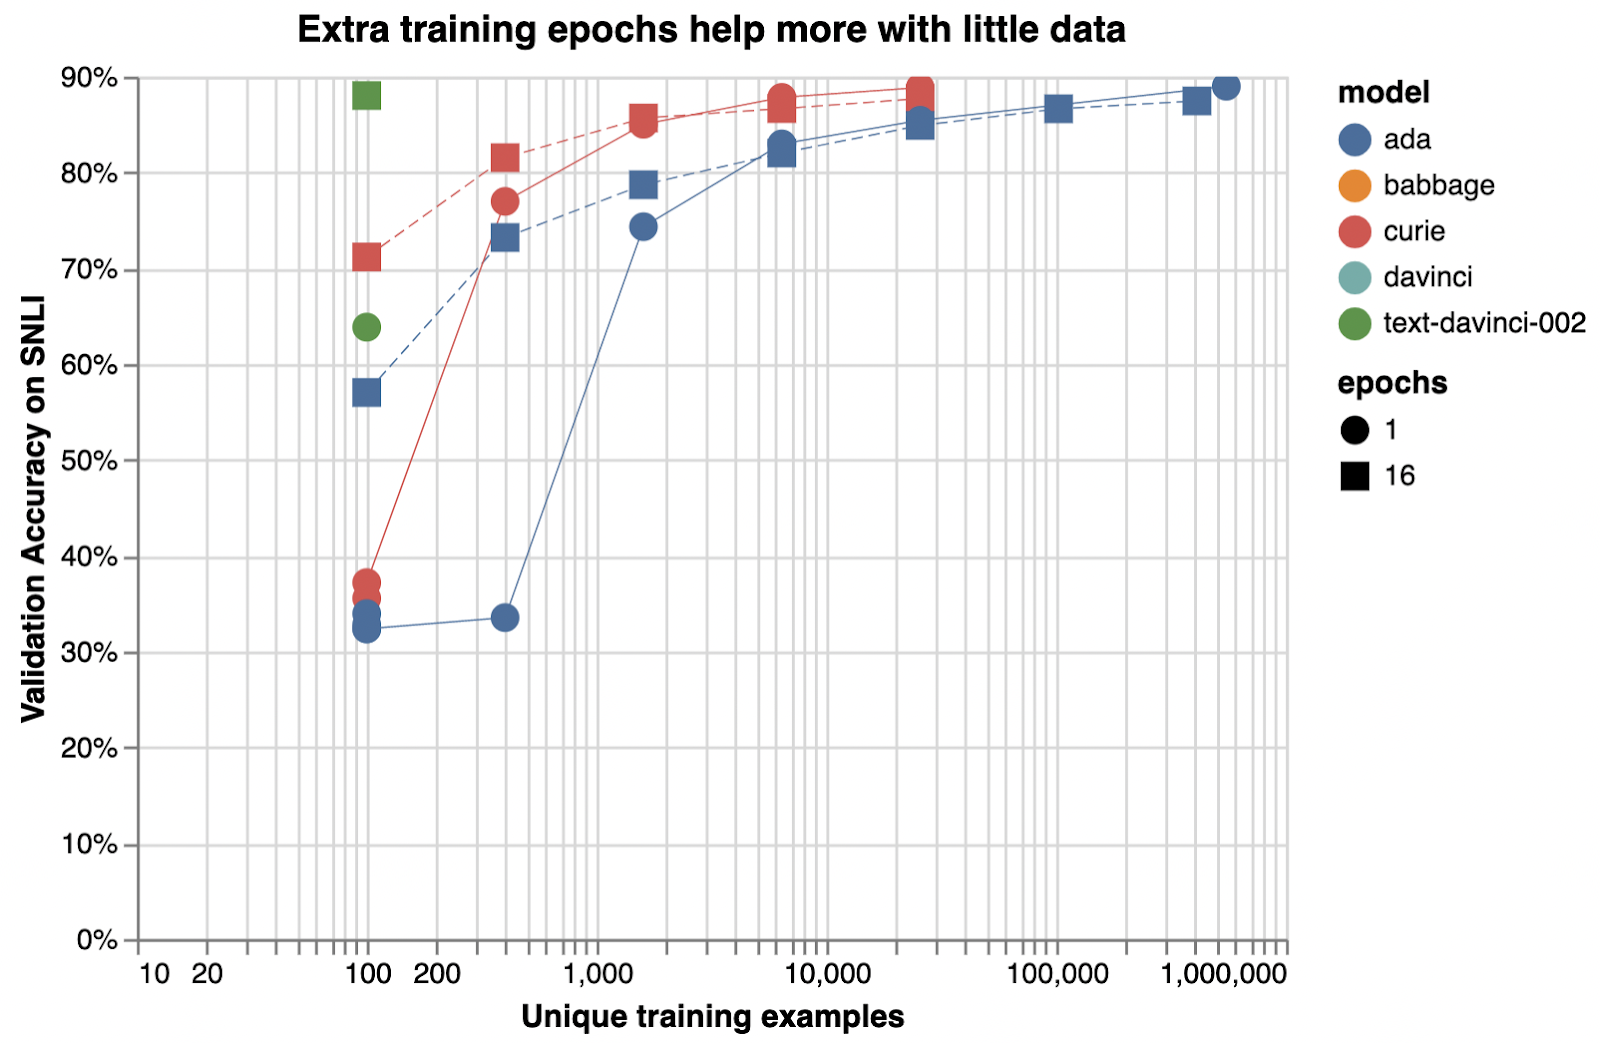
To assess the value of getting more data, you can train models on subsets of your current dataset—e.g., 25%, 50%, 100%—and then see how performance scales with dataset size. If you plot accuracy versus number of training examples, the slope at 100% will indicate the improvement you can expect from getting more data. (Note that you cannot infer the value of additional data from the evolution of accuracy during a single training run, as a model half-trained on twice the data is not equivalent to a fully trained model.)
더 많은 데이터를 얻는 가치를 평가하기 위해 현재 데이터 세트의 하위 집합(예: 25%, 50%, 100%)에서 모델을 교육한 다음 데이터 세트 크기에 따라 성능이 어떻게 확장되는지 확인할 수 있습니다. 정확도 대 교육 예제 수를 플로팅하는 경우 100%의 기울기는 더 많은 데이터를 얻을 때 기대할 수 있는 개선을 나타냅니다. (두 배의 데이터로 절반만 훈련된 모델은 완전히 훈련된 모델과 동일하지 않기 때문에 단일 훈련 실행 동안 정확도의 진화에서 추가 데이터의 가치를 추론할 수 없습니다.)
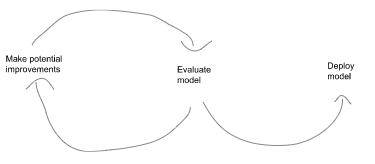
How to evaluate your fine-tuned model
Evaluating your fine-tuned model is crucial to (a) improve your model and (b) tell when it’s good enough to be deployed.
fine-tuned 모델을 평가하는 것은 (a) 모델을 개선하고 (b) 언제 배포하기에 충분한 지를 알려주는 데 중요합니다.
Many metrics can be used to characterize the performance of a classifier
많은 메트릭을 사용하여 분류기의 성능을 특성화할 수 있습니다.
Accuracy
F1
Precision / Positive Predicted Value / False Discovery Rate
Recall / Sensitivity
Specificity
AUC / AUROC (area under the receiver operator characteristic curve)
AUPRC (area under the precision recall curve)
Cross entropy
Which metric to use depends on your specific application and how you weigh different types of mistakes. For example, if detecting something rare but consequential, where a false negative is costlier than a false positive, you might care about recall more than accuracy.
사용할 메트릭은 특정 응용 프로그램과 다양한 유형의 실수에 가중치를 두는 방법에 따라 다릅니다. 예를 들어 거짓 음성이 거짓 긍정보다 비용이 많이 드는 드물지만 결과적인 것을 감지하는 경우 정확도보다 리콜에 더 관심을 가질 수 있습니다.
The OpenAI API offers the option to calculate some of these classification metrics. If enabled, these metrics will be periodically calculated during fine-tuning as well as for your final model. You will see them as additional columns in your results file
OpenAI API는 이러한 분류 메트릭 중 일부를 계산하는 옵션을 제공합니다. 활성화된 경우 이러한 지표는 최종 모델뿐만 아니라 미세 조정 중에 주기적으로 계산됩니다. 결과 파일에 추가 열로 표시됩니다.
To enable classification metrics, you’ll need to:
분류 지표를 활성화하려면 다음을 수행해야 합니다.:
use single-token class labels
단일 토큰 클래스 레이블 사용
provide a validation file (same format as the training file)
유효성 검사 파일 제공(교육 파일과 동일한 형식)
set the flag --compute_classification_metrics
compute_classification_metrics 플래그 설정
for multiclass classification: set the argument --classification_n_classes
다중 클래스 분류: --classification_n_classes 인수 설정
for binary classification: set the argument --classification_positive_class
The following metrics are based on a classification threshold of 0.5 (i.e. when the probability is > 0.5, an example is classified as belonging to the positive class.)
다음 메트릭은 0.5의 분류 임계값을 기반으로 합니다(즉, 확률이 > 0.5인 경우 예는 포지티브 클래스에 속하는 것으로 분류됨).
classification/accuracy
classification/precision
classification/recall
classification/f{beta}
classification/auroc - AUROC
classification/auprc - AUPRC
Note that these evaluations assume that you are using text labels for classes that tokenize down to a single token, as described above. If these conditions do not hold, the numbers you get will likely be wrong.
이러한 평가에서는 위에서 설명한 대로 단일 토큰으로 토큰화하는 클래스에 대해 텍스트 레이블을 사용하고 있다고 가정합니다. 이러한 조건이 충족되지 않으면 얻은 숫자가 잘못되었을 수 있습니다.
Example outputs
Example metrics evolution over a training run, visualized with Weights & Biases
Weights & Biases로 시각화된 교육 실행에 대한 메트릭 진화의 예
How to pick the right model
OpenAI offers fine-tuning for 5 models: OpenAI는 fine-tuning에 다음 5가지 모델을 사용할 것을 권장합니다.
ada (cheapest and fastest)
babbage
curie
davinci
text-davinci-002 (highest quality)
Which model to use will depend on your use case and how you value quality versus price and speed.
사용할 모델은 사용 사례와 품질 대 가격 및 속도의 가치를 어떻게 평가하는지에 따라 달라집니다.
Generally, we see text classification use cases falling into two categories: simple and complex.
일반적으로 텍스트 분류 사용 사례는 단순과 복합의 두 가지 범주로 나뉩니다.
For tasks that are simple or straightforward, such as classifying sentiment, larger models offer diminishing benefit, as illustrated below:
감정 분류와 같이 간단하거나 직접적인 작업의 경우 더 큰 모델은 아래 그림과 같이 이점이 적습니다.
Model
Illustrative accuracy*
Training cost**
Inference cost**
ada
89%
$0.0004 / 1K tokens (~3,000 pages per dollar)
$0.0016 / 1K tokens (~800 pages per dollar)
babbage
90%
$0.0006 / 1K tokens (~2,000 pages per dollar)
$0.0024 / 1K tokens (~500 pages per dollar)
curie
91%
$0.003 / 1K tokens (~400 pages per dollar)
$0.012 / 1K tokens (~100 pages per dollar)
davinci
92%
$0.03 / 1K tokens (~40 pages per dollar)
$0.12 / 1K tokens (~10 pages per dollar)
text-davinci-002
93%
unreleased
unreleased
*Illustrative accuracy on the SNLI dataset, in which sentence pairs are classified as contradictions, implications, or neutral
*문장 쌍이 모순, 암시 또는 중립으로 분류되는 SNLI 데이터 세트에 대한 설명 정확도
**Pages per dollar figures assume ~800 tokens per page. OpenAI Pricing.
Illustrative examples of text classification performance on the Stanford Natural Language Inference (SNLI) Corpus, in which ordered pairs of sentences are classified by their logical relationship: either contradicted, entailed (implied), or neutral. Default fine-tuning parameters were used when not otherwise specified.
SNLI(Stanford Natural Language Inference) 코퍼스의 텍스트 분류 성능에 대한 예시로, 정렬된 문장 쌍이 논리적 관계(모순됨, 함축됨(암시됨) 또는 중립)에 따라 분류됩니다. 달리 지정되지 않은 경우 기본 미세 조정 매개변수가 사용되었습니다.
For complex tasks, requiring subtle interpretation or reasoning or prior knowledge or coding ability, the performance gaps between models can be larger, and better models like curie or text-davinci-002 could be the best fit.
미묘한 해석이나 추론 또는 사전 지식이나 코딩 능력이 필요한 복잡한 작업의 경우 모델 간의 성능 차이가 더 클 수 있으며 curie 또는 text-davinci-002와 같은 더 나은 모델이 가장 적합할 수 있습니다.
A single project might end up trying all models. One illustrative development path might look like this:
단일 프로젝트에서 모든 모델을 시도하게 될 수 있습니다. 예시적인 개발 경로는 다음과 같습니다.
Test code using the cheapest & fastest model (ada)
가장 저렴하고 빠른 모델(ada)을 사용하여 테스트 코드
Run a few early experiments to check whether your dataset works as expected with a middling model (curie)
중간 모델(curie)에서 데이터 세트가 예상대로 작동하는지 확인하기 위해 몇 가지 초기 실험을 실행합니다.
Run a few more experiments with the best model to see how far you can push performance (text-davinci-002)
최상의 모델로 몇 가지 실험을 더 실행하여 성능을 얼마나 높일 수 있는지 확인하십시오(text-davinci-002).
Once you have good results, do a training run with all models to map out the price-performance frontier and select the model that makes the most sense for your use case (ada, babbage, curie, davinci, text-davinci-002)
좋은 결과를 얻으면 모든 모델로 교육 실행을 수행하여 가격 대비 성능 한계를 파악하고 사용 사례에 가장 적합한 모델(ada, babbage, curie, davinci, text-davinci-002)을 선택합니다.
Another possible development path that uses multiple models could be:
여러 모델을 사용하는 또 다른 가능한 개발 경로는 다음과 같습니다.
Starting with a small dataset, train the best possible model (text-davinci-002)
작은 데이터 세트로 시작하여 가능한 최상의 모델 훈련(text-davinci-002)
Use this fine-tuned model to generate many more labels and expand your dataset by multiples
이 미세 조정된 모델을 사용하여 더 많은 레이블을 생성하고 데이터 세트를 배수로 확장하십시오.
Use this new dataset to train a cheaper model (ada)
이 새로운 데이터 세트를 사용하여 더 저렴한 모델(ada) 훈련
How to pick training hyperparameters
Fine-tuning can be adjusted with various parameters. Typically, the default parameters work well and adjustments only result in small performance changes.
미세 조정은 다양한 매개변수로 조정할 수 있습니다. 일반적으로 기본 매개변수는 잘 작동하며 조정해도 성능이 약간만 변경됩니다.
Parameter
Default
Recommendation
n_epochs
controls how many times each example is trained on
각 예제가 훈련되는 횟수를 제어합니다.
4
For classification, we’ve seen good performance with numbers like 4 or 10. Small datasets may need more epochs and large datasets may need fewer epochs.
분류의 경우 4 또는 10과 같은 숫자로 좋은 성능을 보였습니다. 작은 데이터 세트에는 더 많은 에포크가 필요할 수 있고 큰 데이터 세트에는 더 적은 에포크가 필요할 수 있습니다.
If you see low training accuracy, try increasing n_epochs. If you see high training accuracy but low validation accuracy (overfitting), try lowering n_epochs.
훈련 정확도가 낮은 경우 n_epochs를 늘려 보십시오. 훈련 정확도는 높지만 검증 정확도(과적합)가 낮은 경우 n_epochs를 낮추십시오.
You can get training and validation accuracies by setting compute_classification_metrics to True and passing a validation file with labeled examples not in the training data. You can see graphs of these metrics evolving during fine-tuning with a Weights & Biases account.
compute_classification_metrics를 True로 설정하고 교육 데이터에 없는 레이블이 지정된 예제가 있는 유효성 검사 파일을 전달하여 교육 및 유효성 검사 정확도를 얻을 수 있습니다. Weights & Biases 계정을 사용하여 미세 조정하는 동안 진화하는 이러한 지표의 그래프를 볼 수 있습니다.
batch_size controls the number of training examples used in a single training pass 단일 교육 패스에 사용되는 교육 예제의 수를 제어합니다.
null (which dynamically adjusts to 0.2% of training set, capped at 256) (트레이닝 세트의 0.2%로 동적으로 조정되며 256으로 제한됨)
We’ve seen good performance in the range of 0.01% to 2%, but worse performance at 5%+. In general, larger batch sizes tend to work better for larger datasets.
우리는 0.01%에서 2% 범위에서 좋은 성능을 보았지만 5% 이상에서는 더 나쁜 성능을 보였습니다. 일반적으로 더 큰 배치 크기는 더 큰 데이터 세트에서 더 잘 작동하는 경향이 있습니다.
learning_rate_multiplier controls rate at which the model weights are updated 모델 가중치가 업데이트되는 속도를 제어합니다.
null (which dynamically adjusts to 0.05, 0.1, or 0.2 depending on batch size) (배치 크기에 따라 0.05, 0.1 또는 0.2로 동적으로 조정됨)
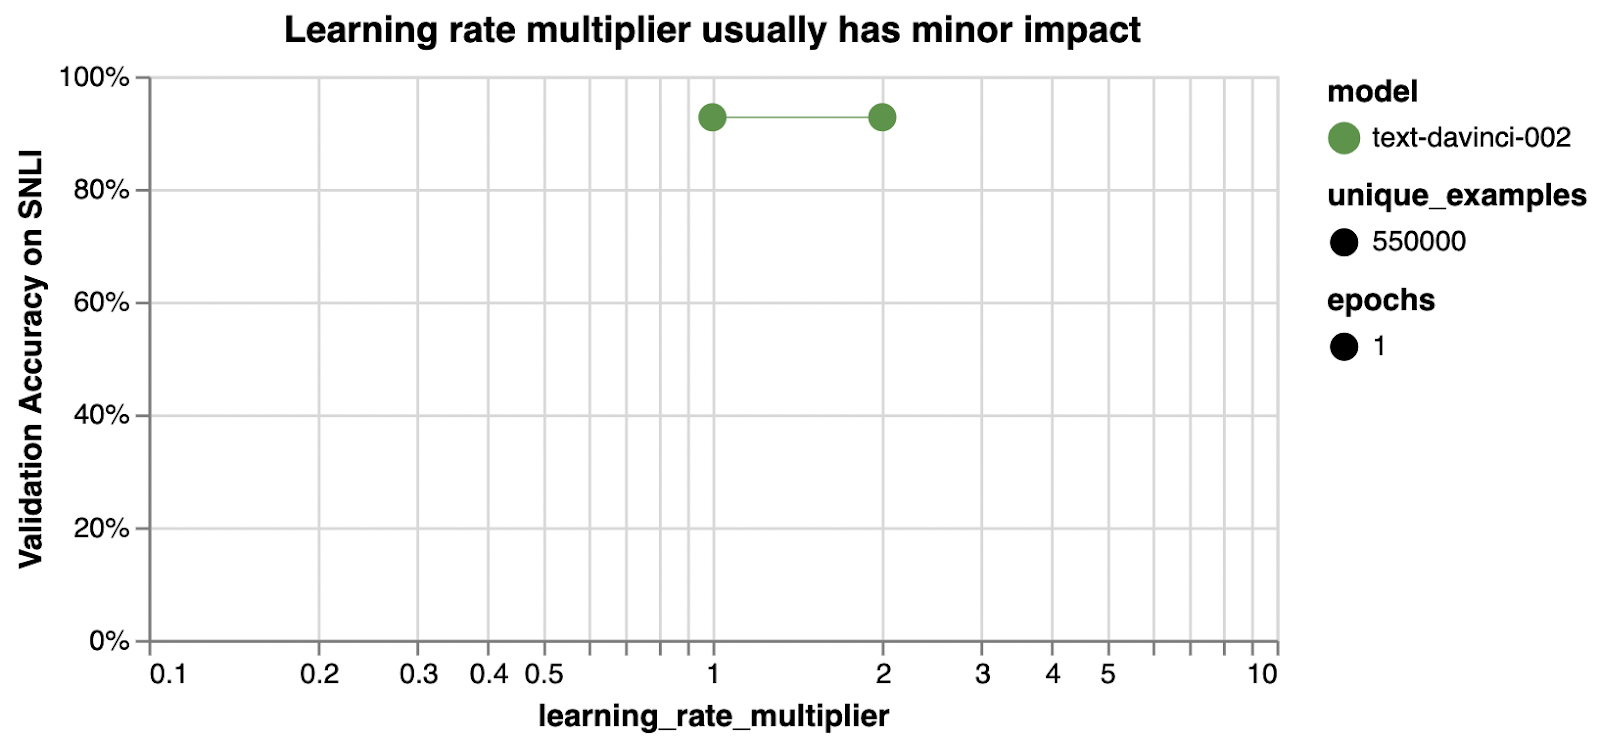
We’ve seen good performance in the range of 0.02 to 0.5. Larger learning rates tend to perform better with larger batch sizes.
0.02~0.5 범위에서 좋은 성능을 보였습니다. 더 큰 학습 속도는 더 큰 배치 크기에서 더 잘 수행되는 경향이 있습니다.
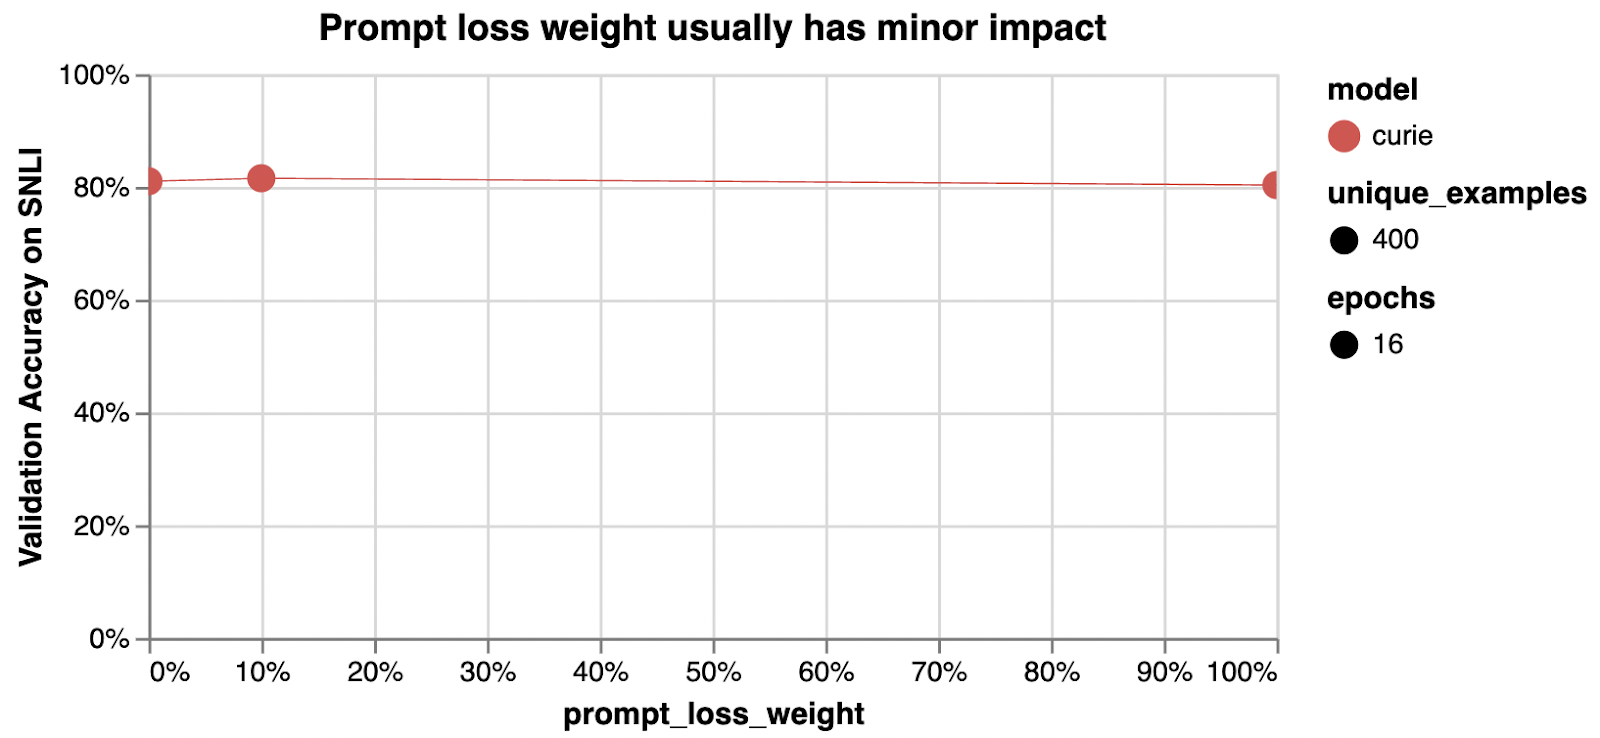
prompt_loss_weight controls how much the model learns from prompt tokens vs completion tokens 모델이 프롬프트 토큰과 완료 토큰에서 학습하는 양을 제어합니다.
0.1
If prompts are very long relative to completions, it may make sense to reduce this weight to avoid over-prioritizing learning the prompt. In our tests, reducing this to 0 is sometimes slightly worse or sometimes about the same, depending on the dataset.
프롬프트가 완료에 비해 매우 긴 경우 프롬프트 학습에 과도한 우선순위를 두지 않도록 이 가중치를 줄이는 것이 좋습니다. 테스트에서 데이터 세트에 따라 이를 0으로 줄이는 것이 때때로 약간 더 나쁘거나 거의 동일합니다.
More detail on prompt_loss_weight
When a model is fine-tuned, it learns to produce text it sees in both the prompt and the completion. In fact, from the point of view of the model being fine-tuned, the distinction between prompt and completion is mostly arbitrary. The only difference between prompt text and completion text is that the model learns less from each prompt token than it does from each completion token. This ratio is controlled by the prompt_loss_weight, which by default is 10%.
모델이 미세 조정되면 prompt and the completion 모두에 표시되는 텍스트를 생성하는 방법을 학습합니다. 실제로 미세 조정되는 모델의 관점에서 신속함과 완료의 구분은 대부분 임의적입니다. 프롬프트 텍스트와 완료 텍스트의 유일한 차이점은 모델이 각 완료 토큰에서 학습하는 것보다 각 프롬프트 토큰에서 학습하는 내용이 적다는 것입니다. 이 비율은 prompt_loss_weight에 의해 제어되며 기본적으로 10%입니다.
A prompt_loss_weight of 100% means that the model learns from prompt and completion tokens equally. In this scenario, you would get identical results with all training text in the prompt, all training text in the completion, or any split between them. For classification, we recommend against 100%.
100%의 prompt_loss_weight는 모델이 프롬프트 및 완료 토큰에서 동일하게 학습함을 의미합니다. 이 시나리오에서는 프롬프트의 모든 학습 텍스트, 완성의 모든 학습 텍스트 또는 이들 간의 분할에 대해 동일한 결과를 얻습니다. 분류의 경우 100% 대비를 권장합니다.
A prompt loss weight of 0% means that the model’s learning is focused entirely on the completion tokens. Note that even in this case, prompts are still necessary because they set the context for each completion. Sometimes we’ve seen a weight of 0% reduce classification performance slightly or make results slightly more sensitive to learning rate; one hypothesis is that a small amount of prompt learning helps preserve or enhance the model’s ability to understand inputs.
0%의 즉각적인 손실 가중치는 모델의 학습이 완료 토큰에 전적으로 집중되어 있음을 의미합니다. 이 경우에도 프롬프트는 각 완료에 대한 컨텍스트를 설정하기 때문에 여전히 필요합니다. 때때로 우리는 0%의 가중치가 분류 성능을 약간 감소시키거나 결과가 학습률에 약간 더 민감해지는 것을 보았습니다. 한 가지 가설은 소량의 즉각적인 학습이 입력을 이해하는 모델의 능력을 유지하거나 향상시키는 데 도움이 된다는 것입니다.
Example hyperparameter sweeps
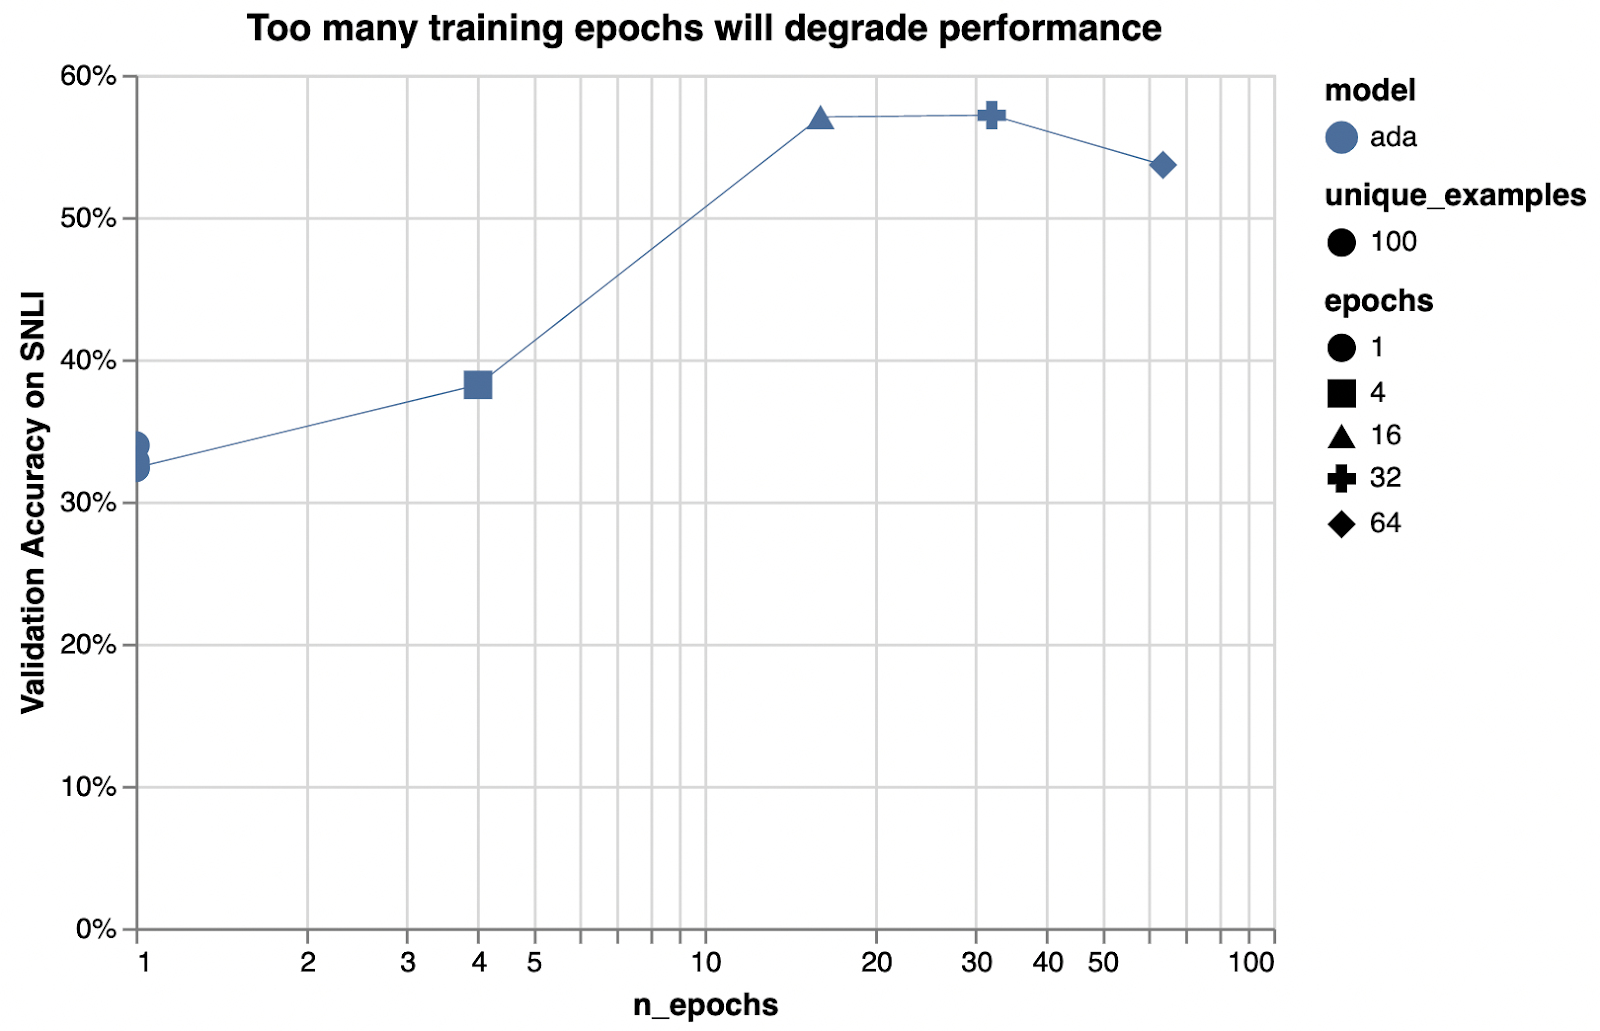
n_epochs
The impact of additional epochs is particularly high here, because only 100 training examples were used.
100개의 학습 예제만 사용되었기 때문에 추가 에포크의 영향이 여기에서 특히 높습니다.
learning_rate_multiplier
prompt_loss_weight
How to pick inference parameters
Parameter
Recommendation
model
(discussed above) [add link]
temperature
Set temperature=0 for classification. Positive values add randomness to completions, which can be good for creative tasks but is bad for a short deterministic task like classification. 분류를 위해 온도=0으로 설정합니다. 양수 값은 완성에 임의성을 추가하므로 창의적인 작업에는 좋을 수 있지만 분류와 같은 짧은 결정론적 작업에는 좋지 않습니다.
max_tokens
If using single-token labels (or labels with unique first tokens), set max_tokens=1. If using longer labels, set to the length of your longest label. 단일 토큰 레이블(또는 고유한 첫 번째 토큰이 있는 레이블)을 사용하는 경우 max_tokens=1로 설정합니다. 더 긴 레이블을 사용하는 경우 가장 긴 레이블의 길이로 설정하십시오.
stop
If using labels of different length, you can optionally append a stop sequence like ‘ END’ to your training completions. Then, pass stop=‘ END’ in your inference call to prevent the model from generating excess text after appending short labels. (Otherwise, you can get completions like “burger -->” “ edible edible edible edible edible edible” as the model continues to generate output after the label is appended.) An alternative solution is to post-process the completions and look for prefixes that match any labels. 길이가 다른 레이블을 사용하는 경우 선택적으로 학습 완료에 ' END'와 같은 중지 시퀀스를 추가할 수 있습니다. 그런 다음 짧은 레이블을 추가한 후 모델이 과도한 텍스트를 생성하지 않도록 추론 호출에서 stop=' END'를 전달합니다. (그렇지 않으면 레이블이 추가된 후에도 모델이 계속 출력을 생성하므로 "burger -->" " edible edible edible edible edible"와 같은 완성을 얻을 수 있습니다.) 대체 솔루션은 완성을 후처리하고 접두사를 찾는 것입니다. 모든 레이블과 일치합니다.
logit_bias
If using single-token labels, set logit_bias={“label1”: 100, “label2”:100, …} with your labels in place of “label1” etc.
For tasks with little data or complex labels, models can output tokens for invented classes never specified in your training set. logit_bias can fix this by upweighting your label tokens so that illegal label tokens are never produced. If using logit_bias in conjunction with multi-token labels, take extra care to check how your labels are being split into tokens, as logit_bias only operates on individual tokens, not sequences.
데이터가 적거나 레이블이 복잡한 작업의 경우 모델은 훈련 세트에 지정되지 않은 발명된 클래스에 대한 토큰을 출력할 수 있습니다. logit_bias는 불법 레이블 토큰이 생성되지 않도록 레이블 토큰의 가중치를 높여 이 문제를 해결할 수 있습니다. 다중 토큰 레이블과 함께 logit_bias를 사용하는 경우 logit_bias는 시퀀스가 아닌 개별 토큰에서만 작동하므로 레이블이 토큰으로 분할되는 방식을 특히 주의하십시오.
Logit_bias can also be used to bias specific labels to appear more or less frequently. Logit_bias를 사용하여 특정 레이블이 더 자주 또는 덜 자주 표시되도록 바이어스할 수도 있습니다.
logprobs
Getting the probabilities of each label can be useful for computing confidence scores, precision-recall curves, calibrating debiasing using logit_bias, or general debugging. 각 레이블의 확률을 얻는 것은 신뢰도 점수 계산, 정밀도 재현 곡선, logit_bias를 사용한 편향성 보정 보정 또는 일반 디버깅에 유용할 수 있습니다.
Setting logprobs=5 will return, for each token position of the completion, the top 5 most likely tokens and the natural logs of their probabilities. To convert logprobs into probabilities, raise e to the power of the logprob (probability = e^logprob). The probabilities returned are independent of temperature and represent what the probability would have been if the temperature had been set to 1. By default 5 is the maximum number of logprobs returned, but exceptions can be requested by emailing support@openai.com and describing your use case.
logprobs=5로 설정하면 완료의 각 토큰 위치에 대해 가장 가능성이 높은 상위 5개 토큰과 해당 확률의 자연 로그가 반환됩니다. logprobs를 확률로 변환하려면 e를 logprob의 거듭제곱으로 올립니다(probability = e^logprob). 반환된 확률은 온도와 무관하며 온도가 1로 설정되었을 경우의 확률을 나타냅니다. 기본적으로 5는 반환되는 logprobs의 최대 수. 예외는 support@openai.com으로 이메일을 보내주세요 귀하의 사용 사례를 보내 주세요.
Example API call to get probabilities for the 5 most likely tokens 가능성이 가장 높은 5개의 토큰에 대한 확률을 얻기 위한 API 호출 예
api_response = openai.Completion.create( model="{fine-tuned model goes here, without brackets}", prompt="toothpaste -->", temperature=0, max_tokens=1, logprobs=5 ) dict_of_logprobs = api_response['choices'][0]['logprobs']['top_logprobs'][0].to_dict() dict_of_probs = {k: 2.718**v for k, v in dict_of_logprobs.items()}
echo
In cases where you want the probability of a particular label that isn’t showing up in the list of logprobs, the echo parameter is useful. If echo is set to True and logprobs is set to a number, the API response will include logprobs for every token of the prompt as well as the completion. So, to get the logprob for any particular label, append that label to the prompt and make an API call with echo=True, logprobs=0, and max_tokens=0.
logprobs 목록에 나타나지 않는 특정 레이블의 확률을 원하는 경우 echo 매개변수가 유용합니다. echo가 True로 설정되고 logprobs가 숫자로 설정되면 API 응답에는 완료뿐 아니라 프롬프트의 모든 토큰에 대한 logprobs가 포함됩니다. 따라서 특정 레이블에 대한 logprob를 가져오려면 해당 레이블을 프롬프트에 추가하고 echo=True, logprobs=0 및 max_tokens=0으로 API 호출을 수행합니다.
Example API call to get the logprobs of prompt tokens
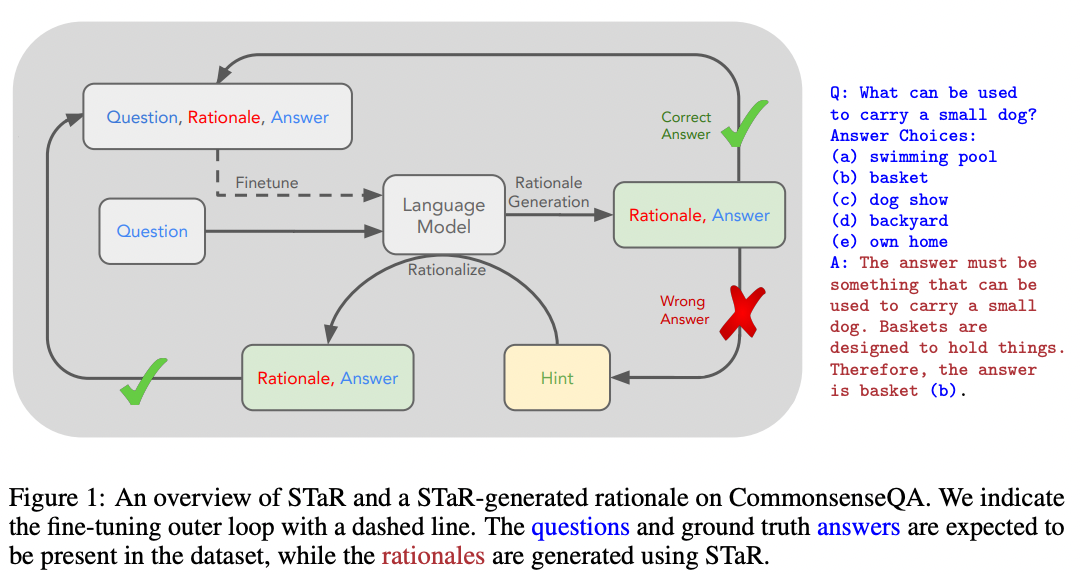
For complex tasks that require reasoning, one useful technique you can experiment with is inserting explanations before the final answer. Giving the model extra time and space to think ‘aloud’ can increase the odds it arrives at the correct final answer.
추론이 필요한 복잡한 작업의 경우 실험할 수 있는 유용한 기술 중 하나는 최종 답변 앞에 설명을 삽입하는 것입니다. 모델에게 '큰 소리로' 생각할 수 있는 추가 시간과 공간을 제공하면 올바른 최종 답변에 도달할 가능성이 높아질 수 있습니다.
“Q: Where do you put your grapes just before checking out? Answer Choices: (a) mouth (b) grocery cart (c) supermarket (d) fruit basket (e) fruit market A:”
“(b)”
“The answer should be the place where grocery items are placed before checking out. Of the above choices, grocery cart makes the most sense for holding grocery items. Therefore, the answer is grocery cart (b).”
“답은 체크아웃하기 전에 식료품을 두는 장소여야 합니다. 위의 선택 중에서 식료품 카트는 식료품을 보관하는 데 가장 적합합니다. 따라서 정답은 식료품 카트(b)입니다.”
Although it can sound daunting to write many example explanations, it turns out you can use large language models to write the explanations. In 2022, Zelikman, Wu, et al. published a procedure called STaR (Self-Taught Reasoner) in which a few-shot prompt can be used to generate a set of {questions, rationales, answers} from just a set of {questions, answers}
많은 예제 설명을 작성하는 것이 어렵게 들릴 수 있지만 큰 언어 모델을 사용하여 설명을 작성할 수 있습니다. 2022년 Zelikman, Wu, et al. {질문, 답변} 세트에서 {질문, 근거, 답변} 세트를 생성하기 위해 몇 번의 프롬프트를 사용할 수 있는 STaR(Self-Taught Reasoner)라는 절차를 발표했습니다.
Sequential fine-tuning
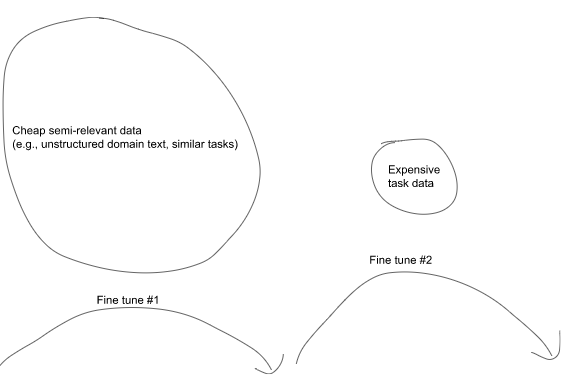
Models can be fine-tuned sequentially as many times as you like. One way you can use this is to pre-train your model on a large amount of relevant text, such as unstructured domain text or similar classification tasks, and then afterwards fine-tune on examples of the task you want the model to perform. An example procedure could look like:
모델은 원하는 만큼 순차적으로 미세 조정할 수 있습니다. 이를 사용할 수 있는 한 가지 방법은 구조화되지 않은 도메인 텍스트 또는 유사한 분류 작업과 같은 많은 양의 관련 텍스트에 대해 모델을 사전 훈련한 다음 나중에 모델이 수행할 작업의 예를 미세 조정하는 것입니다. 예제 절차는 다음과 같습니다.
Step 1: Fine-tune on cheap, semi-relevant data
E.g., unstructured domain text (such as legal or medical text)
E.g., similar task data (such as another large classification set)
Step 2: Fine-tune on expensive labeled examples
E.g., text and classes (if training a classifier)
To fine-tune a previously fine-tuned model, pass in the fine-tuned model name when creating a new fine-tuning job (e.g. -m curie:ft-<org>-<date>). Other training parameters do not have to be changed, however if your new training data is much smaller than your previous training data, you may find it useful to reduce learning_rate_multiplier by a factor of 2 to 4.
이전에 미세 조정된 모델을 미세 조정하려면 새 미세 조정 작업을 생성할 때 미세 조정된 모델 이름을 전달합니다(예: -m curie:ft-<org>-<date>). 다른 훈련 매개변수는 변경할 필요가 없지만 새 훈련 데이터가 이전 훈련 데이터보다 훨씬 작은 경우 learning_rate_multiplier를 2~4배 줄이는 것이 유용할 수 있습니다.
Common mistakes
The most common mistakes when fine-tuning text classifiers are usually related to training data.
텍스트 분류기를 미세 조정할 때 가장 흔한 실수는 일반적으로 훈련 데이터와 관련이 있습니다.
Common mistake #1: Insufficiently specified training data
One thing to keep in mind is that training data is more than just a mapping of inputs to correct answers. Crucially, the inputs need to contain the information needed to derive an answer.
한 가지 명심해야 할 점은 교육 데이터가 정답에 대한 입력의 매핑 이상이라는 것입니다. 결정적으로 입력에는 답을 도출하는 데 필요한 정보가 포함되어야 합니다.
For example, consider fine-tuning a model to predict someone’s grades using the following dataset:
예를 들어 다음 데이터 세트를 사용하여 누군가의 성적을 예측하도록 모델을 미세 조정하는 것을 고려하십시오.
Prompt
Completion
“Alice >>>”
“ A”
“Bob >>>”
“ B+”
“Coco >>>”
“ A-”
“Dominic >>>”
“ B”
Prompt
Completion
“Esmeralda >>>”
???
Without knowing why these students got the grades they did, there is insufficient information for the model to learn from and no hope of making a good personalized prediction for Esmeralda.
이 학생들이 자신이 받은 성적을 받은 이유를 모르면 모델이 배울 수 있는 정보가 충분하지 않으며 Esmeralda에 대해 좋은 개인화된 예측을 할 수 있는 희망이 없습니다.
This can happen more subtly when some information is given but some is still missing. For example, if fine-tuning a classifier on whether a business expense is allowed or disallowed, and the business expense policy varies by date or by location or by employee type, make sure the input contains information on dates, locations, and employee type.
이것은 일부 정보가 제공되었지만 일부가 여전히 누락된 경우 더 미묘하게 발생할 수 있습니다. 예를 들어 비즈니스 비용이 허용되는지 여부에 대한 분류자를 미세 조정하고 비즈니스 비용 정책이 날짜, 위치 또는 직원 유형에 따라 달라지는 경우 입력에 날짜, 위치 및 직원 유형에 대한 정보가 포함되어 있는지 확인하십시오.
Prompt
Completion
“Amount: $50 Item: Steak dinner
###
”
“ allowed”
“Amount: $50 Item: Steak dinner
###
”
“ disallowed”
Prompt
Completion
“Amount: $50 Item: Steak dinner
###
”
???
Common mistake #2: Input data format that doesn’t match the training data format
Make sure that when you use your fine-tuned model, your submitted prompts match the format of your training data.
미세 조정된 모델을 사용할 때 제출된 프롬프트가 훈련 데이터의 형식과 일치하는지 확인하십시오.
Training data format
API call
OK?
“dog toy -->”
“dog toy”
❌Missing separator
“Amount: $50 Item: Steak dinner
###
”
“Is a $50 steak dinner allowed?
###
“
❌Different format
“Esmeralda >>>”
“Esmeralda >>> ”
❌Extra space appended
More examples
Below, we share more examples of training data for possible classifiers.
아래에서 가능한 분류기에 대한 훈련 데이터의 더 많은 예를 공유합니다.
Truthful consistency classifier
Prompt
Completion
"Company: BHFF insurance Product: allround insurance Ad: One stop shop for all your insurance needs! Supported:"
Product review classifier (with multiple classes labeled in parallel)
Prompt
Completion
"4/5 stars
Camera seems fine. Not amazing, but perfectly decent.
Biggest complaint is that the cable is only 5 feet long, which I didn't think to check. It's my fault, so I won't return it, but 5 feet is really short if you have multiple monitors and probably impossible if you have a desktop on the floor next to a standing desk.
###
Positives:"
“ fine, perfectly decent Negatives: not amazing, cable is only 5 feet long Overall sentiment: positive Possible improvements: longer cable Return risk: 1 Support priority: low Customer type: N/A”
"4/5 stars
I bought this on sale for $70. I'm satisfied with it.
(1) The instructions weren't that bad. (There was really only one ambiguous step, and it was easy to make an educated guess at the right way to go. Surprised by the ordering of one of the steps because some bars were hanging there for a while, but whatever.)
(2) It definitely is labor intensive - the most painful step is screwing in 24 small wood screws to get the hooks attached. And it takes a bit of skill to get them all vertically parallel. Got a big blister from all the screwing. And the angles made it hard to use power tools - ended up screwing in by hand because it was easier to stay vertical next to the hook.
(3) I weight 170 pounds and honestly the bench seems fine for supporting my weight. I was worried from the other reviews. But my trick was to leave things a little loose until the end and then really tighten everything once it was all together. I think really tightening at the end prevents any squeaky rocking. But only used it one day so far, so we'll see.
Overall this is definitely cheap, but feels totally fine. It's cheap in a cheap way, not cheap in a junky knockoff way. Would buy again. Looks great.
###
Positives:"
“ instructions weren’t that bad, looks great Negatives: ambiguous step, labor intensive, got a big blister, cheap Overall sentiment: positive Possible improvements: less ambiguous instructions Return risk: 0 Support priority: low Customer type: N/A”
"5/5 stars
I'm a fan. It's shiny and pure metal. Exactly what I wanted.
###
Positives:”
“ shiny, pure metal Negatives: N/A Overall sentiment: positive Possible improvements: N/A Return risk: 0 Support priority: low Customer type: N/A
Sentiment analyzer
Prompt
Completion
"Overjoyed with the new iPhone! ->"
“ positive”
"@lakers disappoint for a third straight night https://t.co/38EFe43 ->"
“ negative”
Email prioritizer
Prompt
Completion
"Subject: Update my address From: Joe Doe To: support@ourcompany.com Date: 2021-06-03 Content: Hi, I would like to update my billing address to match my delivery address.
Please let me know once done.
Thanks, Joe
###
"
“ 4”
Legal claim detector
Prompt
Completion
"When the IPV (injection) is used, 90% or more of individuals develop protective antibodies to all three serotypes of polio virus after two doses of inactivated polio vaccine (IPV), and at least 99% are immune to polio virus following three doses. -->"
“ efficacy”
"Jonas Edward Salk (/sɔːlk/; born Jonas Salk; October 28, 1914 – June 23, 1995) was an American virologist and medical researcher who developed one of the first successful polio vaccines. He was born in New York City and attended the City College of New York and New York University School of Medicine. -->"
“ not”
News subject detector
Prompt
Completion
"PC World - Upcoming chip set will include built-in security features for your PC. >>>"
“ 4”
(where 4 = Sci/Tech)
“Newspapers in Greece reflect a mixture of exhilaration that the Athens Olympics proved successful, and relief that they passed off without any major setback. >>>”
“ 2”
(where 2 = Sports)
Logical relationship detector
Prompt
Completion
"A land rover is being driven across a river. A vehicle is crossing a river.
###
"
“ implication”
"Violin soloists take the stage during the orchestra's opening show at the theater. People are playing the harmonica while standing on a roof.
{
  "text": "Imagine the wildest idea that you've ever had, and you're curious about how it might scale to something that's a 100, a 1,000 times bigger. This is a place where you can get to do that."
}
Request body
file
string Required
The audio file to transcribe, in one of these formats: mp3, mp4, mpeg, mpga, m4a, wav, or webm.
문자로 변환 하게 될 오디오 파일 입니다. mp3, mp4, mpeg, mpga, m4a, wav 또는 webm 형식 중 하나 이어야 합니다.
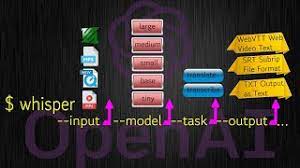
model
string Required
ID of the model to use. Onlywhisper-1is currently available.
사용할 모델의 ID입니다. 현재 whisper-1 모델만 사용할 수 있습니다.
prompt
string Optional
An optional text to guide the model's style or continue a previous audio segment. Thepromptshould match the audio language.
모델의 스타일을 안내하거나 이전 오디오 세그먼트를 계속하는 선택적 텍스트입니다. 프롬프트는 오디오 언어와 일치해야 합니다.
response_format
string Optional Defaults tojson
The format of the transcript output, in one of these options: json, text, srt, verbose_json, or vtt.
필사한 값의 output format입니다. json, text, srt, verbose_json 또는 vtt 포맷 중 하나 입니다.
temperature
number Optional Defaults to0
The sampling temperature, between 0 and 1. Higher values like 0.8 will make the output more random, while lower values like 0.2 will make it more focused and deterministic. If set to 0, the model will uselog probabilityto automatically increase the temperature until certain thresholds are hit.
샘플링 온도는 0에서 1 사이입니다. 0.8과 같이 값이 높을수록 출력이 더 무작위적으로 생성되고 0.2와 같이 값이 낮을수록 더 집중되고 결정적입니다. 0으로 설정하면 모델은 로그 확률을 사용하여 특정 임계값에 도달할 때까지 자동으로 temperature를 높입니다.
language
string Optional
The language of the input audio. Supplying the input language inISO-639-1format will improve accuracy and latency.
입력 오디오의 언어입니다. ISO-639-1 형식으로 입력 언어를 제공하면 정확도와 대기 시간이 향상됩니다.
{
  "text": "Hello, my name is Wolfgang and I come from Germany. Where are you heading today?"
}
Request body
file
string Required
The audio file to translate, in one of these formats: mp3, mp4, mpeg, mpga, m4a, wav, or webm.
문자로 변환 하게 될 오디오 파일 입니다. mp3, mp4, mpeg, mpga, m4a, wav 또는 webm 형식 중 하나 이어야 합니다.
model
string Required
ID of the model to use. Onlywhisper-1is currently available.
사용할 모델의 ID입니다. 현재 whisper-1 모델만 사용할 수 있습니다.
prompt
string Optional
An optional text to guide the model's style or continue a previous audio segment. Thepromptshould be in English.
모델의 스타일을 안내하거나 이전 오디오 세그먼트를 계속하는 선택적 텍스트입니다. 프롬프트는 오디오 언어와 일치해야 합니다.
response_format
string Optional Defaults tojson
The format of the transcript output, in one of these options: json, text, srt, verbose_json, or vtt.
transcript output 의 포맷입니다. json, text, srt, verbose_json 또는 vtt 포맷 중 하나 입니다.
temperature
number Optional Defaults to0
The sampling temperature, between 0 and 1. Higher values like 0.8 will make the output more random, while lower values like 0.2 will make it more focused and deterministic. If set to 0, the model will uselog probabilityto automatically increase the temperature until certain thresholds are hit.
샘플링 온도는 0에서 1 사이입니다. 0.8과 같이 값이 높을수록 출력이 더 무작위적으로 생성되고 0.2와 같이 값이 낮을수록 더 집중되고 결정적입니다. 0으로 설정하면 모델은 로그 확률을 사용하여 특정 임계값에 도달할 때까지 자동으로temperature를 높입니다.
This guide includes an overview on error codes you might see from both theAPIand ourofficial Python library. Each error code mentioned in the overview has a dedicated section with further guidance.
이 가이드에는 API와 공식 Python 라이브러리 모두에서 볼 수 있는 오류 코드에 대한 개요가 포함되어 있습니다. 개요에 언급된 각 오류 코드에는 추가 지침이 있는 전용 섹션이 있습니다.
API errors
CODE OVERVIEW
401 - Invalid Authentication
Cause:Invalid Authentication Solution:Ensure the correctAPI keyand requesting organization are being used.
401 - Incorrect API key provided
Cause:The requesting API key is not correct. Solution:Ensure the API key used is correct, clear your browser cache, orgenerate a new one.
401 - You must be a member of an organization to use the API
Cause:Your account is not part of an organization. Solution:Contact us to get added to a new organization or ask your organization manager toinvite you to an organization.
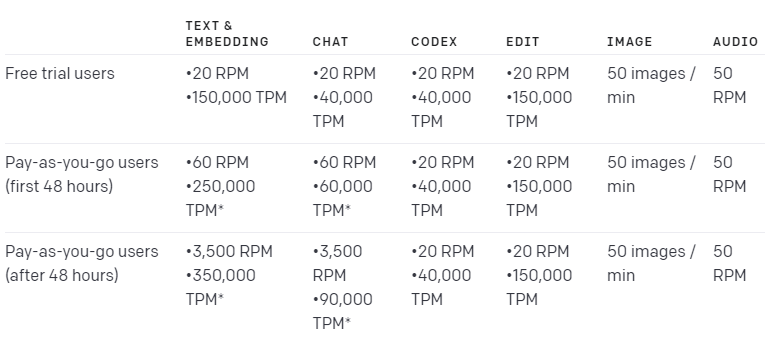
429 - Rate limit reached for requests
Cause:You are sending requests too quickly. Solution:Pace your requests. Read theRate limit guide.
429 - You exceeded your current quota, please check your plan and billing details
429 - The engine is currently overloaded, please try again later
Cause:Our servers are experiencing high traffic. Solution:Please retry your requests after a brief wait.
500 - The server had an error while processing your request
Cause:Issue on our servers. Solution:Retry your request after a brief wait and contact us if the issue persists. Check thestatus page.
401 - Invalid Authentication
This error message indicates that your authentication credentials are invalid. This could happen for several reasons, such as:
이 오류 메시지는 인증 자격 증명이 유효하지 않음을 나타냅니다. 이는 다음과 같은 여러 가지 이유로 발생할 수 있습니다.
You are using a revoked API key.
취소된 API 키를 사용하고 있습니다.
You are using a different API key than the one assigned to the requesting organization.
요청 조직에 할당된 것과 다른 API 키를 사용하고 있습니다.
You are using an API key that does not have the required permissions for the endpoint you are calling.
호출 중인 엔드포인트에 필요한 권한이 없는 API 키를 사용하고 있습니다.
To resolve this error, please follow these steps:
이 오류를 해결하려면 다음 단계를 따르십시오.
Check that you are using the correct API key and organization ID in your request header. You can find your API key and organization ID inyour account settings.
요청 헤더에서 올바른 API 키와 조직 ID를 사용하고 있는지 확인하세요. 계정 설정에서 API 키와 조직 ID를 찾을 수 있습니다.
If you are unsure whether your API key is valid, you cangenerate a new one. Make sure to replace your old API key with the new one in your requests and follow ourbest practices guide.
API 키가 유효한지 확실하지 않은 경우 새 키를 생성할 수 있습니다. 요청 시 이전 API 키를 새 키로 교체하고 권장사항 가이드를 따르세요.
401 - Incorrect API key provided
This error message indicates that the API key you are using in your request is not correct. This could happen for several reasons, such as:
이 오류 메시지는 요청에 사용 중인 API 키가 올바르지 않음을 나타냅니다. 이는 다음과 같은 여러 가지 이유로 발생할 수 있습니다.
There is a typo or an extra space in your API key.
API 키에 오타나 추가 공백이 있습니다.
You are using an API key that belongs to a different organization.
다른 조직에 속한 API 키를 사용하고 있습니다.
You are using an API key that has been deleted or deactivated.
삭제 또는 비활성화된 API 키를 사용하고 있습니다.
An old, revoked API key might be cached locally.
해지된 이전 API 키는 로컬에 캐시될 수 있습니다.
To resolve this error, please follow these steps:
이 오류를 해결하려면 다음 단계를 따르십시오.
Try clearing your browser's cache and cookies, then try again.
브라우저의 캐시와 쿠키를 삭제한 후 다시 시도하세요.
Check that you are using the correct API key in your request header.
요청 헤더에서 올바른 API 키를 사용하고 있는지 확인하십시오.
If you are unsure whether your API key is correct, you cangenerate a new one. Make sure to replace your old API key in your codebase and follow ourbest practices guide.
API 키가 올바른지 확실하지 않은 경우 새 키를 생성할 수 있습니다. 코드베이스에서 이전 API 키를 교체하고 모범 사례 가이드를 따르십시오.
401 - You must be a member of an organization to use the API
This error message indicates that your account is not part of an organization. This could happen for several reasons, such as:
이 오류 메시지는 귀하의 계정이 조직의 일부가 아님을 나타냅니다. 이는 다음과 같은 여러 가지 이유로 발생할 수 있습니다.
You have left or been removed from your previous organization.
이전 조직에서 탈퇴했거나 제거되었습니다.
Your organization has been deleted.
조직이 삭제되었습니다.
To resolve this error, please follow these steps:
이 오류를 해결하려면 다음 단계를 따르십시오.
If you have left or been removed from your previous organization, you can either request a new organization or get invited to an existing one.
이전 조직에서 탈퇴했거나 제거된 경우 새 조직을 요청하거나 기존 조직에 초대받을 수 있습니다.
To request a new organization, reach out to us via help.openai.com
새 조직을 요청하려면 help.openai.com을 통해 문의하십시오.
Existing organization owners can invite you to join their organization via theMembers Panel.
기존 조직 소유자는 구성원 패널을 통해 귀하를 조직에 가입하도록 초대할 수 있습니다.
429 - Rate limit reached for requests
This error message indicates that you have hit your assigned rate limit for the API. This means that you have submitted too many tokens or requests in a short period of time and have exceeded the number of requests allowed. This could happen for several reasons, such as:
이 오류 메시지는 API에 할당된 Rate Limit에 도달했음을 나타냅니다. 이는 단기간에 너무 많은 토큰 또는 요청을 제출했고 허용된 요청 수를 초과했음을 의미합니다. 이는 다음과 같은 여러 가지 이유로 발생할 수 있습니다.
You are using a loop or a script that makes frequent or concurrent requests.
자주 또는 동시에 요청하는 루프 또는 스크립트를 사용하고 있습니다.
You are sharing your API key with other users or applications.
다른 사용자 또는 애플리케이션과 API 키를 공유하고 있습니다.
You are using a free plan that has a low rate limit.
Rate Limit이 낮은 무료 플랜을 사용하고 있습니다.
To resolve this error, please follow these steps:
이 오류를 해결하려면 다음 단계를 따르십시오.
Pace your requests and avoid making unnecessary or redundant calls.
요청 속도를 조절하고 불필요하거나 중복된 호출을 피하십시오.
If you are using a loop or a script, make sure to implement a backoff mechanism or a retry logic that respects the rate limit and the response headers. You can read more about our rate limiting policy and best practices in ourrate limit guide.
루프 또는 스크립트를 사용하는 경우 rate limit 및 응답 헤더를 준수하는 backoff메커니즘 또는 재시도 논리를 구현해야 합니다. rate limit guide에서 rate limit 정책 및 모범 사례에 대해 자세히 알아볼 수 있습니다.
If you are sharing your organization with other users, note that limits are applied per organization and not per user. It is worth checking on the usage of the rest of your team as this will contribute to the limit.
조직을 다른 사용자와 공유하는 경우 제한은 사용자가 아닌 조직별로 적용됩니다. 한도에 영향을 미치므로 나머지 팀의 사용량을 확인하는 것이 좋습니다.
If you are using a free or low-tier plan, consider upgrading to a pay-as-you-go plan that offers a higher rate limit. You can compare the restrictions of each plan in ourrate limit guide.
무료 또는 낮은 계층 요금제를 사용하는 경우 더 높은 rate limit을 제공하는 종량제 요금제로 업그레이드하는 것이 좋습니다. 요금 제한 가이드에서 각 플랜의 제한 사항을 비교할 수 있습니다.
try:
  #Make your OpenAI API request here
  response = openai.Completion.create(prompt="Hello world",
                                      model="text-davinci-003")
except openai.error.APIError as e:
  #Handle API error here, e.g. retry or log
  print(f"OpenAI API returned an API Error: {e}")
  pass
except openai.error.APIConnectionError as e:
  #Handle connection error here
  print(f"Failed to connect to OpenAI API: {e}")
  pass
except openai.error.RateLimitError as e:
  #Handle rate limit error (we recommend using exponential backoff)
  print(f"OpenAI API request exceeded rate limit: {e}")
  pass
429 - You exceeded your current quota, please check your plan and billing details
This error message indicates that you have hit your maximum monthly spend for the API. You can view your maximum monthly limit, under ‘hard limit’ in your [account billing settings](/account/billing/limits). This means that you have consumed all the credits allocated to your plan and have reached the limit of your current billing cycle. This could happen for several reasons, such as:
이 오류 메시지는 API에 대한 최대 월별 지출에 도달했음을 나타냅니다. [계정 결제 설정](/account/billing/limits)의 '하드 한도'에서 최대 월 한도를 확인할 수 있습니다. 이는 계획에 할당된 모든 크레딧을 사용했으며 현재 청구 주기의 한도에 도달했음을 의미합니다. 이는 다음과 같은 여러 가지 이유로 발생할 수 있습니다.
You are using a high-volume or complex service that consumes a lot of credits or tokens.
크레딧이나 토큰을 많이 소모하는 대용량 또는 복잡한 서비스를 사용하고 있습니다.
Your limit is set too low for your organization’s usage.
한도가 조직의 사용량에 비해 너무 낮게 설정되었습니다.
To resolve this error, please follow these steps:
이 오류를 해결하려면 다음 단계를 따르십시오.
Check your current quota in youraccount settings. You can see how many tokens your requests have consumed in theusage sectionof your account.
계정 설정에서 현재 할당량을 확인하세요. 계정의 사용량 섹션에서 요청이 소비한 토큰 수를 확인할 수 있습니다.
If you are using a free plan, consider upgrading to a pay-as-you-go plan that offers a higher quota.
무료 요금제를 사용 중인 경우 더 높은 할당량을 제공하는 종량제 요금제로 업그레이드하는 것이 좋습니다.
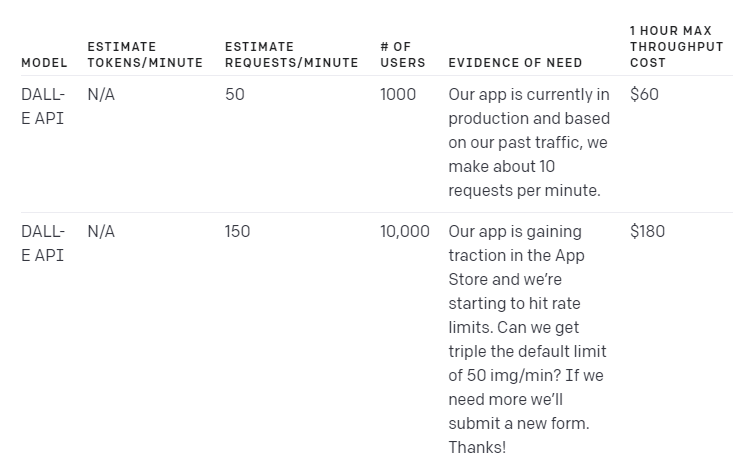
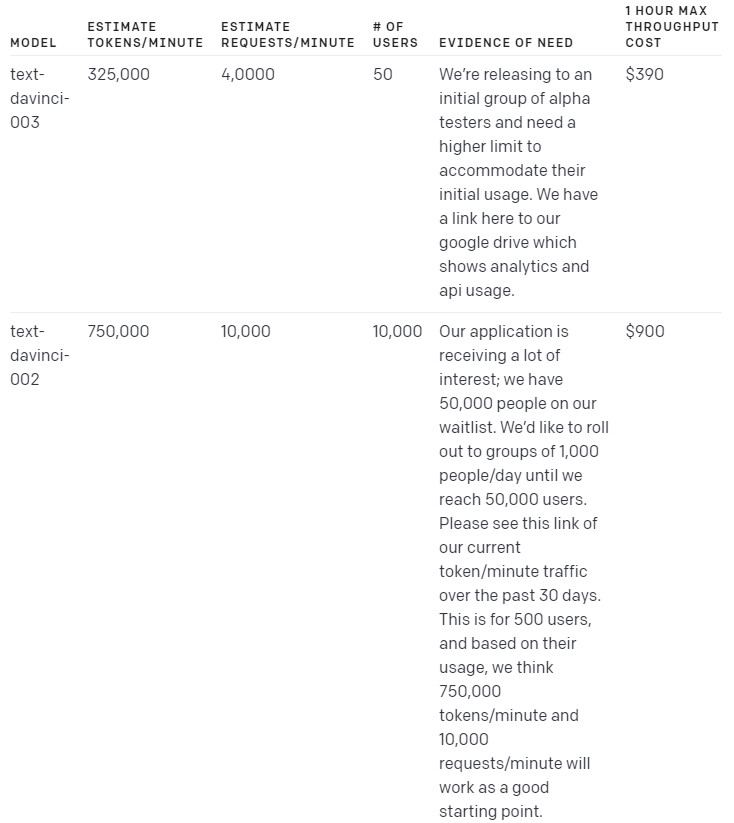
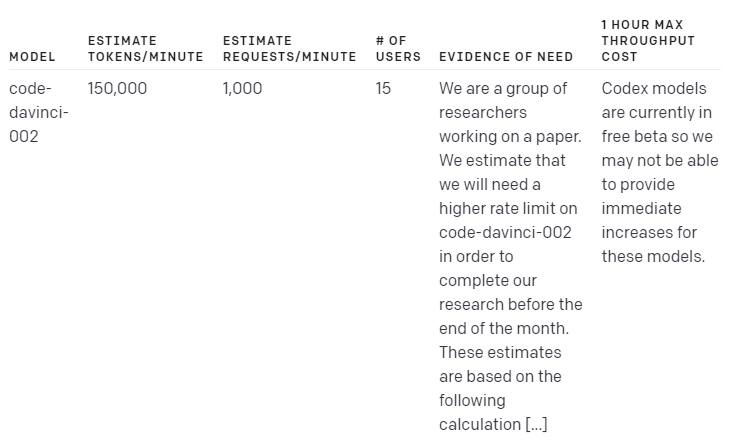
If you need a quota increase, you canapply for oneand provide relevant details on expected usage. We will review your request and get back to you in ~7-10 business days.
할당량 증가가 필요한 경우 신청하고 예상 사용량에 대한 관련 세부 정보를 제공할 수 있습니다. 귀하의 요청을 검토한 후 영업일 기준 ~7~10일 이내에 연락드리겠습니다.
429 - The engine is currently overloaded, please try again later
This error message indicates that our servers are experiencing high traffic and are unable to process your request at the moment. This could happen for several reasons, such as:
이 오류 메시지는 당사 서버의 트래픽이 많아 현재 귀하의 요청을 처리할 수 없음을 나타냅니다. 이는 다음과 같은 여러 가지 이유로 발생할 수 있습니다.
There is a sudden spike or surge in demand for our services.
서비스에 대한 수요가 갑자기 급증하거나 급증합니다.
There is scheduled or unscheduled maintenance or update on our servers.
서버에 예정되거나 예정되지 않은 유지 관리 또는 업데이트가 있습니다.
There is an unexpected or unavoidable outage or incident on our servers.
당사 서버에 예상치 못한 또는 피할 수 없는 중단 또는 사고가 발생했습니다.
To resolve this error, please follow these steps:
이 오류를 해결하려면 다음 단계를 따르십시오.
Retry your request after a brief wait. We recommend using an exponential backoff strategy or a retry logic that respects the response headers and the rate limit. You can read more about our rate limitbest practices.
잠시 기다린 후 요청을 다시 시도하십시오. exponential backoff 전략 또는 응답 헤더 및 Rate limit을 준수하는 재시도 논리를 사용하는 것이 좋습니다. Rate limit 모범 사례에 대해 자세히 알아볼 수 있습니다.
Check ourstatus pagefor any updates or announcements regarding our services and servers.
서비스 및 서버에 관한 업데이트 또는 공지 사항은 상태 페이지를 확인하십시오.
If you are still getting this error after a reasonable amount of time, please contact us for further assistance. We apologize for any inconvenience and appreciate your patience and understanding.
상당한 시간이 지난 후에도 이 오류가 계속 발생하면 당사에 문의하여 추가 지원을 받으십시오. 불편을 끼쳐 드려 죄송하며 양해해 주셔서 감사합니다.
Python library error types
TYPE OVERVIEW
APIError
Cause:Issue on our side. Solution:Retry your request after a brief wait and contact us if the issue persists.
Timeout
Cause:Request timed out. Solution:Retry your request after a brief wait and contact us if the issue persists.
RateLimitError
Cause:You have hit your assigned rate limit. Solution:Pace your requests. Read more in ourRate limit guide.
APIConnectionError
Cause:Issue connecting to our services. Solution:Check your network settings, proxy configuration, SSL certificates, or firewall rules.
InvalidRequestError
Cause:Your request was malformed or missing some required parameters, such as a token or an input. Solution:The error message should advise you on the specific error made. Check thedocumentationfor the specific API method you are calling and make sure you are sending valid and complete parameters. You may also need to check the encoding, format, or size of your request data.
AuthenticationError
Cause:Your API key or token was invalid, expired, or revoked. Solution:Check your API key or token and make sure it is correct and active. You may need to generate a new one from your account dashboard.
ServiceUnavailableError
Cause:Issue on our servers. Solution:Retry your request after a brief wait and contact us if the issue persists. Check thestatus page.
APIError
An `APIError` indicates that something went wrong on our side when processing your request. This could be due to a temporary error, a bug, or a system outage.
'APIError'는 요청을 처리할 때 OpenAI 측에서 문제가 발생했음을 나타냅니다. 이는 일시적인 오류, 버그 또는 시스템 중단 때문일 수 있습니다.
We apologize for any inconvenience and we are working hard to resolve any issues as soon as possible. You cancheck our system status pagefor more information.
불편을 끼쳐 드려 죄송하며 가능한 한 빨리 문제를 해결하기 위해 노력하고 있습니다. 자세한 내용은 시스템 상태 페이지에서 확인할 수 있습니다.
If you encounter anAPIError, please try the following steps:
APIError가 발생하면 다음 단계를 시도해 보세요.
Wait a few seconds and retry your request. Sometimes, the issue may be resolved quickly and your request may succeed on the second attempt.
몇 초간 기다린 후 요청을 다시 시도하십시오. 경우에 따라 문제가 빠르게 해결되고 두 번째 시도에서 요청이 성공할 수 있습니다.
Check our status page for any ongoing incidents or maintenance that may affect our services. If there is an active incident, please follow the updates and wait until it is resolved before retrying your request.
당사 서비스에 영향을 미칠 수 있는 진행 중인 사건이나 유지 보수에 대해서는 상태 페이지를 확인하십시오. active incident가 있는 경우 업데이트를 따르고 요청을 다시 시도하기 전에 문제가 해결될 때까지 기다리십시오.
If the issue persists, check out our Persistent errors next steps section.
문제가 지속되면 지속적인 오류 다음 단계 섹션을 확인하세요.
Our support team will investigate the issue and get back to you as soon as possible. Note that our support queue times may be long due to high demand. You can alsopost in our Community Forumbut be sure to omit any sensitive information.
지원팀에서 문제를 조사하고 최대한 빨리 답변을 드릴 것입니다. 수요가 많기 때문에 지원 대기 시간이 길어질 수 있습니다. 커뮤니티 포럼에 게시할 수도 있지만 민감한 정보는 생략해야 합니다.
Timeout
A `Timeout` error indicates that your request took too long to complete and our server closed the connection. This could be due to a network issue, a heavy load on our services, or a complex request that requires more processing time.
'시간 초과' 오류는 요청을 완료하는 데 시간이 너무 오래 걸려 서버가 연결을 종료했음을 나타냅니다. 이는 네트워크 문제, 서비스에 대한 과부하 또는 더 많은 처리 시간이 필요한 복잡한 요청 때문일 수 있습니다.
If you encounter aTimeouterror, please try the following steps:
시간 초과 오류가 발생하면 다음 단계를 시도하십시오.
Wait a few seconds and retry your request. Sometimes, the network congestion or the load on our services may be reduced and your request may succeed on the second attempt.
몇 초간 기다린 후 요청을 다시 시도하십시오. 경우에 따라 네트워크 정체 또는 당사 서비스의 부하가 줄어들 수 있으며 두 번째 시도에서 요청이 성공할 수 있습니다.
Check your network settings and make sure you have a stable and fast internet connection. You may need to switch to a different network, use a wired connection, or reduce the number of devices or applications using your bandwidth.
네트워크 설정을 확인하고 안정적이고 빠른 인터넷 연결이 있는지 확인하십시오. 다른 네트워크로 전환하거나 유선 연결을 사용하거나 대역폭을 사용하는 장치 또는 응용 프로그램 수를 줄여야 할 수 있습니다.
If the issue persists, check out our persistent errors next steps section.
문제가 지속되면 지속적인 오류 다음 단계 섹션을 확인하세요.
RateLimitError
A `RateLimitError` indicates that you have hit your assigned rate limit. This means that you have sent too many tokens or requests in a given period of time, and our services have temporarily blocked you from sending more.
'RateLimitError'는 할당된 rate limit에 도달했음을 나타냅니다. 이는 귀하가 주어진 기간 동안 너무 많은 토큰 또는 요청을 보냈고 당사 서비스가 일시적으로 귀하의 추가 전송을 차단했음을 의미합니다.
We impose rate limits to ensure fair and efficient use of our resources and to prevent abuse or overload of our services.
If you encounter aRateLimitError, please try the following steps:
당사는 자원의 공정하고 효율적인 사용을 보장하고 서비스의 남용 또는 과부하를 방지하기 위해 Rate limit을 부과합니다.
RateLimitError가 발생하면 다음 단계를 시도하십시오.
Send fewer tokens or requests or slow down. You may need to reduce the frequency or volume of your requests, batch your tokens, or implement exponential backoff. You can read ourRate limit guidefor more details.
더 적은 수의 토큰 또는 요청을 보내거나 속도를 늦추십시오. 요청의 빈도나 양을 줄이거나 토큰을 일괄 처리하거나 exponential backoff를 구현해야 할 수 있습니다. 자세한 내용은 Rate limit guide를 참조하세요.
Wait until your rate limit resets (one minute) and retry your request. The error message should give you a sense of your usage rate and permitted usage.
Rate Limit이 재설정될 때까지(1분) 기다렸다가 요청을 다시 시도하십시오. 오류 메시지는 사용률과 허용된 사용에 대한 정보를 제공해야 합니다.
You can also check your API usage statistics from your account dashboard.
계정 대시보드에서 API 사용 통계를 확인할 수도 있습니다.
APIConnectionError
An `APIConnectionError` indicates that your request could not reach our servers or establish a secure connection. This could be due to a network issue, a proxy configuration, an SSL certificate, or a firewall rule.
APIConnectionError'는 요청이 OpenAI 서버에 도달하지 못하거나 보안 연결을 설정할 수 없음을 나타냅니다. 이는 네트워크 문제, 프록시 구성, SSL 인증서 또는 방화벽 규칙 때문일 수 있습니다.
If you encounter anAPIConnectionError, please try the following steps:
APIConnectionError가 발생하면 다음 단계를 시도해 보세요.
Check your network settings and make sure you have a stable and fast internet connection. You may need to switch to a different network, use a wired connection, or reduce the number of devices or applications using your bandwidth.
네트워크 설정을 확인하고 안정적이고 빠른 인터넷 연결이 있는지 확인하십시오. 다른 네트워크로 전환하거나 유선 연결을 사용하거나 대역폭을 사용하는 장치 또는 응용 프로그램 수를 줄여야 할 수 있습니다.
Check your proxy configuration and make sure it is compatible with our services. You may need to update your proxy settings, use a different proxy, or bypass the proxy altogether.
프록시 구성을 확인하고 당사 서비스와 호환되는지 확인하십시오. 프록시 설정을 업데이트하거나 다른 프록시를 사용하거나 프록시를 모두 우회해야 할 수 있습니다.
Check your SSL certificates and make sure they are valid and up-to-date. You may need to install or renew your certificates, use a different certificate authority, or disable SSL verification.
SSL 인증서를 확인하고 유효하고 최신인지 확인하십시오. 인증서를 설치 또는 갱신하거나 다른 인증 기관을 사용하거나 SSL 확인을 비활성화해야 할 수 있습니다.
Check your firewall rules and make sure they are not blocking or filtering our services. You may need to modify your firewall settings.
방화벽 규칙을 확인하고 당사 서비스를 차단하거나 필터링하지 않는지 확인하십시오. 방화벽 설정을 수정해야 할 수도 있습니다.
If appropriate, check that your container has the correct permissions to send and receive traffic.
해당하는 경우 컨테이너에 트래픽을 보내고 받을 수 있는 올바른 권한이 있는지 확인하십시오.
If the issue persists, check out our persistent errors next steps section.
문제가 지속되면 지속적인 오류 다음 단계 섹션을 확인하세요.
InvalidRequestError
AnInvalidRequestErrorindicates that your request was malformed or missing some required parameters, such as a token or an input. This could be due to a typo, a formatting error, or a logic error in your code.
InvalidRequestError는 요청 형식이 잘못되었거나 토큰 또는 입력과 같은 일부 필수 매개변수가 누락되었음을 나타냅니다. 이는 코드의 오타, 형식 오류 또는 논리 오류 때문일 수 있습니다.
If you encounter anInvalidRequestError, please try the following steps:
InvalidRequestError가 발생하면 다음 단계를 시도하십시오.
Read the error message carefully and identify the specific error made. The error message should advise you on what parameter was invalid or missing, and what value or format was expected.
오류 메시지를 주의 깊게 읽고 발생한 특정 오류를 식별하십시오. 오류 메시지는 어떤 매개변수가 잘못되었거나 누락되었는지, 어떤 값이나 형식이 예상되었는지 알려줍니다.
Check theAPI Referencefor the specific API method you were calling and make sure you are sending valid and complete parameters. You may need to review the parameter names, types, values, and formats, and ensure they match the documentation.
호출한 특정 API 메서드에 대한 API 참조를 확인하고 유효하고 완전한 매개변수를 보내고 있는지 확인하십시오. 매개변수 이름, 유형, 값 및 형식을 검토하고 문서와 일치하는지 확인해야 할 수 있습니다.
Check the encoding, format, or size of your request data and make sure they are compatible with our services. You may need to encode your data in UTF-8, format your data in JSON, or compress your data if it is too large.
요청 데이터의 인코딩, 형식 또는 크기를 확인하고 당사 서비스와 호환되는지 확인하십시오. 데이터를 UTF-8로 인코딩하거나 데이터를 JSON 형식으로 지정하거나 데이터가 너무 큰 경우 데이터를 압축해야 할 수 있습니다.
Test your request using a tool like Postman or curl and make sure it works as expected. You may need to debug your code and fix any errors or inconsistencies in your request logic.
Postman 또는 curl과 같은 도구를 사용하여 요청을 테스트하고 예상대로 작동하는지 확인하십시오. 코드를 디버깅하고 요청 논리의 오류나 불일치를 수정해야 할 수 있습니다.
If the issue persists, check out our persistent errors next steps section.
문제가 지속되면 지속적인 오류 다음 단계 섹션을 확인하세요.
AuthenticationError
An `AuthenticationError` indicates that your API key or token was invalid, expired, or revoked. This could be due to a typo, a formatting error, or a security breach.
'AuthenticationError'는 API 키 또는 토큰이 유효하지 않거나 만료되었거나 취소되었음을 나타냅니다. 이는 오타, 형식 오류 또는 보안 위반 때문일 수 있습니다.
If you encounter anAuthenticationError, please try the following steps:
인증 오류가 발생하면 다음 단계를 시도하십시오.
Check your API key or token and make sure it is correct and active. You may need to generate a new key from the API Key dashboard, ensure there are no extra spaces or characters, or use a different key or token if you have multiple ones.
API 키 또는 토큰을 확인하고 올바르고 활성화되어 있는지 확인하십시오. API 키 대시보드에서 새 키를 생성하거나, 추가 공백이나 문자가 없는지 확인하거나, 키나 토큰이 여러 개인 경우 다른 키나 토큰을 사용해야 할 수 있습니다.
Ensure that you have followed the correct formatting.
올바른 형식을 따랐는지 확인하십시오.
ServiceUnavailableError
A `ServiceUnavailableError` indicates that our servers are temporarily unable to handle your request. This could be due to a planned or unplanned maintenance, a system upgrade, or a server failure. These errors can also be returned during periods of high traffic.
'ServiceUnavailableError'는 서버가 일시적으로 귀하의 요청을 처리할 수 없음을 나타냅니다. 이는 계획되거나 계획되지 않은 유지 관리, 시스템 업그레이드 또는 서버 오류 때문일 수 있습니다. 이러한 오류는 트래픽이 많은 기간에도 반환될 수 있습니다.
We apologize for any inconvenience and we are working hard to restore our services as soon as possible.
If you encounter aServiceUnavailableError, please try the following steps:
불편을 끼쳐 드려 죄송하며 최대한 빨리 서비스를 복구하기 위해 노력하고 있습니다.
Wait a few minutes and retry your request. Sometimes, the issue may be resolved quickly and your request may succeed on the next attempt.
몇 분 정도 기다린 후 요청을 다시 시도하십시오. 경우에 따라 문제가 빠르게 해결되고 다음 시도에서 요청이 성공할 수 있습니다.
Check ourstatus pagefor any ongoing incidents or maintenance that may affect our services. If there is an active incident, please follow the updates and wait until it is resolved before retrying your request.
당사 서비스에 영향을 미칠 수 있는 진행 중인 사건이나 유지 보수에 대해서는 상태 페이지를 확인하십시오. 활성 사고가 있는 경우 업데이트를 따르고 요청을 다시 시도하기 전에 문제가 해결될 때까지 기다리십시오.
If the issue persists, check out our persistent errors next steps section.
Any other relevant details that may help us diagnose the issue
Our support team will investigate the issue and get back to you as soon as possible. Note that our support queue times may be long due to high demand. You can alsopost in our Community Forumbut be sure to omit any sensitive information.
지원팀에서 문제를 조사하고 최대한 빨리 답변을 드릴 것입니다. 수요가 많기 때문에 지원 대기 시간이 길어질 수 있습니다. 커뮤니티 포럼에 게시할 수도 있지만 민감한 정보는 생략해야 합니다.
Handling errors
We advise you to programmatically handle errors returned by the API. To do so, you may want to use a code snippet like below:
API에서 반환된 오류를 프로그래밍 방식으로 처리하는 것이 좋습니다. 이렇게 하려면 아래와 같은 코드 스니펫을 사용할 수 있습니다.
A rate limit is a restriction that an API imposes on the number of times a user or client can access the server within a specified period of time.
Rate limit은 API가 사용자 또는 클라이언트가 특정 시간동안 서버에 접속할 수 있는 횟수에 부과하는 제한 입니다.
Why do we have rate limits?
Rate limits are a common practice for APIs, and they're put in place for a few different reasons:
Rate limit은 API에 대한 일반적인 관행입니다. 이 제한이 있는 이유는 몇가지 이유가 있습니다.
They help protect against abuse or misuse of the API.For example, a malicious actor could flood the API with requests in an attempt to overload it or cause disruptions in service. By setting rate limits, OpenAI can prevent this kind of activity.
API의 남용 또는 오용을 방지하는 데 도움이 됩니다. 예를 들어 악의적인 행위자는 API에 과부하를 일으키거나 서비스를 중단시키려는 시도로 API에 요청을 플러딩할 수 있습니다. Rate Limit을 설정함으로써 OpenAI는 이러한 종류의 공격을 방지할 수 있습니다.
Rate limits help ensure that everyone has fair access to the API.If one person or organization makes an excessive number of requests, it could bog down the API for everyone else. By throttling the number of requests that a single user can make, OpenAI ensures that the most number of people have an opportunity to use the API without experiencing slowdowns.
Rate Limit은 모든 사람이 API에 공정하게 액세스할 수 있도록 도와줍니다. 한 개인이나 조직이 과도한 수의 요청을 하면 다른 모든 사람의 API가 중단될 수 있습니다. 단일 사용자가 만들 수 있는 요청 수를 제한함으로써 OpenAI는 대부분의 사람들이 속도 저하 없이 API를 사용할 기회를 갖도록 보장합니다.
Rate limits can help OpenAI manage the aggregate load on its infrastructure.If requests to the API increase dramatically, it could tax the servers and cause performance issues. By setting rate limits, OpenAI can help maintain a smooth and consistent experience for all users.
Rate limit은 OpenAI가 인프라의 총 로드를 관리하는 데 도움이 될 수 있습니다. API에 대한 요청이 급격히 증가하면 서버에 부담을 주고 성능 문제를 일으킬 수 있습니다. Rate limit을 설정함으로써 OpenAI는 모든 사용자에게 원활하고 일관된 경험을 유지하는 데 도움을 줄 수 있습니다.
Please work through this document in its entirety to better understand how OpenAI’s rate limit system works. We include code examples and possible solutions to handle common issues. It is recommended to follow this guidance before filling out theRate Limit Increase Request formwith details regarding how to fill it out in the last section.
OpenAI의 Rate limit 시스템이 작동하는 방식을 더 잘 이해하려면 이 문서 전체를 살펴보십시오. 일반적인 문제를 처리할 수 있는 코드 예제와 가능한 솔루션이 포함되어 있습니다. 요금 한도 인상 요청 양식을 작성하기 전에 마지막 섹션에서 작성 방법에 대한 세부 정보를 작성하기 전에 이 지침을 따르는 것이 좋습니다.
What are the rate limits for our API?
We enforce rate limits at theorganization level, not user level, based on the specific endpoint used as well as the type of account you have. Rate limits are measured in two ways:RPM(requests per minute) andTPM(tokens per minute). The table below highlights the default rate limits for our API but these limits can be increased depending on your use case after filling out the Rate Limit increase request form.
OpenAI는 사용된 특정 엔드포인트와 보유한 계정 유형을 기반으로 사용자 수준이 아닌 조직 수준에서 속도 제한을 적용합니다. Rate Limit은 RPM(분당 요청) 및 TPM(분당 토큰)의 두 가지 방식으로 측정됩니다. 아래 표에는 API에 대한 기본 Rate Limit이 강조되어 있지만 이러한 제한은 Rate Limit 증가 요청 양식을 작성한 후 사용 사례에 따라 증가할 수 있습니다.
TheTPM(tokens per minute) unit is different depending on the model:
TPM 은 모델에 따라 다릅니다.
실제로 이것은 davinci 모델에 비해 ada 모델에 분당 약 200배 더 많은 토큰을 보낼 수 있음을 의미합니다.
It is important to note that the rate limit can be hit by either option depending on what occurs first. For example, you might send 20 requests with only 100 tokens to the Codex endpoint and that would fill your limit, even if you did not send 40k tokens within those 20 requests.
Rate limit은 먼저 발생하는 항목에 따라 두 옵션 중 하나에 의해 적중될 수 있다는 점에 유의하는 것이 중요합니다. 예를 들어 Codex 엔드포인트에 100개의 토큰만 있는 20개의 요청을 보낼 수 있으며 20개의 요청 내에서 40,000개의 토큰을 보내지 않았더라도 제한을 채울 수 있습니다.
How do rate limits work?
Rate limit이 분당 요청 60개이고 분당 150,000 davinci 토큰인 경우 requests/min 한도에 도달하거나 토큰이 부족하여 제한을 받게 됩니다. 둘 중 어느 하나에 도달하면 이러한 상황이 발생합니다. 예를 들어 분당 최대 요청 수가 60이면 초당 1개의 요청을 보낼 수 있어야 합니다. 800ms마다 1개의 요청을 보내는 경우 Rate Limit에 도달하면 프로그램을 200ms만 휴면 상태로 만들면 하나 더 요청을 보낼 수 있습니다. 그렇지 않으면 후속 요청이 실패합니다. 기본적으로 분당 3,000개의 요청을 사용하면 고객은 20ms마다 또는 0.02초마다 효과적으로 1개의 요청을 보낼 수 있습니다.
What happens if I hit a rate limit error?
Rate limit errors look like this: Rate limit 에러 메세지는 아래 처럼 나옵니다.
Rate limit reached for default-text-davinci-002 in organization org-{id} on requests per min. Limit: 20.000000 / min. Current: 24.000000 / min.
If you hit a rate limit, it means you've made too many requests in a short period of time, and the API is refusing to fulfill further requests until a specified amount of time has passed.
Rate Limit에 도달하면 짧은 시간에 너무 많은 요청을 했고 지정된 시간이 지날 때까지 API가 추가 요청 이행을 거부하고 있음을 의미합니다.
Rate limits vsmax_tokens
Eachmodel we offerhas a limited number of tokens that can be passed in as input when making a request. You cannot increase the maximum number of tokens a model takes in. For example, if you are usingtext-ada-001, the maximum number of tokens you can send to this model is 2,048 tokens per request.
OpenAI가 제공하는 각 모델에는 request시 input으로 전달할 수 있는 토큰 수가 제한 돼 있습니다. 모델이 받을 수 있는 최대 토큰 수는 늘릴 수 없습니다. 예를 들어 text-ada-001을 사용하는 경우 이 모델에 보낼 수 있는 최대 토큰 수는 요청당 2048개의 토큰 입니다.
Error Mitigation
What are some steps I can take to mitigate this?
The OpenAI Cookbook has apython notebookthat explains details on how to avoid rate limit errors.
OpenAI Cookbook에는 Rate Limit 오류를 방지하는 방법에 대한 세부 정보를 설명하는 Python 노트북이 있습니다.
You should also exercise caution when providing programmatic access, bulk processing features, and automated social media posting - consider only enabling these for trusted customers.
또한 프로그래밍 방식 액세스, 대량 처리 기능 및 자동화된 소셜 미디어 게시를 제공할 때 주의해야 합니다. 신뢰할 수 있는 고객에 대해서만 이러한 기능을 활성화하는 것이 좋습니다.
To protect against automated and high-volume misuse, set a usage limit for individual users within a specified time frame (daily, weekly, or monthly). Consider implementing a hard cap or a manual review process for users who exceed the limit.
자동화된 대량 오용으로부터 보호하려면 지정된 기간(일별, 주별 또는 월별) 내에서 개별 사용자에 대한 사용 제한을 설정하십시오. 한도를 초과하는 사용자에 대해 하드 캡 또는 수동 검토 프로세스를 구현하는 것을 고려하십시오.
Retrying with exponential backoff
One easy way to avoid rate limit errors is to automatically retry requests with a random exponential backoff. Retrying with exponential backoff means performing a short sleep when a rate limit error is hit, then retrying the unsuccessful request. If the request is still unsuccessful, the sleep length is increased and the process is repeated. This continues until the request is successful or until a maximum number of retries is reached. This approach has many benefits:
Rate Limit 오류를 방지하는 한 가지 쉬운 방법은 andom exponential backoff로 요청을 자동으로 재시도하는 것입니다. exponential backoff로 재시도한다는 것은 Rate Limit 오류에 도달했을 때 short sleep 모드를 수행한 다음 실패한 요청을 다시 시도하는 것을 의미합니다. 요청이 여전히 실패하면 sleep 시간이 증가하고 프로세스가 반복됩니다. 이것은 요청이 성공하거나 최대 재시도 횟수에 도달할 때까지 계속됩니다. 이 접근 방식에는 다음과 같은 많은 이점이 있습니다.
Automatic retries means you can recover from rate limit errors without crashes or missing data
자동 재시도는 충돌이나 데이터 손실 없이 rate limit 오류에서 복구할 수 있음을 의미합니다.
Exponential backoff means that your first retries can be tried quickly, while still benefiting from longer delays if your first few retries fail
Exponential backoff는 첫 번째 재시도를 빠르게 시도할 수 있음을 의미하며 처음 몇 번의 재시도가 실패할 경우 더 긴 지연으로부터 이점을 누릴 수 있습니다.
Adding random jitter to the delay helps retries from all hitting at the same time.
지연에 andom jitter를 추가하면 동시에 모든 hitting에서 재시도하는 데 도움이 됩니다.
Note that unsuccessful requests contribute to your per-minute limit, so continuously resending a request won’t work.
실패한 요청은 분당 한도에 영향을 미치므로 계속해서 요청을 다시 보내면 작동하지 않습니다.
Below are a few example solutionsfor Pythonthat use exponential backoff.
다음은 exponential backoff를 사용하는 Python에 대한 몇 가지 예제 솔루션입니다.
Example #1: Using the Tenacity library
Tenacity is an Apache 2.0 licensed general-purpose retrying library, written in Python, to simplify the task of adding retry behavior to just about anything. To add exponential backoff to your requests, you can use thetenacity.retrydecorator. The below example uses thetenacity.wait_random_exponentialfunction to add random exponential backoff to a request.
Tenacity는 Python으로 작성된 Apache 2.0 라이센스 범용 재시도 라이브러리로 거의 모든 항목에 재시도 동작을 추가하는 작업을 단순화합니다. 요청에 exponential backoff를 추가하려면 tenacity.retry 데코레이터를 사용할 수 있습니다. 아래 예에서는 tenacity.wait_random_exponential 함수를 사용하여 무작위 exponential backoff를 요청에 추가합니다.
import openai
from tenacity import (
    retry,
    stop_after_attempt,
    wait_random_exponential,
)  # for exponential backoff

@retry(wait=wait_random_exponential(min=1, max=60), stop=stop_after_attempt(6))
def completion_with_backoff(**kwargs):
    return openai.Completion.create(**kwargs)

completion_with_backoff(model="text-davinci-003", prompt="Once upon a time,")
Note that the Tenacity library is a third-party tool, and OpenAI makes no guarantees about its reliability or security.
import backoff
import openai
@backoff.on_exception(backoff.expo, openai.error.RateLimitError)
def completions_with_backoff(**kwargs):
    return openai.Completion.create(**kwargs)

completions_with_backoff(model="text-davinci-003", prompt="Once upon a time,")
Like Tenacity, the backoff library is a third-party tool, and OpenAI makes no guarantees about its reliability or security.
Tenacity와 마찬가지로 백오프 라이브러리는 타사 도구이며 OpenAI는 안정성이나 보안에 대해 보장하지 않습니다.
Example 3: Manual backoff implementation
If you don't want to use third-party libraries, you can implement your own backoff logic following this example:
타사 라이브러리를 사용하지 않으려면 다음 예제에 따라 자체 백오프 논리를 구현할 수 있습니다.
# imports
import random
import time

import openai

# define a retry decorator
def retry_with_exponential_backoff(
    func,
    initial_delay: float = 1,
    exponential_base: float = 2,
    jitter: bool = True,
    max_retries: int = 10,
    errors: tuple = (openai.error.RateLimitError,),
):
    """Retry a function with exponential backoff."""

    def wrapper(*args, **kwargs):
        # Initialize variables
        num_retries = 0
        delay = initial_delay

        # Loop until a successful response or max_retries is hit or an exception is raised
        while True:
            try:
                return func(*args, **kwargs)

            # Retry on specific errors
            except errors as e:
                # Increment retries
                num_retries += 1

                # Check if max retries has been reached
                if num_retries > max_retries:
                    raise Exception(
                        f"Maximum number of retries ({max_retries}) exceeded."
                    )

                # Increment the delay
                delay *= exponential_base * (1 + jitter * random.random())

                # Sleep for the delay
                time.sleep(delay)

            # Raise exceptions for any errors not specified
            except Exception as e:
                raise e

    return wrapper

@retry_with_exponential_backoff
def completions_with_backoff(**kwargs):
    return openai.Completion.create(**kwargs)
다시 말하지만 OpenAI는 이 솔루션의 보안이나 효율성을 보장하지 않지만 자체 솔루션을 위한 좋은 출발점이 될 수 있습니다.
Batching requests
The OpenAI API has separate limits for requests per minute and tokens per minute.
OpenAI API에는 분당 요청 및 분당 토큰에 대한 별도의 제한이 있습니다.
If you're hitting the limit on requests per minute, but have available capacity on tokens per minute, you can increase your throughput by batching multiple tasks into each request. This will allow you to process more tokens per minute, especially with our smaller models.
분당 요청 제한에 도달했지만 분당 토큰에 사용 가능한 용량이 있는 경우 여러 작업을 각 요청에 일괄 처리하여 처리량을 늘릴 수 있습니다. 이렇게 하면 특히 더 작은 모델을 사용하여 분당 더 많은 토큰을 처리할 수 있습니다.
Sending in a batch of prompts works exactly the same as a normal API call, except you pass in a list of strings to the prompt parameter instead of a single string.
단일 문자열 대신 프롬프트 매개변수에 문자열 목록을 전달한다는 점을 제외하면 프롬프트 일괄 전송은 일반 API 호출과 정확히 동일하게 작동합니다.
Example without batching
import openai

num_stories = 10
prompt = "Once upon a time,"

# serial example, with one story completion per request
for _ in range(num_stories):
    response = openai.Completion.create(
        model="curie",
        prompt=prompt,
        max_tokens=20,
    )
    # print story
    print(prompt + response.choices[0].text)
Example with batching
import openai  # for making OpenAI API requests


num_stories = 10
prompts = ["Once upon a time,"] * num_stories

# batched example, with 10 story completions per request
response = openai.Completion.create(
    model="curie",
    prompt=prompts,
    max_tokens=20,
)

# match completions to prompts by index
stories = [""] * len(prompts)
for choice in response.choices:
    stories[choice.index] = prompts[choice.index] + choice.text

# print stories
for story in stories:
    print(story)
Warning: the response object may not return completions in the order of the prompts, so always remember to match responses back to prompts using the index field.
경고: 응답 개체는 프롬프트 순서대로 완료를 반환하지 않을 수 있으므로 항상 인덱스 필드를 사용하여 응답을 프롬프트에 다시 일치시켜야 합니다.
Request Increase
When should I consider applying for a rate limit increase?
Our default rate limits help us maximize stability and prevent abuse of our API. We increase limits to enable high-traffic applications, so the best time to apply for a rate limit increase is when you feel that you have the necessary traffic data to support a strong case for increasing the rate limit. Large rate limit increase requests without supporting data are not likely to be approved. If you're gearing up for a product launch, please obtain the relevant data through a phased release over 10 days.
Keep in mind that rate limit increases can sometimes take 7-10 days so it makes sense to try and plan ahead and submit early if there is data to support you will reach your rate limit given your current growth numbers.
기본 rate limit은 안정성을 극대화하고 API 남용을 방지하는 데 도움이 됩니다. 우리는 트래픽이 많은 애플리케이션을 활성화하기 위해 제한을 늘립니다. 따라서 rate limits 증가를 신청할 가장 좋은 시기는 속도 제한 증가에 대한 강력한 사례를 지원하는 데 필요한 트래픽 데이터가 있다고 생각할 때입니다. 지원 데이터가 없는 대규모 rate limits 증가 요청은 승인되지 않을 가능성이 높습니다. 제품 출시를 준비하고 있다면 10일에 걸친 단계별 릴리스를 통해 관련 데이터를 얻으십시오.
Will my rate limit increase request be rejected?
A rate limit increase request is most often rejected because it lacks the data needed to justify the increase. We have provided numerical examples below that show how to best support a rate limit increase request and try our best to approve all requests that align with our safety policy and show supporting data. We are committed to enabling developers to scale and be successful with our API.
rate limit 증가 요청은 증가를 정당화하는 데 필요한 데이터가 부족하기 때문에 거부되는 경우가 가장 많습니다. 속도 제한 증가 요청을 가장 잘 지원하는 방법을 보여주고 안전 정책에 부합하는 모든 요청을 승인하고 지원 데이터를 표시하기 위해 최선을 다하는 방법을 아래에 숫자로 나타낸 예를 제공했습니다. 우리는 개발자가 API를 사용하여 확장하고 성공할 수 있도록 최선을 다하고 있습니다.
I’ve implemented exponential backoff for my text/code APIs, but I’m still hitting this error. How do I increase my rate limit?
Currently, we don’t support increasing ourfree beta endpoints, such as the editendpoint. We alsodon’t increase ChatGPTrate limits but you can join the waitlist forChatGPT Professional access.
현재 edit endpoint 같은 free beta endpoints 에 대해서는 제한량 증가를 지원하지 않습니다. 또한 ChatGPT Rate Limit을 늘리지 않지만 ChatGPT Professional 액세스 대기자 명단에 가입할 수 있습니다.
We understand the frustration that limited rate limits can cause, and we would love to raise the defaults for everyone. However, due to shared capacity constraints, we can only approve rate limit increases for paid customers who have demonstrated a need through ourRate Limit Increase Request form. To help us evaluate your needs properly, we ask that you please provide statistics on your current usage or projections based on historic user activity in the 'Share evidence of need' section of the form. If this information is not available, we recommend a phased release approach. Start by releasing the service to a subset of users at your current rate limits, gather usage data for 10 business days, and then submit a formal rate limit increase request based on that data for our review and approval.
We will review your request and if it is approved, we will notify you of the approval within a period of 7-10 business days.
Here are some examples of how you might fill out this form:
limited rate limits이 야기할 수 있는 불만을 이해하고 있으며 모든 사람을 위해 기본값을 높이고 싶습니다. 그러나 공유 용량 제약으로 인해 rate limit 증가 요청 양식을 통해 필요성을 입증한 유료 고객에 대해서만 rate limit 증가를 승인할 수 있습니다. 귀하의 필요를 적절하게 평가할 수 있도록 양식의 '필요에 대한 증거 공유' 섹션에서 이전 사용자 활동을 기반으로 현재 사용량 또는 예상에 대한 통계를 제공해 주시기 바랍니다. 이 정보를 사용할 수 없는 경우 단계적 릴리스 접근 방식을 권장합니다. 현재 rate limit으로 사용자 하위 집합에 서비스를 릴리스하고 영업일 기준 10일 동안 사용 데이터를 수집한 다음 검토 및 승인을 위해 해당 데이터를 기반으로 공식적인 rate limit 증가 요청을 제출합니다.
DALL-E API examples
Language model examples
Code model examples
Please note that these examples are just general use case scenarios, the actual usage rate will vary depending on the specific implementation and usage.
이러한 예는 일반적인 사용 사례 시나리오일 뿐이며 실제 사용률은 특정 구현 및 사용에 따라 달라집니다.