
https://d2l.ai/chapter_linear-classification/image-classification-dataset.html
4.2. The Image Classification Dataset — Dive into Deep Learning 1.0.0-beta0 documentation
d2l.ai
4.2. The Image Classification Dataset
%matplotlib inline
import time
import torch
import torchvision
from torchvision import transforms
from d2l import torch as d2l

d2l.use_svg_display()
위 코드는 PyTorch와 함께 딥러닝 라이브러리인 d2l (Dive into Deep Learning)을 사용하기 위한 환경을 설정하는 데 사용됩니다. 코드를 단계별로 살펴보겠습니다:
- %matplotlib inline: 이는 주피터 노트북의 매직 명령어로, matplotlib 그래프를 노트북 안에서 직접 표시할 수 있게 합니다.
- import time: time 모듈을 가져옵니다. 이 모듈은 시간과 관련된 작업을 수행하는 함수들을 제공합니다.
- import torch: PyTorch 라이브러리를 가져옵니다. PyTorch는 인기 있는 오픈 소스 딥러닝 프레임워크입니다.
- import torchvision: torchvision 라이브러리를 가져옵니다. torchvision은 컴퓨터 비전 작업을 위한 사전 훈련된 모델과 데이터셋을 제공합니다.
- from torchvision import transforms: torchvision에서 transforms 모듈을 가져옵니다. 이 모듈은 일반적인 이미지 변환 기능을 제공합니다.
- from d2l import torch as d2l: d2l 라이브러리에서 torch 모듈을 가져옵니다. d2l은 PyTorch와 함께 작업하기 위한 다양한 유틸리티와 함수를 제공하는 딥러닝 라이브러리입니다.
- d2l.use_svg_display(): 이는 d2l 라이브러리의 함수 호출로, 그래프의 표시 형식을 SVG (Scalable Vector Graphics) 형식으로 설정합니다. 이렇게 함으로써 d2l이 생성한 그래프가 주피터 노트북에서 올바르게 표시됩니다.
이 코드 세그먼트는 d2l 라이브러리를 PyTorch와 함께 사용하기 위한 필요한 라이브러리와 설정을 설정합니다. 이를 통해 딥러닝 모델과 데이터셋을 사용할 수 있게 됩니다.
4.2.1. Loading the Dataset
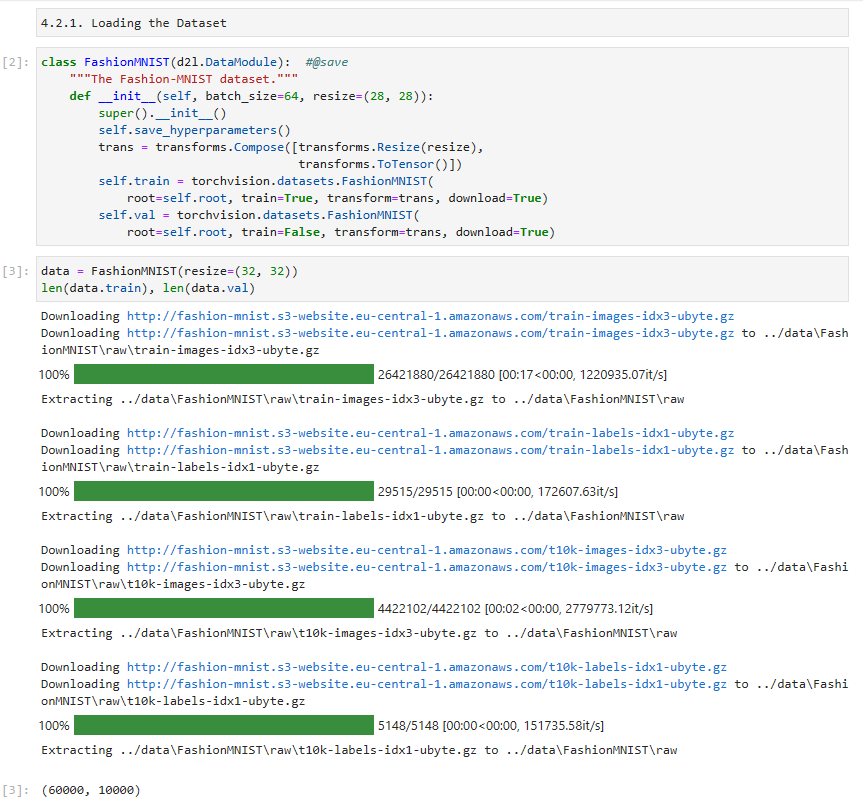
class FashionMNIST(d2l.DataModule):  #@save
    """The Fashion-MNIST dataset."""
    def __init__(self, batch_size=64, resize=(28, 28)):
        super().__init__()
        self.save_hyperparameters()
        trans = transforms.Compose([transforms.Resize(resize),
                                    transforms.ToTensor()])
        self.train = torchvision.datasets.FashionMNIST(
            root=self.root, train=True, transform=trans, download=True)
        self.val = torchvision.datasets.FashionMNIST(
            root=self.root, train=False, transform=trans, download=True)
위 코드는 Fashion-MNIST 데이터셋을 사용하기 위한 FashionMNIST 클래스를 정의하는 부분입니다. 코드를 한 줄씩 살펴보겠습니다.
- FashionMNIST 클래스는 d2l.DataModule을 상속받아 Fashion-MNIST 데이터셋을 사용할 수 있도록 합니다.
- __init__ 메서드는 클래스의 생성자입니다. batch_size와 resize를 매개변수로 받습니다.
- super().__init__()은 상위 클래스인 d2l.DataModule의 생성자를 호출합니다.
- self.save_hyperparameters()는 현재 클래스의 하이퍼파라미터를 저장합니다.
- trans는 데이터 변환을 위한 transforms.Compose 객체입니다. transforms.Resize(resize)는 이미지 크기를 resize 크기로 조정하는 변환을 수행하고, transforms.ToTensor()는 이미지를 텐서로 변환하는 변환을 수행합니다.
- self.train은 학습 데이터셋을 나타내는 torchvision.datasets.FashionMNIST 객체입니다. root는 데이터셋을 저장할 디렉토리를 의미하며, train=True는 학습 데이터셋을 로드하라는 의미입니다. transform은 데이터 변환을 적용하는 것을 의미하고, download=True는 데이터셋이 로컬에 없을 경우 다운로드하도록 지정합니다.
- self.val은 검증 데이터셋을 나타내는 torchvision.datasets.FashionMNIST 객체입니다. train=False로 설정하여 검증 데이터셋을 로드하도록 지정합니다.
이 코드는 Fashion-MNIST 데이터셋을 사용하기 위해 필요한 클래스와 데이터 변환을 초기화하는 부분입니다. 이를 통해 학습 데이터셋과 검증 데이터셋을 사용할 수 있습니다.
Fashion-MNIST consists of images from 10 categories, each represented by 6,000 images in the training dataset and by 1,000 in the test dataset. A test dataset is used for evaluating model performance (it must not be used for training). Consequently the training set and the test set contain 60,000 and 10,000 images, respectively.
Fashion-MNIST는 10개 범주의 이미지로 구성되며 각 범주는 훈련 데이터 세트에서 6,000개의 이미지로, 테스트 데이터 세트에서 1,000개로 표시됩니다. 테스트 데이터 세트는 모델 성능을 평가하는 데 사용됩니다(학습에 사용해서는 안 됨). 결과적으로 훈련 세트와 테스트 세트에는 각각 60,000개와 10,000개의 이미지가 포함됩니다.
data = FashionMNIST(resize=(32, 32))
len(data.train), len(data.val)
Local에서 실행한 결과.
위 코드는 FashionMNIST 데이터셋을 생성하고, 학습 데이터셋과 검증 데이터셋의 길이를 확인하는 부분입니다. 코드를 한 줄씩 살펴보겠습니다.
- data = FashionMNIST(resize=(32, 32))는 FashionMNIST 클래스의 객체를 생성하고, resize 매개변수를 (32, 32)로 설정하여 이미지 크기를 32x32로 조정합니다.
- len(data.train), len(data.val)은 data.train과 data.val의 길이를 확인하는 코드입니다. len(data.train)은 학습 데이터셋의 샘플 수를 반환하고, len(data.val)은 검증 데이터셋의 샘플 수를 반환합니다.
이 코드는 FashionMNIST 데이터셋 객체를 생성하고, 학습 데이터셋과 검증 데이터셋의 길이를 확인하는 부분입니다.
The images are grayscale and upscaled to 32×32 pixels in resolution above. This is similar to the original MNIST dataset which consisted of (binary) black and white images. Note, though, that most modern image data which has 3 channels (red, green, blue) and hyperspectral images which can have in excess of 100 channels (the HyMap sensor has 126 channels). By convention we store image as a c×ℎ×w tensor, where c is the number of color channels, ℎ is the height and w is the width.
이미지는 그레이스케일이며 위의 해상도에서 32×32 픽셀로 업스케일됩니다. 이것은 (바이너리) 흑백 이미지로 구성된 원본 MNIST 데이터 세트와 유사합니다. 그러나 3개 채널(빨간색, 녹색, 파란색)이 있는 대부분의 최신 이미지 데이터와 100개 이상의 채널(HyMap 센서에는 126개 채널이 있음)을 가질 수 있는 초분광 이미지가 있습니다. 관례적으로 우리는 이미지를 c×ℎ×w 텐서로 저장합니다. 여기서 c는 색상 채널 수, ℎ는 높이, w는 너비입니다.
data.train[0][0].shape
이 코드는 FashionMNIST 학습 데이터셋의 첫 번째 샘플의 이미지의 형태(shape)를 확인하는 부분입니다.
- data.train[0]은 학습 데이터셋의 첫 번째 샘플을 의미합니다. 이 샘플은 튜플 형태로 구성되어 있으며, 첫 번째 요소는 이미지를 나타냅니다.
- data.train[0][0]은 첫 번째 샘플의 이미지를 의미합니다.
- .shape는 이미지의 형태(shape)를 반환하는 속성(attribute)입니다. 이를 통해 이미지의 차원과 크기를 확인할 수 있습니다.
따라서 위의 코드는 FashionMNIST 학습 데이터셋의 첫 번째 샘플의 이미지의 형태(shape)를 확인하는 부분입니다.
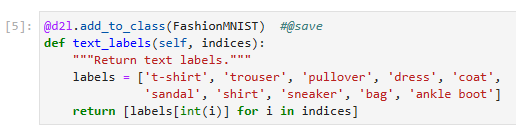
The categories of Fashion-MNIST have human-understandable names. The following convenience method converts between numeric labels and their names.
Fashion-MNIST의 범주에는 사람이 이해할 수 있는 이름이 있습니다. 다음 편의 메서드는 숫자 레이블과 이름 사이를 변환합니다.
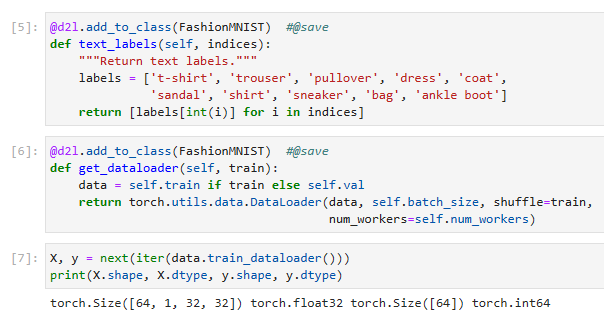
@d2l.add_to_class(FashionMNIST)  #@save
def text_labels(self, indices):
    """Return text labels."""
    labels = ['t-shirt', 'trouser', 'pullover', 'dress', 'coat',
              'sandal', 'shirt', 'sneaker', 'bag', 'ankle boot']
    return [labels[int(i)] for i in indices]
이 코드는 FashionMNIST 클래스에 text_labels 메서드를 추가하는 부분입니다. 이 메서드는 주어진 인덱스에 해당하는 레이블을 텍스트 형태로 반환합니다. 코드를 한 줄씩 살펴보겠습니다.
- @d2l.add_to_class(FashionMNIST)는 FashionMNIST 클래스에 text_labels 메서드를 추가하기 위한 데코레이터(decorator)입니다. 이를 통해 클래스 외부에서 해당 메서드를 정의할 수 있습니다.
- def text_labels(self, indices):는 text_labels 메서드를 정의하는 부분입니다. 이 메서드는 self와 indices를 매개변수로 받습니다.
- labels는 Fashion-MNIST 클래스에 대응하는 레이블을 나타내는 문자열 리스트입니다.
- [labels[int(i)] for i in indices]는 주어진 인덱스에 해당하는 레이블을 텍스트 형태로 반환하는 코드입니다. indices는 인덱스들의 리스트이며, int(i)를 통해 각 인덱스를 정수로 변환한 후 labels에서 해당하는 레이블을 가져옵니다.
이 코드는 FashionMNIST 클래스에 text_labels 메서드를 추가하여 주어진 인덱스에 해당하는 레이블을 텍스트 형태로 반환할 수 있도록 합니다.
4.2.2. Reading a Minibatch
To make our life easier when reading from the training and test sets, we use the built-in data iterator rather than creating one from scratch. Recall that at each iteration, a data iterator reads a minibatch of data with size batch_size. We also randomly shuffle the examples for the training data iterator.
학습 및 테스트 세트에서 읽을 때 삶을 더 쉽게 만들기 위해 처음부터 새로 만드는 대신 내장된 데이터 반복자를 사용합니다. 각 반복에서 데이터 반복자는 크기가 batch_size인 데이터의 미니 배치를 읽습니다. 또한 교육 데이터 반복자에 대한 예제를 무작위로 섞습니다.
@d2l.add_to_class(FashionMNIST)  #@save
def get_dataloader(self, train):
    data = self.train if train else self.val
    return torch.utils.data.DataLoader(data, self.batch_size, shuffle=train,
                                       num_workers=self.num_workers)
위 코드는 FashionMNIST 클래스에 get_dataloader 메서드를 추가하는 부분입니다. 이 메서드는 주어진 train 매개변수에 따라 학습 데이터셋 또는 검증 데이터셋에 대한 데이터 로더(DataLoader)를 반환합니다. 코드를 한 줄씩 살펴보겠습니다.
- @d2l.add_to_class(FashionMNIST)는 FashionMNIST 클래스에 get_dataloader 메서드를 추가하기 위한 데코레이터(decorator)입니다.
- def get_dataloader(self, train):는 get_dataloader 메서드를 정의하는 부분입니다. 이 메서드는 self와 train을 매개변수로 받습니다.
- data = self.train if train else self.val는 train이 True일 경우 학습 데이터셋(self.train)을, 그렇지 않은 경우 검증 데이터셋(self.val)을 선택하여 data 변수에 할당합니다.
- torch.utils.data.DataLoader(data, self.batch_size, shuffle=train, num_workers=self.num_workers)는 데이터 로더(DataLoader) 객체를 생성합니다. data는 로딩할 데이터셋을 나타내며, self.batch_size는 배치 크기를, shuffle=train은 학습 데이터셋인 경우에는 데이터를 섞어서 로드하도록 설정합니다. num_workers=self.num_workers는 데이터를 로드할 때 사용할 워커(worker)의 수를 나타냅니다.
이 코드는 FashionMNIST 클래스에 get_dataloader 메서드를 추가하여 학습 데이터셋 또는 검증 데이터셋에 대한 데이터 로더를 반환할 수 있도록 합니다.
To see how this works, let’s load a minibatch of images by invoking the train_dataloader method. It contains 64 images.
작동 방식을 확인하기 위해 train_dataloader 메서드를 호출하여 이미지의 미니 배치를 로드해 보겠습니다. 64개의 이미지가 포함되어 있습니다.
X, y = next(iter(data.train_dataloader()))
print(X.shape, X.dtype, y.shape, y.dtype)
위 코드는 데이터셋의 첫 번째 배치를 가져와서 배치의 형태(shape)와 데이터 타입(dtype)을 출력하는 부분입니다.
- next(iter(data.train_dataloader()))는 데이터 로더(data.train_dataloader())에서 첫 번째 배치를 가져오는 것을 의미합니다. iter() 함수를 통해 데이터 로더를 이터레이터로 변환하고, next() 함수를 호출하여 첫 번째 배치를 가져옵니다.
- X, y = next(iter(data.train_dataloader()))는 가져온 첫 번째 배치를 X와 y 변수에 할당합니다. 여기서 X는 입력 데이터를, y는 해당하는 타깃(label) 데이터를 나타냅니다.
- print(X.shape, X.dtype, y.shape, y.dtype)는 X와 y의 형태(shape)와 데이터 타입(dtype)을 출력합니다. .shape은 배열의 차원과 크기를 나타내는 속성(attribute)이며, .dtype은 배열의 데이터 타입을 나타내는 속성입니다.
따라서 위의 코드는 데이터셋의 첫 번째 배치를 가져와서 해당 배치의 형태와 데이터 타입을 출력하는 부분입니다.
Let’s look at the time it takes to read the images. Even though it is a built-in loader, it is not blazingly fast. Nonetheless, this is sufficient since processing images with a deep network takes quite a bit longer. Hence it is good enough that training a network will not be IO constrained.
이미지를 읽는 데 걸리는 시간을 살펴보겠습니다. 빌트인 로더임에도 불구하고 엄청나게 빠르지는 않습니다. 그럼에도 불구하고 딥 네트워크로 이미지를 처리하는 데 시간이 꽤 오래 걸리므로 이 정도면 충분합니다. 따라서 네트워크 교육이 IO 제약을 받지 않는 것으로 충분합니다.
tic = time.time()
for X, y in data.train_dataloader():
    continue
f'{time.time() - tic:.2f} sec'
위 코드는 학습 데이터셋을 반복(iterate)하면서 각 배치의 처리 시간을 측정하는 부분입니다.
- tic = time.time()은 현재 시간을 기록하는 부분으로, 시간 측정의 시작점을 나타냅니다.
- for X, y in data.train_dataloader():는 학습 데이터셋의 데이터 로더를 이용하여 배치 단위로 데이터를 가져오는 반복문입니다. X는 입력 데이터를, y는 해당하는 타깃(label) 데이터를 나타냅니다. 여기서 continue 문은 아무 작업도 수행하지 않고 다음 반복으로 진행하도록 합니다.
- f'{time.time() - tic:.2f} sec'은 시간 측정이 끝난 후에 경과 시간을 계산하여 소수점 둘째 자리까지 문자열로 반환합니다. {time.time() - tic:.2f}은 경과 시간을 소수점 둘째 자리까지 표시하도록 지정한 것이며, ' sec'는 문자열 " sec"를 추가하여 최종 문자열을 생성합니다.
따라서 위의 코드는 학습 데이터셋의 모든 배치를 순회하면서 처리 시간을 측정하고, 총 소요 시간을 출력하는 부분입니다. 출력 결과는 경과 시간이 소수점 둘째 자리까지 표시된 문자열로 나타납니다.

4.2.3. Visualization
We’ll be using the Fashion-MNIST dataset quite frequently. A convenience function show_images can be used to visualize the images and the associated labels. Details of its implementation are deferred to the appendix.
우리는 Fashion-MNIST 데이터셋을 꽤 자주 사용할 것입니다. 편의 함수 show_images를 사용하여 이미지 및 관련 레이블을 시각화할 수 있습니다. 구현에 대한 자세한 내용은 부록에 있습니다.
def show_images(imgs, num_rows, num_cols, titles=None, scale=1.5):  #@save
    """Plot a list of images."""
    raise NotImplementedError
위 코드는 이미지들을 그리기 위한 함수 show_images를 정의하는 부분입니다.
- show_images 함수는 다음과 같은 매개변수를 받습니다:
- imgs: 이미지들을 담고 있는 리스트입니다.
- num_rows: 그릴 이미지들의 행(row) 개수입니다.
- num_cols: 그릴 이미지들의 열(column) 개수입니다.
- titles: 각 이미지에 대한 제목(title)을 담고 있는 리스트입니다. (선택적 매개변수)
- scale: 이미지의 크기를 조절하는 스케일(scale) 값입니다. (선택적 매개변수)
- 함수의 내용은 NotImplementedError를 발생시키는 부분으로, 아직 구현되지 않았음을 나타냅니다. 따라서 이 함수는 현재 사용할 수 없으며, 필요한 경우 구현하여 사용해야 합니다.
즉, 위의 코드는 아직 구현되지 않은 show_images 함수를 정의하는 부분입니다.
Let’s put it to good use. In general, it is a good idea to visualize and inspect data that you’re training on. Humans are very good at spotting unusual aspects and as such, visualization serves as an additional safeguard against mistakes and errors in the design of experiments. Here are the images and their corresponding labels (in text) for the first few examples in the training dataset.
유용하게 사용합시다. 일반적으로 학습 중인 데이터를 시각화하고 검사하는 것이 좋습니다. 인간은 비정상적인 측면을 발견하는 데 매우 능숙하므로 시각화는 실험 설계의 실수와 오류에 대한 추가 보호 장치 역할을 합니다. 다음은 교육 데이터 세트의 처음 몇 가지 예에 대한 이미지와 해당 레이블(텍스트)입니다.
@d2l.add_to_class(FashionMNIST)  #@save
def visualize(self, batch, nrows=1, ncols=8, labels=[]):
    X, y = batch
    if not labels:
        labels = self.text_labels(y)
    d2l.show_images(X.squeeze(1), nrows, ncols, titles=labels)
batch = next(iter(data.val_dataloader()))
data.visualize(batch)
위 코드는 FashionMNIST 데이터셋 클래스에 visualize 메서드를 추가하는 부분입니다.
- @d2l.add_to_class(FashionMNIST)는 FashionMNIST 클래스에 새로운 메서드인 visualize를 추가하기 위한 데코레이터(decorator)입니다.
- visualize 메서드는 다음과 같은 매개변수를 받습니다:
- batch: 시각화할 이미지들과 레이블을 담고 있는 배치(batch)입니다.
- nrows: 그릴 이미지들의 행(row) 개수입니다. 기본값은 1입니다.
- ncols: 그릴 이미지들의 열(column) 개수입니다. 기본값은 8입니다.
- labels: 각 이미지에 대한 제목(title)으로 사용할 레이블(label) 리스트입니다. (선택적 매개변수)
- X, y = batch는 입력 이미지와 레이블을 batch에서 언패킹하여 가져오는 부분입니다.
- if not labels: labels = self.text_labels(y)는 만약 labels가 제공되지 않았다면, 레이블 y를 이용하여 각 이미지에 대한 제목을 생성합니다. 이를 위해 self.text_labels 메서드를 사용합니다.
- d2l.show_images(X.squeeze(1), nrows, ncols, titles=labels)는 d2l 모듈의 show_images 함수를 호출하여 이미지를 시각화하는 부분입니다. X.squeeze(1)은 이미지의 차원을 조정하여 1차원의 이미지로 변환합니다. 시각화할 이미지들, 행과 열의 개수, 그리고 제목들을 인자로 전달합니다.
마지막으로, batch = next(iter(data.val_dataloader()))를 통해 검증 데이터셋의 첫 번째 배치를 가져온 뒤, data.visualize(batch)를 호출하여 해당 배치를 시각화합니다.

We are now ready to work with the Fashion-MNIST dataset in the sections that follow.
이제 다음 섹션에서 Fashion-MNIST 데이터 세트로 작업할 준비가 되었습니다.
Tip. 위 iterator 중 첫 5개의 item을 출력 해 봤습니다.
dataloader = iter(data.val_dataloader())
for _ in range(5):
    batch = next(dataloader)
    data.visualize(batch)
참고로 전체를 디스플레이 하려면 아래와 같이 하면 됩니다.
dataloader = iter(data.val_dataloader())
for batch in dataloader:
    data.visualize(batch)
그런데 이렇게 하면 item들이 너무 많아서 다 display 하지는 못할 겁니다.
저 같은 경우는 50개만 출력 됐습니다.

위 메세지를 클릭하면 나머지 모두 다 출력 됩니다.
참고로 전체 아이템 갯수는 157개입니다.
dataloader = iter(data.val_dataloader())
num_items = len(dataloader)
print(num_items)
4.2.4. Summary
We now have a slightly more realistic dataset to use for classification. Fashion-MNIST is an apparel classification dataset consisting of images representing 10 categories. We will use this dataset in subsequent sections and chapters to evaluate various network designs, from a simple linear model to advanced residual networks. As we commonly do with images, we read them as a tensor of shape (batch size, number of channels, height, width). For now, we only have one channel as the images are grayscale (the visualization above use a false color palette for improved visibility).
이제 분류에 사용할 약간 더 현실적인 데이터 세트가 있습니다. Fashion-MNIST는 10개의 카테고리를 나타내는 이미지로 구성된 의류 분류 데이터셋입니다. 다음 섹션과 장에서 이 데이터 세트를 사용하여 간단한 선형 모델에서 고급 잔차 네트워크에 이르기까지 다양한 네트워크 디자인을 평가할 것입니다. 일반적으로 이미지와 마찬가지로 모양의 텐서(배치 크기, 채널 수, 높이, 너비)로 읽습니다. 지금은 이미지가 회색조이므로 채널이 하나만 있습니다(위의 시각화는 가시성을 높이기 위해 거짓 색상 팔레트를 사용함).
Lastly, data iterators are a key component for efficient performance. For instance, we might use GPUs for efficient image decompression, video transcoding, or other preprocessing. Whenever possible, you should rely on well-implemented data iterators that exploit high-performance computing to avoid slowing down your training loop.
마지막으로 데이터 반복자는 효율적인 성능을 위한 핵심 구성 요소입니다. 예를 들어 효율적인 이미지 압축 해제, 비디오 트랜스코딩 또는 기타 사전 처리를 위해 GPU를 사용할 수 있습니다. 가능할 때마다 고성능 컴퓨팅을 활용하는 잘 구현된 데이터 반복기에 의존하여 교육 루프 속도를 늦추지 않아야 합니다.
4.2.5. Exercises
- Does reducing the batch_size (for instance, to 1) affect the reading performance?
- The data iterator performance is important. Do you think the current implementation is fast enough? Explore various options to improve it. Use a system profiler to find out where the bottlenecks are.
- Check out the framework’s online API documentation. Which other datasets are available?
'Dive into Deep Learning > D2L Linear Neural Networks' 카테고리의 다른 글
| D2L - 4.7. Environment and Distribution Shift (0) | 2023.06.27 |
|---|---|
| D2L - 4.6. Generalization in Classification (0) | 2023.06.27 |
| D2L - 4.5. Concise Implementation of Softmax Regression¶ (0) | 2023.06.27 |
| D2L - 4.4. Softmax Regression Implementation from Scratch (0) | 2023.06.26 |
| D2L - 4.3. The Base Classification Model (0) | 2023.06.26 |
| D2L 4.1. Softmax Regression (1) | 2023.06.26 |
| D2L - 4. Linear Neural Networks for Classification (0) | 2023.06.26 |
| D2L - Local Environment Setting (0) | 2023.06.26 |
| D2L - 3.5. Concise Implementation of Linear Regression, 이미지 분류 데이터 (Fashion-MNIST) (0) | 2023.06.22 |
| D2L - 3.4. Linear Regression Implementation from Scratch , Softmax 회귀(regression) (0) | 2023.06.22 |