개발자로서 현장에서 일하면서 새로 접하는 기술들이나 알게된 정보 등을 정리하기 위한 블로그입니다. 운 좋게 미국에서 큰 회사들의 프로젝트에서 컬설턴트로 일하고 있어서 새로운 기술들을 접할 기회가 많이 있습니다. 미국의 IT 프로젝트에서 사용되는 툴들에 대해 많은 분들과 정보를 공유하고 싶습니다.
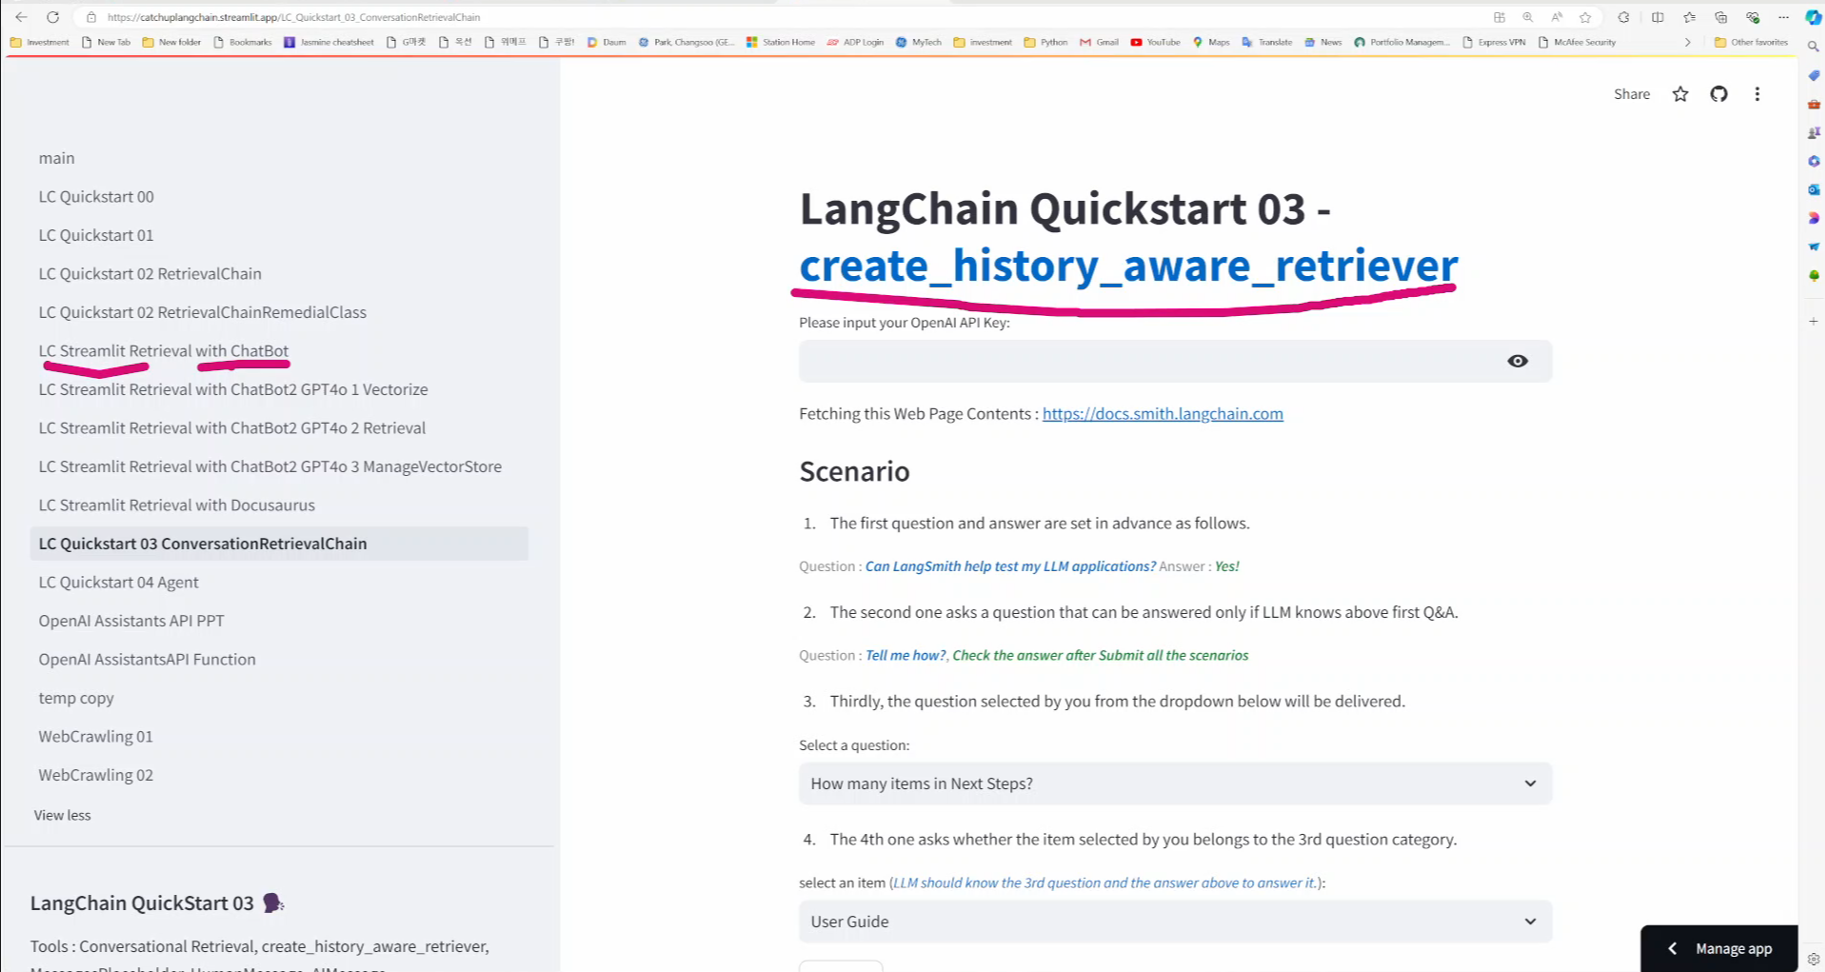
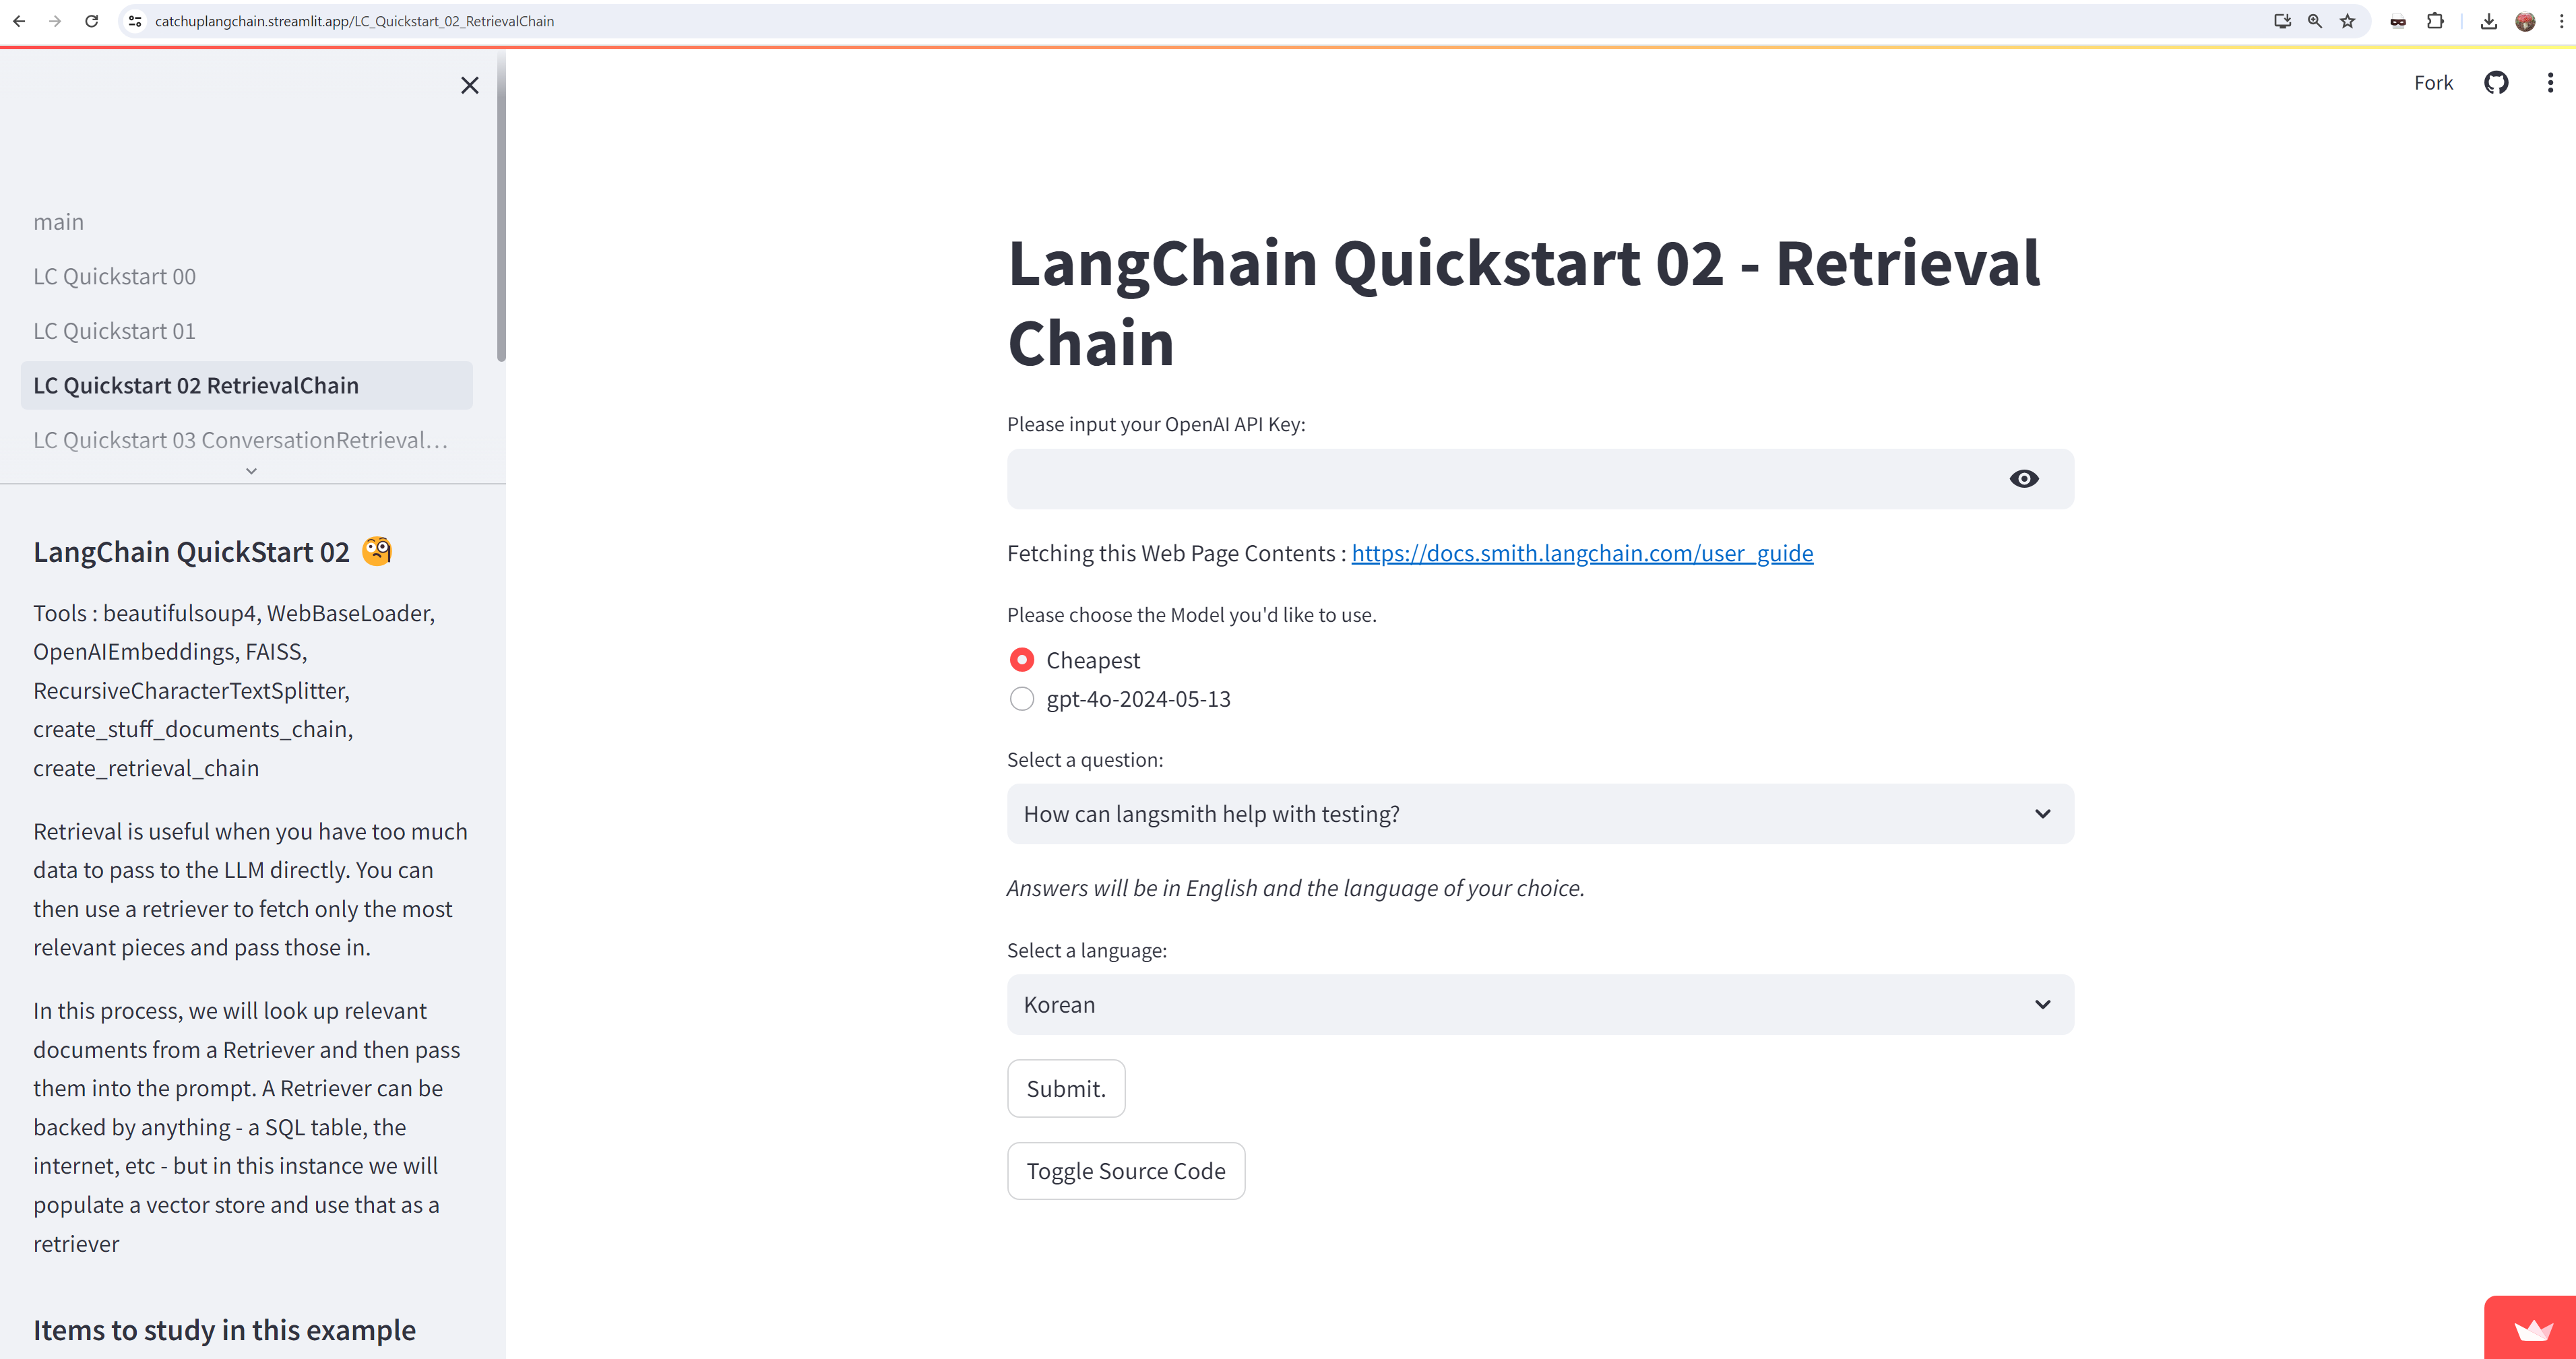
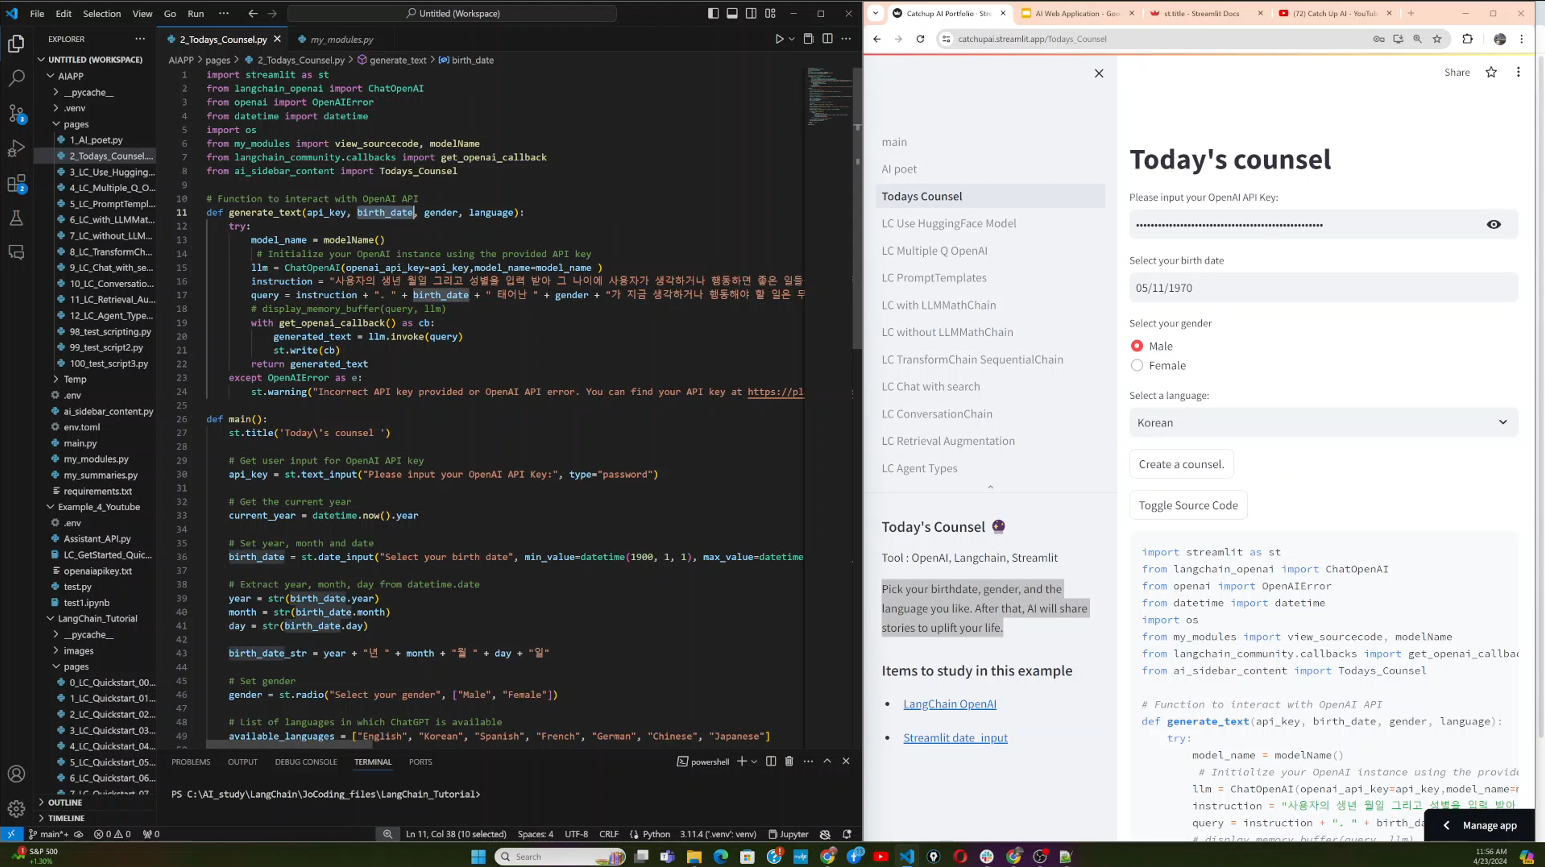
이번 시간에는 지난번 LangChain의 RetrievalChain 을 배울 때 사용했던 소스코드를 그대로 사용할 겁니다.
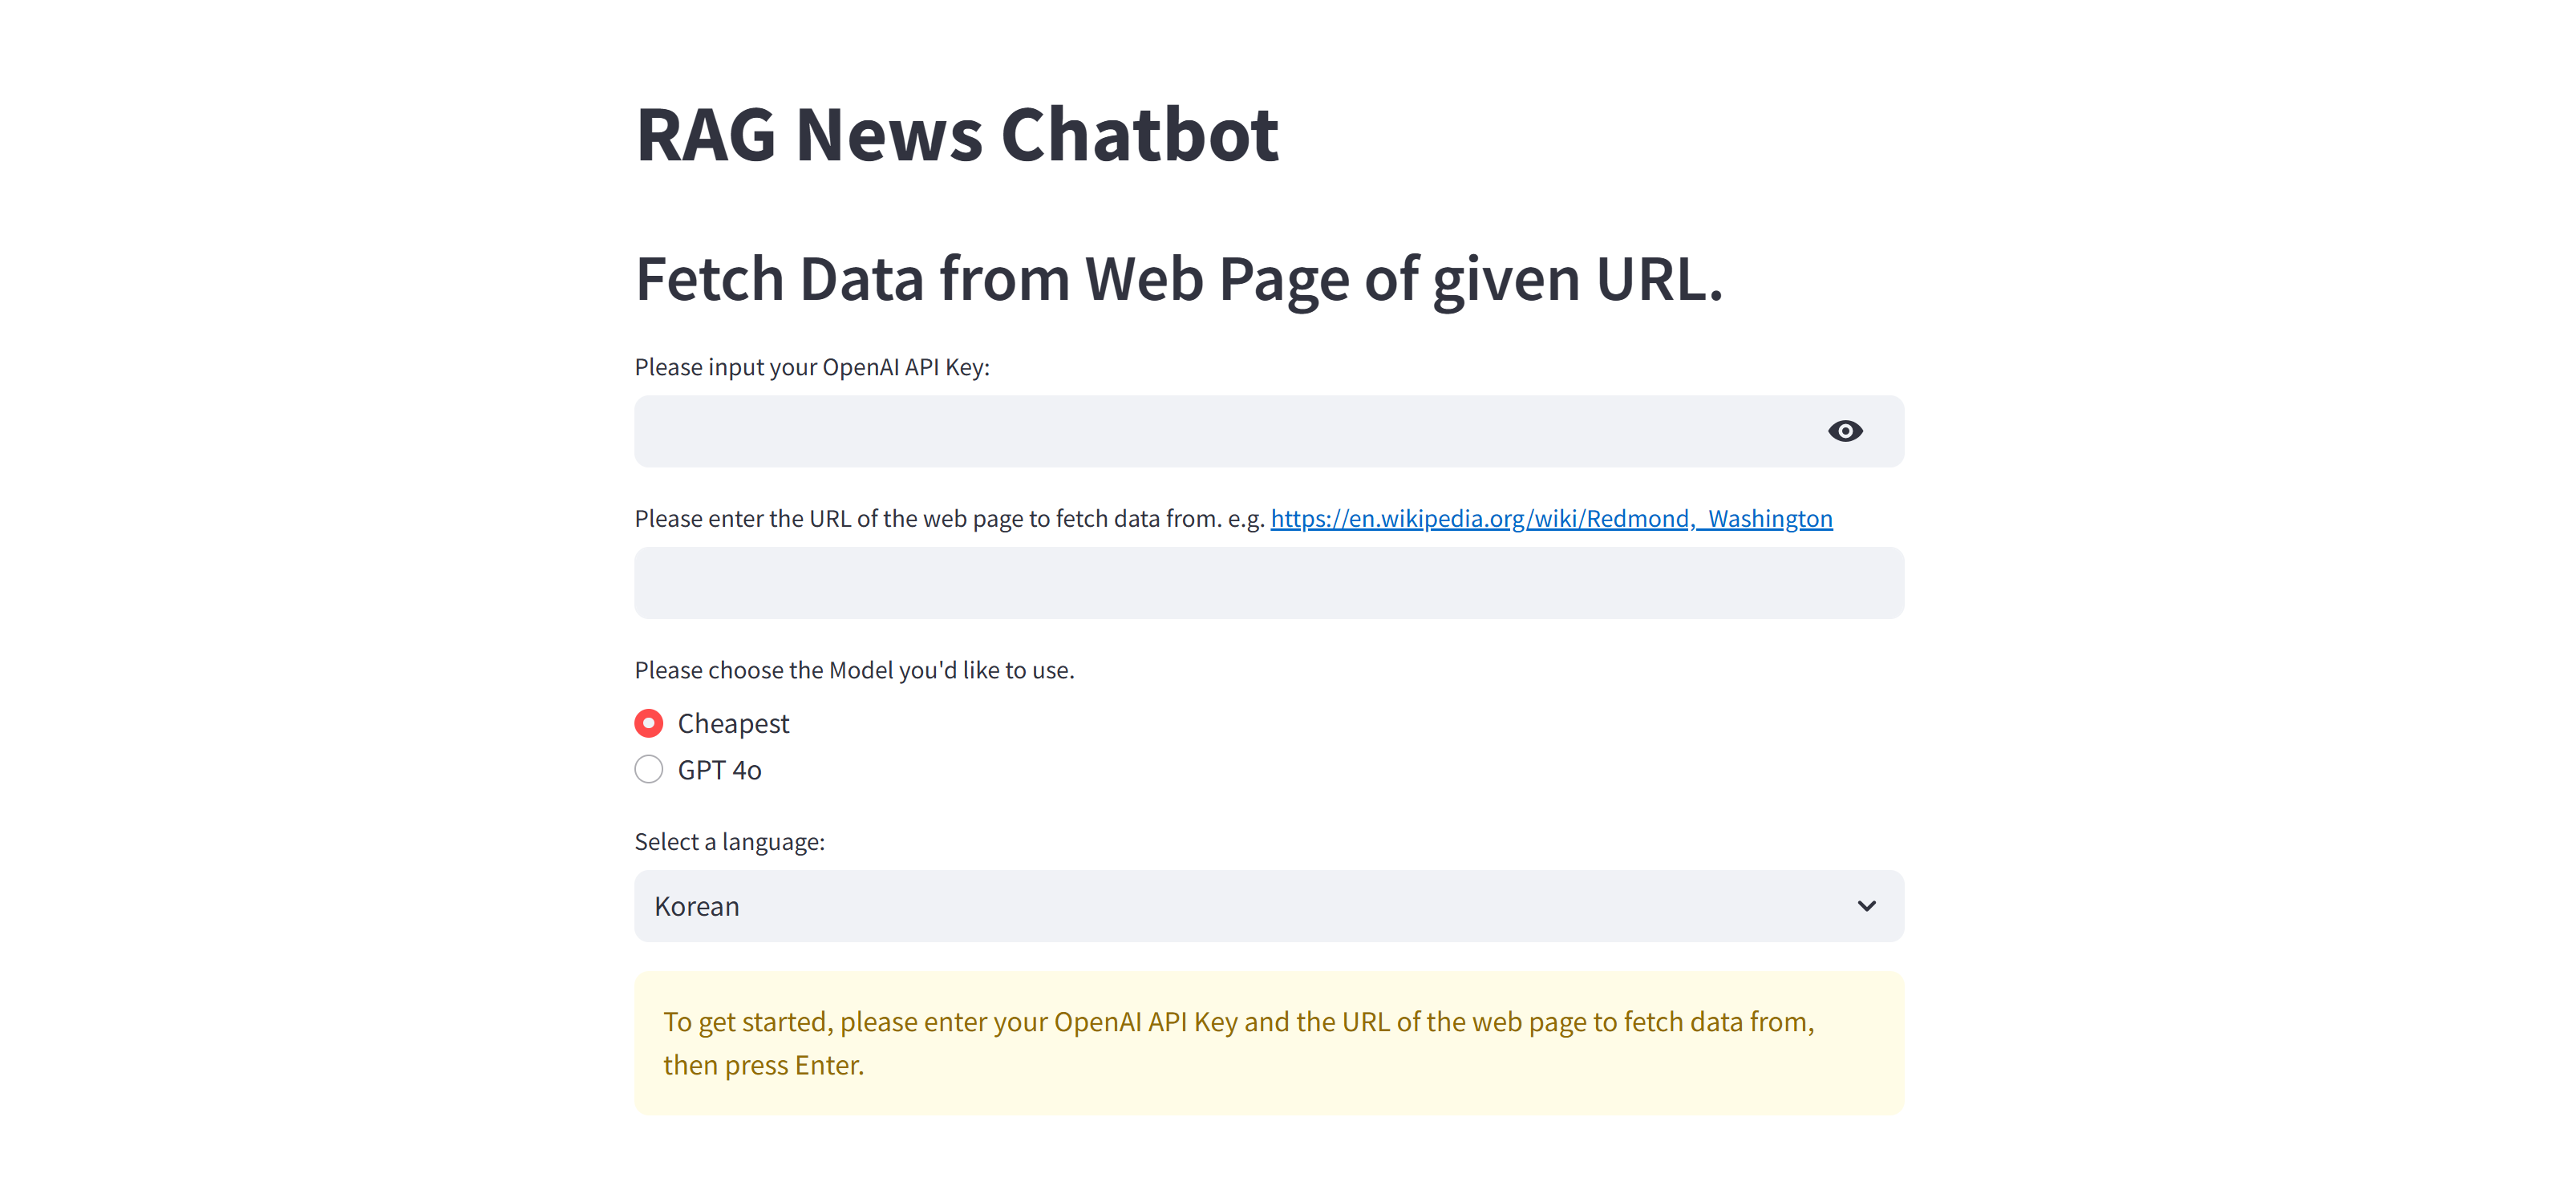
그 소스코드에 Streamlit 의 Session 관련 기능들을 사용해서 ChatBot 기능을 구현해 봅니다.
주요 스트림릿 툴들은 st.session_state(), st.session_message 그리고 st.session_input 등입니다.
이 각 툴들은 어떤 역할을 하고 또 어떻게 사용해야 되는지 알아봅니다.
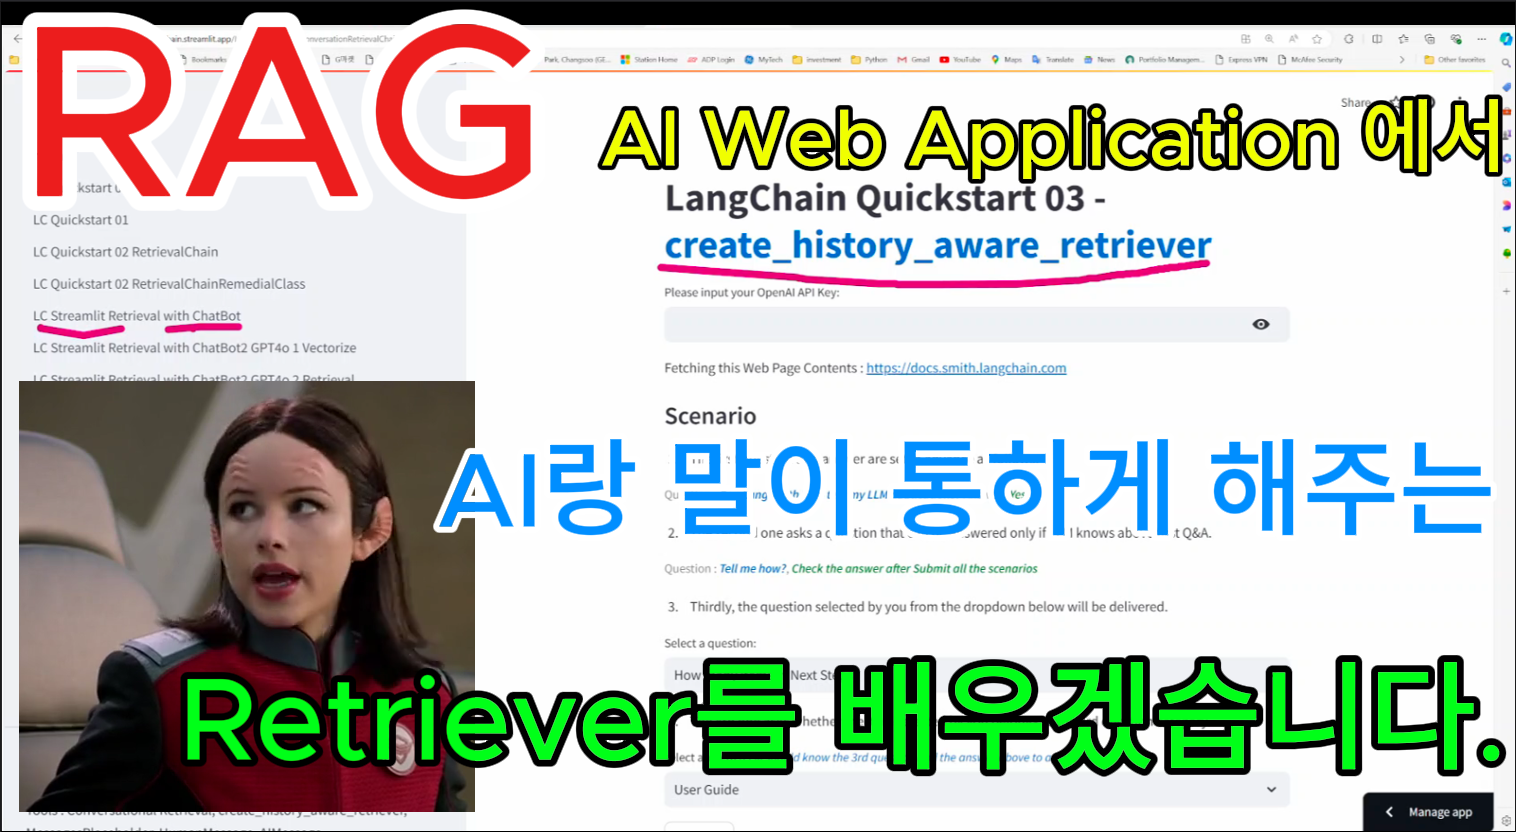
지난 시간에 배웠던 랭체인의 create_history_aware_retriever 도 챗봇 기능을 구현하기 위해 지원되는 기능입니다.
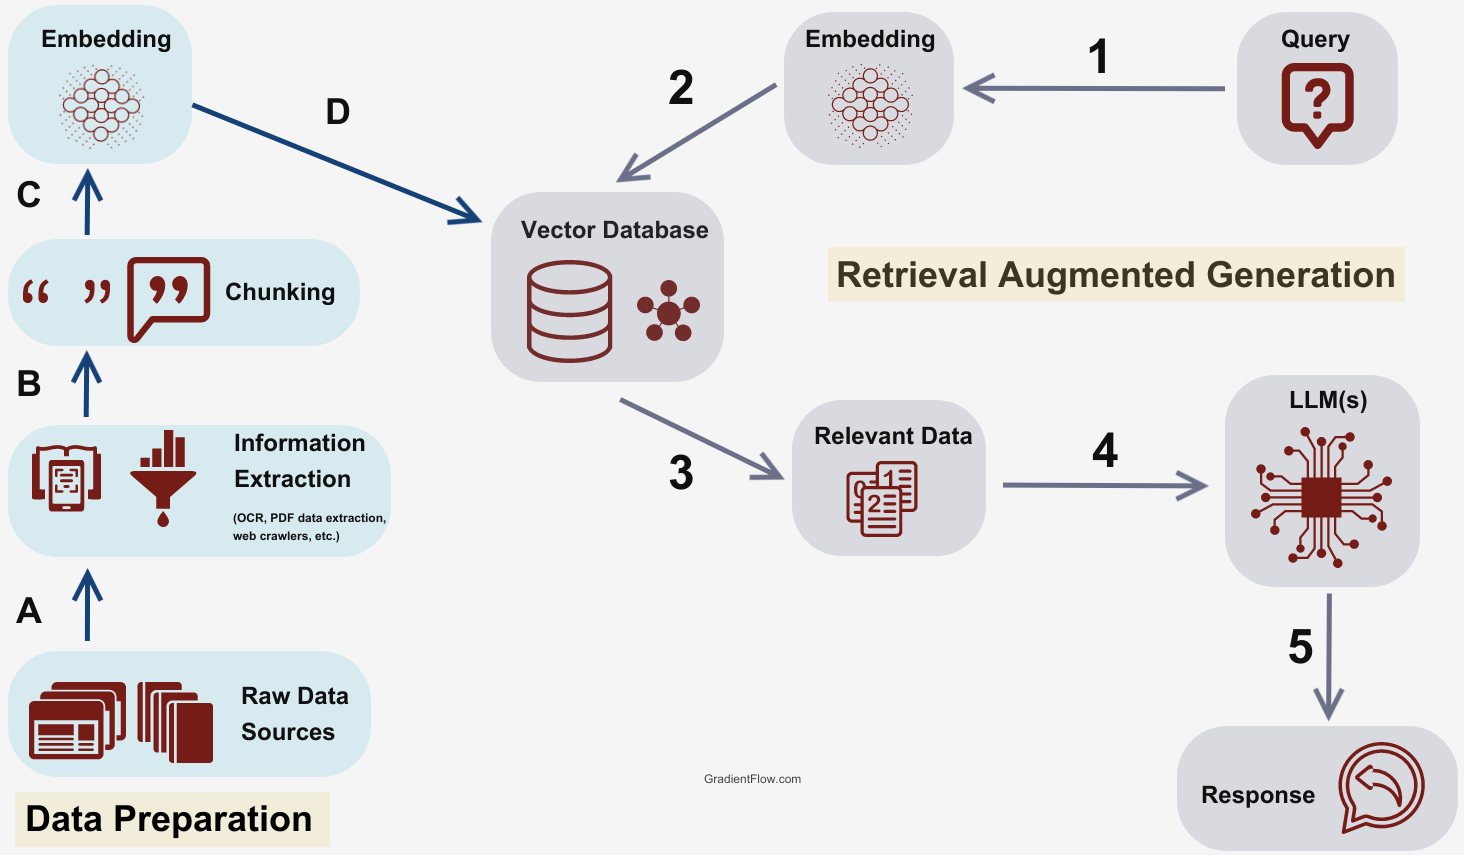
둘 다 사용자의 질문과 인공지능의 대답을 저장해 두고 다음 질문 할 때 그 history와 함께 새로운 질문을 인공지능에 보내서 인공지능이 그동안의 질문과 답변을 참고해서 질문의 의미를 좀 더 정확하게 파악할 수 있게 해 좀 더 해당 질문에 정확한 답변을 보낼 수 있도록 해 주는 겁니다.
그리고 그 질문과 답변 history를 브라우저에 표시할 수도 있어서 사용자도 질문과 답변 히스토리를 볼 수 있도록 해 줍니다.
랭체인은 스크립트 내 변수에 해당 히스토리를 저장해서 사용하고 스트림릿은 세션단위에서 그 히스토리를 저장해서 사용합니다.
그렇기 때문에 둘 다 새로운 브라우저에서 대화를 할 때는 이전 히스토리를 사용할 수 없습니다.
이렇게 해당 정보가 휘발되지 않고 다른 브라우저에서 볼 수도 있고 컴퓨터를 껐다가 켜도 그 정보를 사용할 수 있도록 려면 스크립트 내 변수나 브라우저 세션 등 임시 저장공간에 저장을 하지않고 파일이나 DB 등 제 3의 장소에 저장해서 사용해야 합니다.
오늘은 스트림릿에서 제공하는 st.session_state 를 사용해서 간단하게 챗봇을 구현하는 기술을 배워 봅니다.
We releasedgpt-3.5-turboandgpt-4earlier this year, and in only a short few months, have seenincredible applicationsbuilt by developers on top of these models.
우리는 올해 초에 gpt-3.5-turbo 및 gpt-4를 출시했고 불과 몇 달 만에 개발자들이 이러한 모델 위에 구축한 놀라운 애플리케이션을 보았습니다.
Today, we’re following up with some exciting updates:
오늘 우리는 다음과 같은 몇 가지 흥미로운 업데이트를 진행합니다.
new function calling capability in the Chat Completions API
Chat Completions API의 새로운 함수 호출 기능
updated and more steerable versions ofgpt-4andgpt-3.5-turbo
gpt-4 및 gpt-3.5-turbo의 업데이트되고 조정 가능한 버전
new 16k context version ofgpt-3.5-turbo(vs the standard 4k version)
gpt-3.5-turbo의 새로운 16k 컨텍스트 버전(표준 4k 버전 대비)
75% cost reduction on our state-of-the-art embeddings model
최첨단 임베딩 모델로 비용 75% 절감
25% cost reduction on input tokens forgpt-3.5-turbo
gpt-3.5-turbo의 입력 토큰 비용 25% 감소
announcing the deprecation timeline for thegpt-3.5-turbo-0301andgpt-4-0314models
gpt-3.5-turbo-0301 및 gpt-4-0314 모델에 대한 지원 중단 일정 발표
All of these models come with the same data privacy and security guarantees we introduced on March 1 — customers own all outputs generated from their requests and their API data will not be used for training.
이러한 모든 모델에는 3월 1일에 도입한 것과 동일한 데이터 개인 정보 보호 및 보안 보장이 제공됩니다. 고객은 요청에서 생성된 모든 출력을 소유하고 API 데이터는 교육에 사용되지 않습니다.
Function calling
Developers can now describe functions togpt-4-0613andgpt-3.5-turbo-0613, and have the model intelligently choose to output a JSON object containing arguments to call those functions. This is a new way to more reliably connect GPT's capabilities with external tools and APIs.
개발자는 이제 gpt-4-0613 및 gpt-3.5-turbo-0613에 함수를 설명하고 모델이 이러한 함수를 호출하기 위한 인수가 포함된 JSON 개체를 출력하도록 지능적으로 선택하도록 할 수 있습니다. 이는 GPT의 기능을 외부 도구 및 API와 보다 안정적으로 연결하는 새로운 방법입니다.
These models have been fine-tuned to both detect when a function needs to be called (depending on the user’s input) and to respond with JSON that adheres to the function signature. Function calling allows developers to more reliably get structured data back from the model. For example, developers can:
이러한 모델은 (사용자 입력에 따라) 함수를 호출해야 하는 시기를 감지하고 함수 서명을 준수하는 JSON으로 응답하도록 미세 조정되었습니다. 함수 호출을 통해 개발자는 모델에서 구조화된 데이터를 보다 안정적으로 가져올 수 있습니다. 예를 들어 개발자는 다음을 수행할 수 있습니다.
Create chatbots that answer questions by calling external tools (e.g., like ChatGPT Plugins)
외부 도구(예: ChatGPT 플러그인)를 호출하여 질문에 답하는 챗봇 생성
Convert queries such as “Email Anya to see if she wants to get coffee next Friday” to a function call likesend_email(to: string, body: string), or “What’s the weather like in Boston?” toget_current_weather(location: string, unit: 'celsius' | 'fahrenheit').
"다음 금요일에 커피를 마시고 싶은지 확인하기 위해 Anya에게 이메일 보내기"와 같은 쿼리를 send_email(to: 문자열, 본문: 문자열) 또는 "보스턴의 날씨는 어떻습니까?"와 같은 쿼리를 get_current_weather(location: string, unit: 'celsius' | 'fahrenheit') 함수 호출로 변환합니다.
Convert natural language into API calls or database queries
자연어를 API 호출 또는 데이터베이스 쿼리로 변환
Convert “Who are my top ten customers this month?” to an internal API call such asget_customers_by_revenue(start_date: string, end_date: string, limit: int), or “How many orders did Acme, Inc. place last month?” to a SQL query usingsql_query(query: string).
"이번 달 내 상위 10명의 고객은 누구입니까?" 를 get_customers_by_revenue(start_date: string, end_date: string, limit: int)과 같은 internal API 로 convert 합니다. 또는 "지난 달 Acme, Inc.에서 몇 건의 주문을 했습니까?"와 같은 내부 API 호출에 sql_query(query: string)를 사용한 SQL 쿼리로 변환합니다.
Extract structured data from text
텍스트에서 구조화된 데이터 추출
Define a function calledextract_people_data(people: [{name: string, birthday: string, location: string}]), to extract all people mentioned in a Wikipedia article.
extract_people_data(people: [{name: string, birthday: string, location: string}])라는 함수를 정의하여 Wikipedia 기사에 언급된 모든 사람을 추출합니다.
These use cases are enabled by new API parameters in our/v1/chat/completionsendpoint,functionsandfunction_call, that allow developers to describe functions to the model via JSON Schema, and optionally ask it to call a specific function. Get started with ourdeveloper documentationandadd evalsif you find cases where function calling could be improved
이러한 사용 사례는 개발자가 JSON 스키마를 통해 모델에 함수를 설명하고 선택적으로 특정 함수를 호출하도록 요청할 수 있는 /v1/chat/completions 엔드포인트, functions 및 function_call의 새로운 API 매개변수에 의해 활성화됩니다. 개발자 설명서를 시작하고 함수 호출을 개선할 수 있는 경우를 찾으면 평가를 추가하십시오.
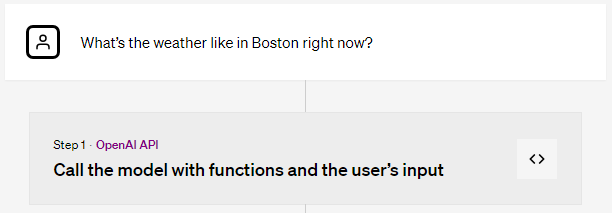
Function calling example
Request
curl https://api.openai.com/v1/chat/completions -u :$OPENAI_API_KEY -H 'Content-Type: application/json' -d '{
  "model": "gpt-3.5-turbo-0613",
  "messages": [
    {"role": "user", "content": "What is the weather like in Boston?"}
  ],
  "functions": [
    {
      "name": "get_current_weather",
      "description": "Get the current weather in a given location",
      "parameters": {
        "type": "object",
        "properties": {
          "location": {
            "type": "string",
            "description": "The city and state, e.g. San Francisco, CA"
          },
          "unit": {
            "type": "string",
            "enum": ["celsius", "fahrenheit"]
          }
        },
        "required": ["location"]
      }
    }
  ]
}'
curl https://api.openai.com/v1/chat/completions -u :$OPENAI_API_KEY -H 'Content-Type: application/json' -d '{
  "model": "gpt-3.5-turbo-0613",
  "messages": [
    {"role": "user", "content": "What is the weather like in Boston?"},
    {"role": "assistant", "content": null, "function_call": {"name": "get_current_weather", "arguments": "{ \"location\": \"Boston, MA\"}"}},
    {"role": "function", "name": "get_current_weather", "content": "{\"temperature\": "22", \"unit\": \"celsius\", \"description\": \"Sunny\"}"}
  ],
  "functions": [
    {
      "name": "get_current_weather",
      "description": "Get the current weather in a given location",
      "parameters": {
        "type": "object",
        "properties": {
          "location": {
            "type": "string",
            "description": "The city and state, e.g. San Francisco, CA"
          },
          "unit": {
            "type": "string",
            "enum": ["celsius", "fahrenheit"]
          }
        },
        "required": ["location"]
      }
    }
  ]
}'
Response
{
  "id": "chatcmpl-123",
  ...
  "choices": [{
    "index": 0,
    "message": {
      "role": "assistant",
      "content": "The weather in Boston is currently sunny with a temperature of 22 degrees Celsius.",
    },
    "finish_reason": "stop"
  }]
}
Since the alpha release of ChatGPT plugins, we have learned much about making tools and language models work together safely. However, there are still open research questions. For example, a proof-of-concept exploit illustrates how untrusted data from a tool’s output can instruct the model to perform unintended actions. We are working to mitigate these and other risks. Developers can protect their applications by only consuming information from trusted tools and by including user confirmation steps before performing actions with real-world impact, such as sending an email, posting online, or making a purchase.
ChatGPT 플러그인의 알파 릴리스 이후로 우리는 도구와 언어 모델이 안전하게 함께 작동하도록 만드는 방법에 대해 많은 것을 배웠습니다. 그러나 여전히 열려 있는 연구 질문이 있습니다. 예를 들어 개념 증명 익스플로잇은 도구 출력의 신뢰할 수 없는 데이터가 의도하지 않은 작업을 수행하도록 모델에 지시할 수 있는 방법을 보여줍니다. 우리는 이러한 위험 및 기타 위험을 완화하기 위해 노력하고 있습니다. 개발자는 신뢰할 수 있는 도구의 정보만 사용하고 이메일 보내기, 온라인 게시 또는 구매와 같은 실제 영향이 있는 작업을 수행하기 전에 사용자 확인 단계를 포함하여 애플리케이션을 보호할 수 있습니다.
New models
GPT-4
gpt-4-0613includes an updated and improved model with function calling.
gpt-4-0613에는 함수 호출로 업데이트되고 개선된 모델이 포함되어 있습니다.
gpt-4-32k-0613includes the same improvements asgpt-4-0613, along with an extended context length for better comprehension of larger texts.
gpt-4-32k-0613에는 gpt-4-0613과 동일한 개선 사항이 포함되어 있으며 더 큰 텍스트를 더 잘 이해할 수 있도록 컨텍스트 길이가 확장되었습니다.
With these updates, we’ll be inviting many more people fromthe waitlistto try GPT-4 over the coming weeks, with the intent to remove the waitlist entirely with this model. Thank you to everyone who has been patiently waiting, we are excited to see what you build with GPT-4!
이 업데이트를 통해 우리는 이 모델로 대기자 명단을 완전히 제거하기 위해 앞으로 몇 주 동안 대기자 명단에서 더 많은 사람들을 초대하여 GPT-4를 시도할 것입니다. 끈기 있게 기다려주신 모든 분들께 감사드립니다. 여러분이 GPT-4로 빌드하는 것을 보게 되어 기쁩니다!
GPT-3.5 Turbo
gpt-3.5-turbo-0613includes the same function calling as GPT-4 as well as more reliable steerability via the system message, two features that allow developers to guide the model's responses more effectively.
gpt-3.5-turbo-0613에는 GPT-4와 동일한 기능 호출과 시스템 메시지를 통한 보다 안정적인 조종성, 개발자가 모델의 응답을 보다 효과적으로 안내할 수 있는 두 가지 기능이 포함되어 있습니다.
gpt-3.5-turbo-16koffers 4 times the context length ofgpt-3.5-turboat twice the price: $0.003 per 1K input tokens and $0.004 per 1K output tokens. 16k context means the model can now support ~20 pages of text in a single request.
gpt-3.5-turbo-16k는 두 배의 가격으로 gpt-3.5-turbo 컨텍스트 길이의 4배를 제공합니다: 입력 토큰 1,000개당 $0.003 및 출력 토큰 1,000개당 $0.004. 16k 컨텍스트는 이제 모델이 단일 요청에서 최대 20페이지의 텍스트를 지원할 수 있음을 의미합니다.
Model deprecations
Today, we’ll begin the upgrade and deprecation process for the initial versions ofgpt-4andgpt-3.5-turbothat weannounced in March. Applications using the stable model names (gpt-3.5-turbo,gpt-4, andgpt-4-32k) will automatically be upgraded to the new models listed above on June 27th. For comparing model performance between versions, ourEvals librarysupports public and private evals to show how model changes will impact your use cases.
오늘 우리는 3월에 발표한 gpt-4 및 gpt-3.5-turbo의 초기 버전에 대한 업그레이드 및 사용 중단 프로세스를 시작합니다. 안정적인 모델 이름(gpt-3.5-turbo, gpt-4 및 gpt-4-32k)을 사용하는 애플리케이션은 6월 27일에 위에 나열된 새 모델로 자동 업그레이드됩니다. 버전 간 모델 성능을 비교하기 위해 Evals 라이브러리는 공개 및 비공개 평가를 지원하여 모델 변경이 사용 사례에 어떤 영향을 미치는지 보여줍니다.
Developers who need more time to transition can continue using the older models by specifyinggpt-3.5-turbo-0301,gpt-4-0314, orgpt-4-32k-0314in the ‘model’ parameter of their API request. These older models will be accessible through September 13th, after which requests specifying those model names will fail. You can stay up to date on model deprecations via ourmodel deprecation page. This is the first update to these models; so, we eagerly welcomedeveloper feedbackto help us ensure a smooth transition.
전환하는 데 시간이 더 필요한 개발자는 API 요청의 '모델' 매개변수에 gpt-3.5-turbo-0301, gpt-4-0314 또는 gpt-4-32k-0314를 지정하여 이전 모델을 계속 사용할 수 있습니다. 이러한 이전 모델은 9월 13일까지 액세스할 수 있으며 그 이후에는 해당 모델 이름을 지정하는 요청이 실패합니다. 모델 지원 중단 페이지를 통해 모델 지원 중단에 대한 최신 정보를 확인할 수 있습니다. 이것은 이러한 모델에 대한 첫 번째 업데이트입니다. 따라서 원활한 전환을 보장하는 데 도움이 되는 개발자 피드백을 기꺼이 환영합니다.
Lower pricing
We continue to make our systems more efficient and are passing those savings on to developers, effective today.
우리는 계속해서 시스템을 더 효율적으로 만들고 이러한 절감액을 개발자에게 전달하고 있습니다. 오늘부터 유효합니다.
Embeddings
text-embedding-ada-002is our most popular embeddings model. Today we’re reducing the cost by 75% to $0.0001 per 1K tokens.
text-embedding-ada-002는 가장 인기 있는 임베딩 모델입니다. 오늘 우리는 비용을 75% 줄여 1,000개 토큰당 $0.0001입니다.
GPT-3.5 Turbo
gpt-3.5-turbois our most popular chat model and powers ChatGPT for millions of users. Today we're reducing the cost ofgpt-3.5-turbo’s input tokens by 25%. Developers can now use this model for just $0.0015 per 1K input tokens and $0.002 per 1K output tokens, which equates to roughly 700 pages per dollar.
gpt-3.5-turbo는 당사의 가장 인기 있는 채팅 모델이며 수백만 명의 사용자를 위한 ChatGPT를 지원합니다. 오늘 우리는 gpt-3.5-turbo의 입력 토큰 비용을 25%까지 줄입니다. 개발자는 이제 이 모델을 1K 입력 토큰당 $0.0015 및 1K 출력 토큰당 $0.002로 사용할 수 있습니다. 이는 달러당 약 700페이지에 해당합니다.
gpt-3.5-turbo-16kwill be priced at $0.003 per 1K input tokens and $0.004 per 1K output tokens.
gpt-3.5-turbo-16k의 가격은 입력 토큰 1,000개당 $0.003, 출력 토큰 1,000개당 $0.004입니다.
Developer feedback is a cornerstone of our platform’s evolution and we will continue to make improvements based on the suggestions we hear. We’re excited to see how developers use these latest models and new features in their applications.
개발자 피드백은 우리 플랫폼 발전의 초석이며 우리는 우리가 듣는 제안을 기반으로 계속해서 개선할 것입니다. 개발자가 애플리케이션에서 이러한 최신 모델과 새로운 기능을 어떻게 사용하는지 보게 되어 기쁩니다.